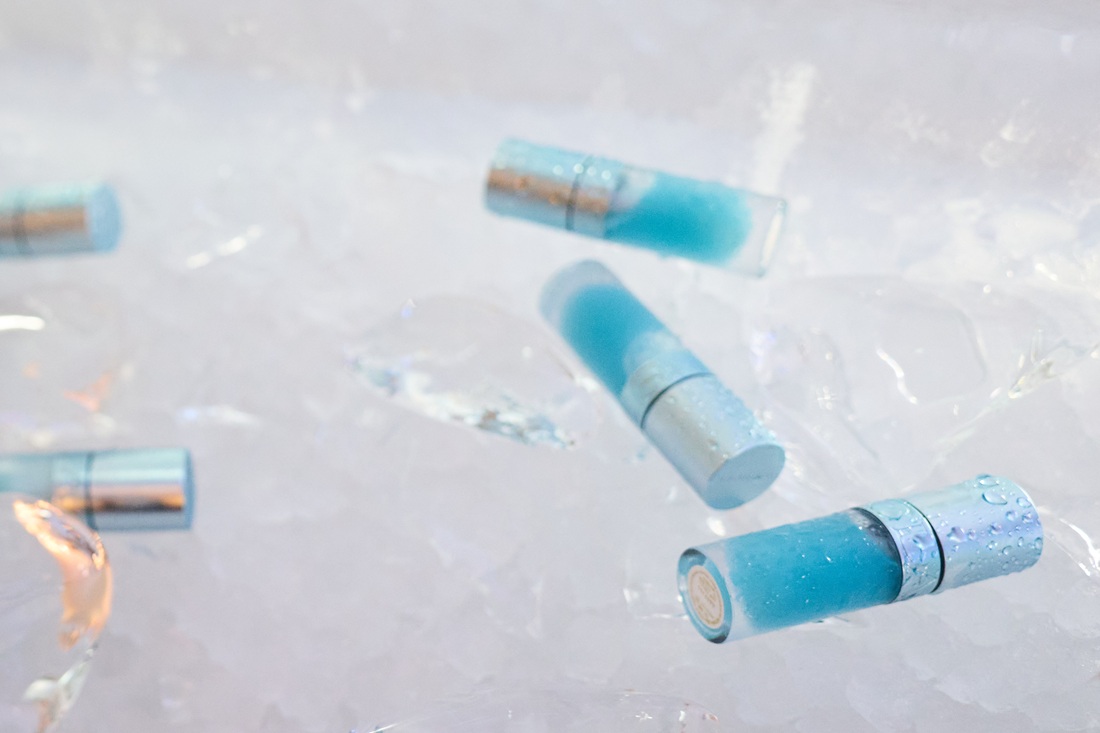
How to (Safely) Remove a Gel Manicure at Home

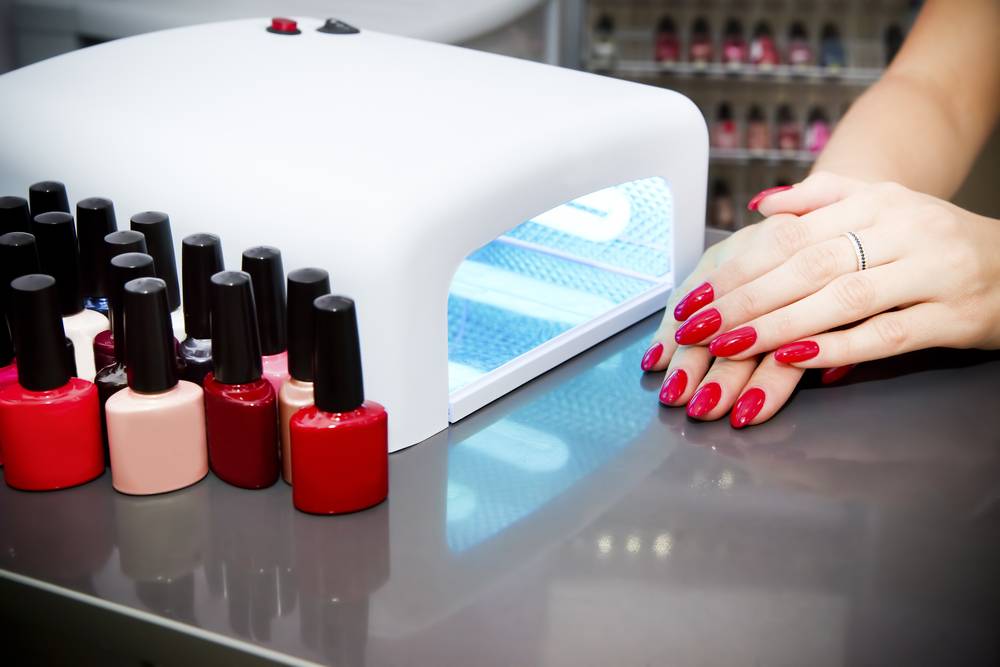
In the last couple of years gel manicures has become all the rave in the beauty industry. For women who do not have a lot of spare time for nail upkeep, gel manicures are the perfect option for you. Generally, gel manicures could last up to two weeks as well as look as shiny as it did the first day your manicure was applied.
For those of you who have been living under a rock, gel manicures are applied the same, but depending on your manicurist (and salon) are cured in different ways. After the polish is applied, your manicurist can opt to cure the manicure with either a UV light, LED light or a gel activator that is painted on top. According to Skyy Hadley, owner of As U Wish Nail Salon, “UV light is present in sunlight, tanning lamps, and nail-polish lamps and is the most invisible form of light. LED light is a light source that is visible and can contain invisible forms of light, such as UV. Using an LED light to cure your gel will speed up the process significantly. UV bulbs need to be changed based on hours of use. A lot of salons don’t realize this and they aren’t changing it. An old UV bulb can mean a duller outcome and faster chips for the client. LED bulbs, on the other hand, never need to be changed. A UV light cured gel top coat must be used with the UV or LED light in order for the system to work.” An activator is a topcoat that can be sprayed or brushed on to cure the product.
While there’s nothing more satisfying than having a long-lasting manicure, all good things must come to an end. It’s important to learn how to safely and effectively remove a gel manicure at home. Removing your gel manicure incorrectly can be harmful to your nails. By peeling off a gel manicure, you are not only removing the gel, but also the delicate top layers of your nails. This can result in white patches and textural irregularities throughout the nails.
Have no fear, Hadley dished expert, step-by-step tips on how to safely remove your own gel manicure. See what she had to say below.
File: Use an emery board to lightly buff each nail to remove the shiny top coat so you’re left with a powdery finish. Be careful not to over buff so you don’t hit your natural nail underneath the gel.
Soak: Next you must soak your nails in 100% acetone polish remover. To do this, take a piece of cotton ball the size of your nail and pour the acetone on it, place it on your nail and cover your nail with a piece of aluminum foil or tape to keep it in place. Do this on every nail and let soak for 15 minutes to relax the gel.
Remove: Remove the cotton pieces from your nails and take a wooden cuticle stick to push the gel polish off your nails. If you have trouble, instead of forcing it, soak your nails with a cotton ball for 5 more minutes and try again.
Moisturize: After the gel has been removed, wash your hands and apply a cuticle oil to the nail and cuticle. This will rehydrate your nails after using acetone on them to keep them strong and healthy between polishes.
It’s important to take your time when removing a gel manicure yourself as it can be a slow process and you want to treat your nails very delicately and carefully to avoid weakening them.
(Photo via Shutterstock)
Related Articles

The Feel-Good Formula for Summer
Discover easy summer wellness habits, from fitness and skincare to nutrition and style, for a healthier, more enjoyable season.
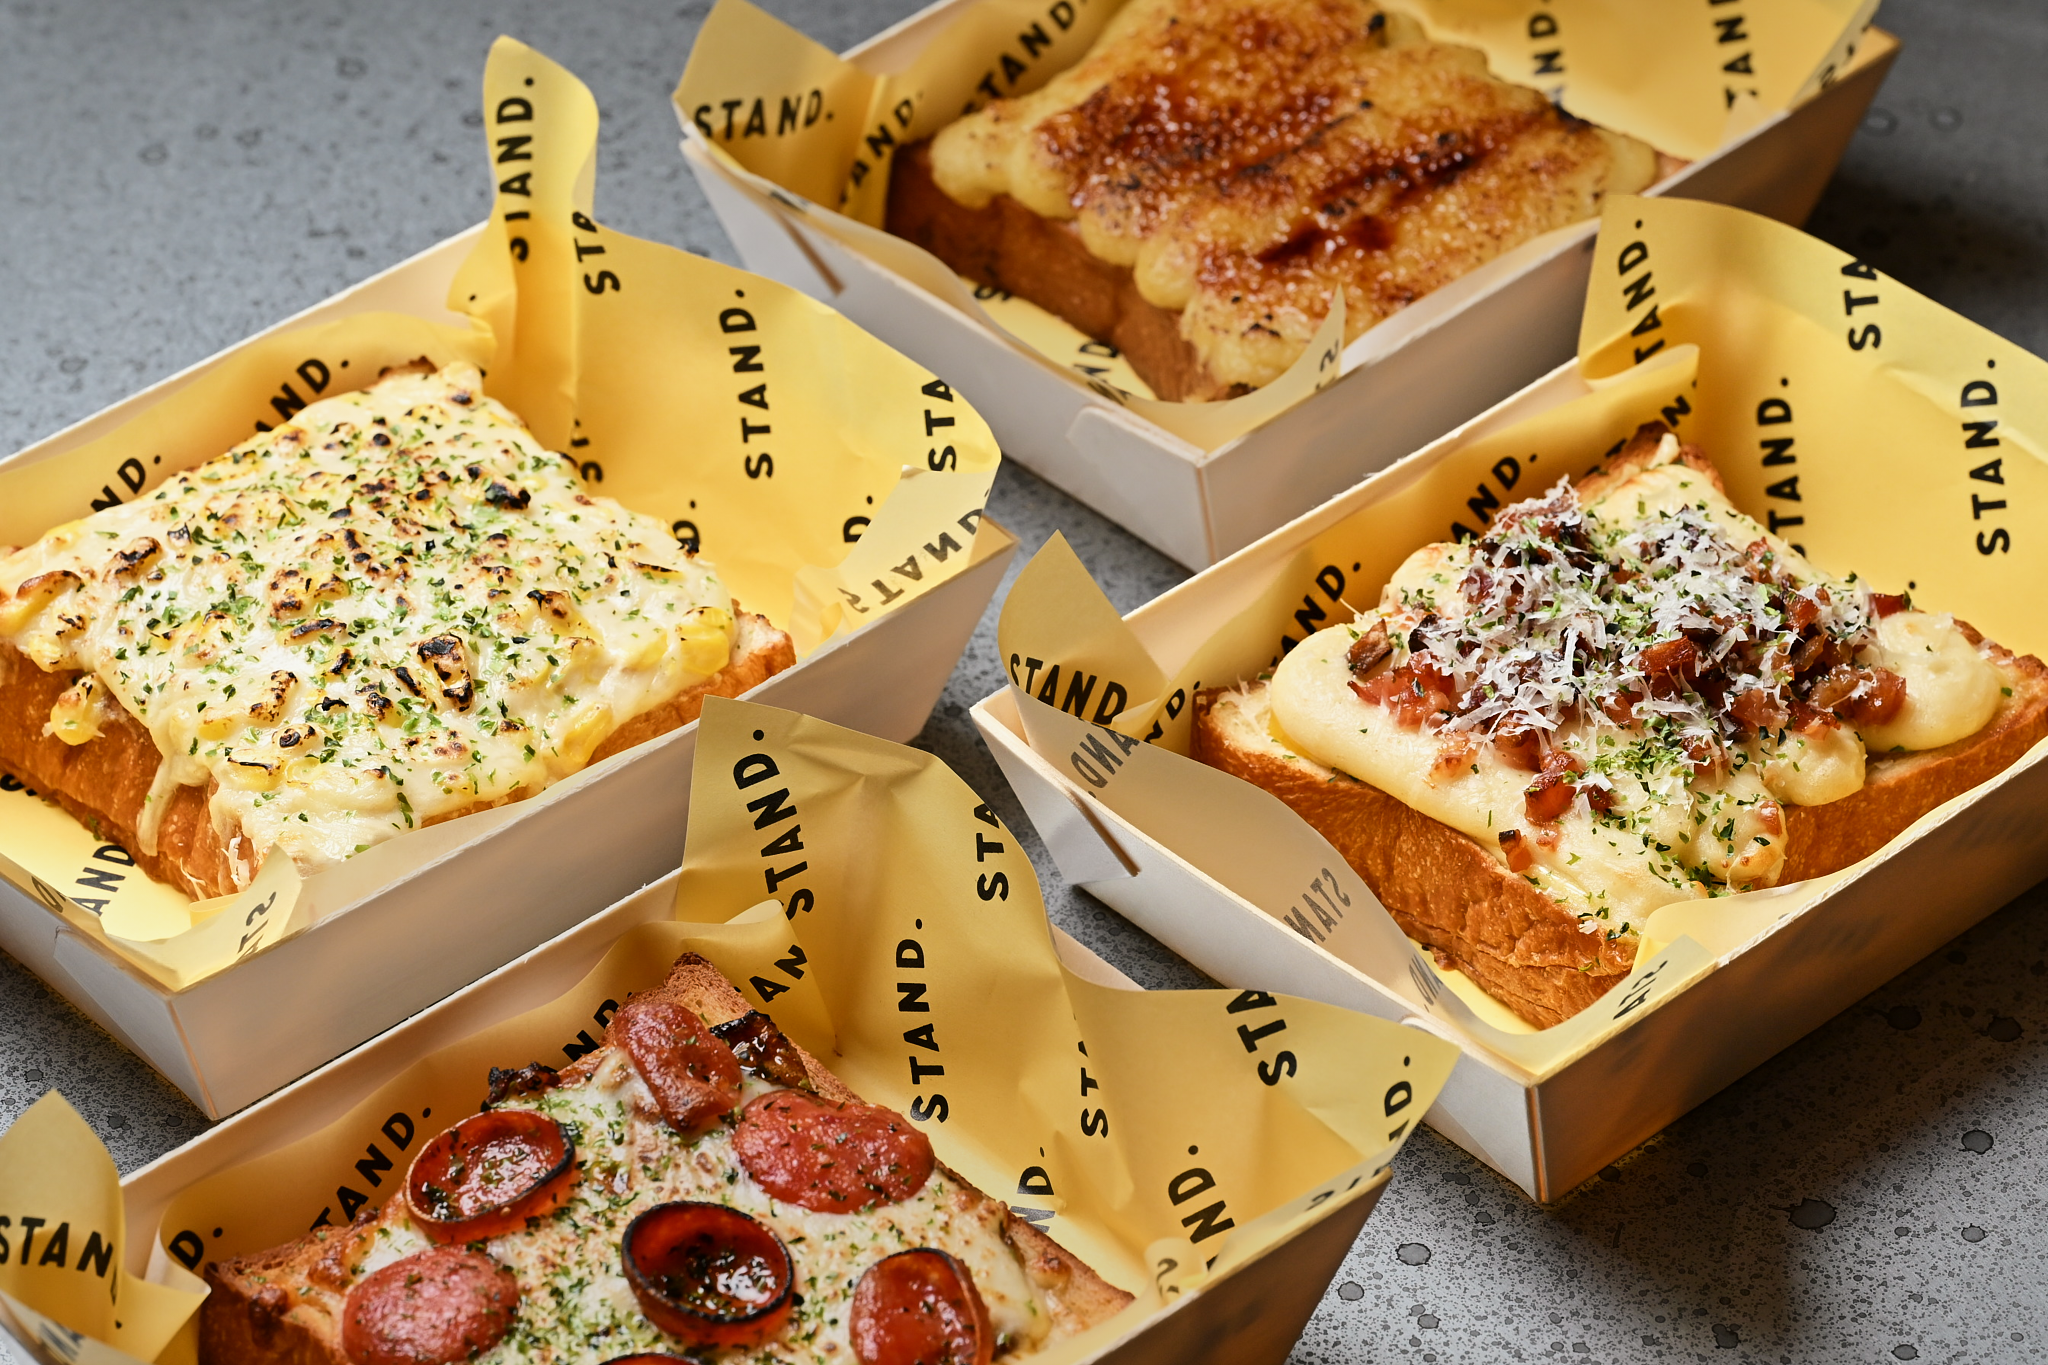
STAND: A New Japanese Café From the Team Behind SHINGO
Miami’s most celebrated omakase restaurant just made way to a more accessible sibling. The team behind Michelin-starred SHINGO has opened STAND, a Japanese café on Miracle Mile in Coral Gables, on Thursday, June 4, and shaped up to be one of the city’s most anticipated daytime openings of the year. Photo Credit: Salar Abduaziz From […]
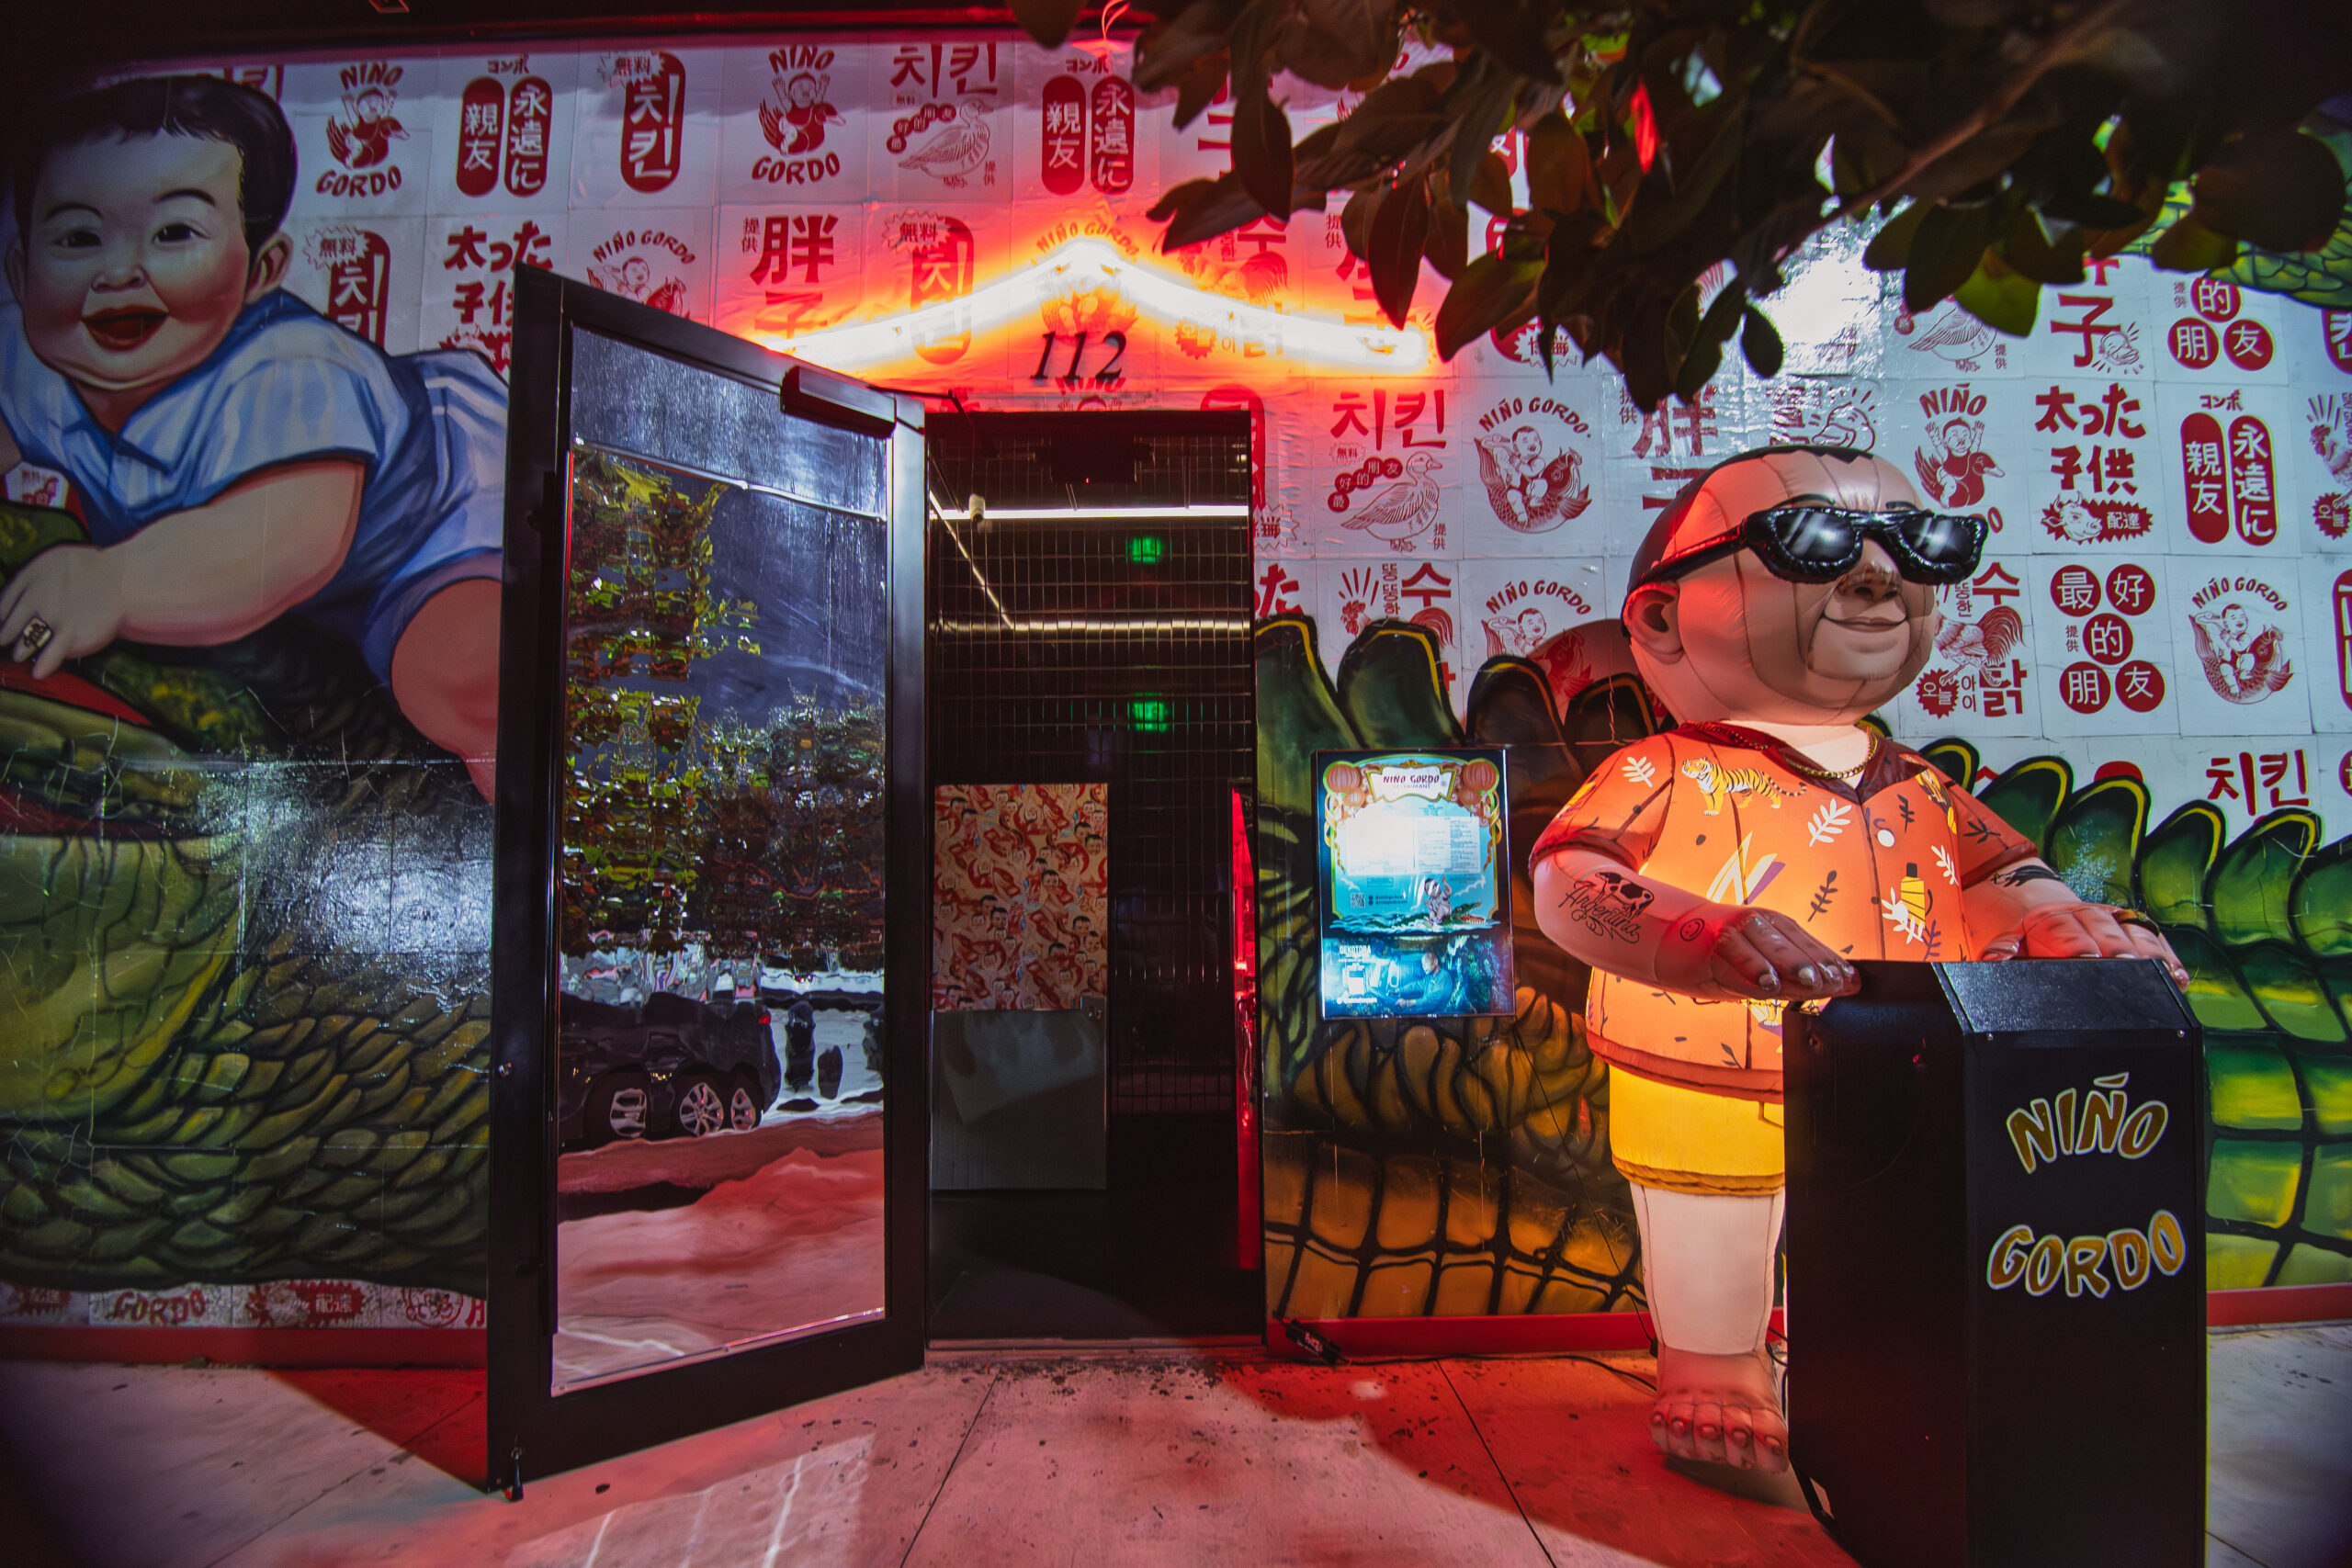
Niño Gordo Miami: Inside Wynwood’s Most Unique Dining Experience
There is a particular kind of restaurant that does not so much open in a neighborhood as detonate inside it. Niño Gordo, the cult Buenos Aires import that landed in Wynwood in May 2025, is exactly that kind of place. It is loud, maximalist, and unapologetically theatrical, the type of restaurant where the décor alone […]

KidSuper’s Resenha Proved That Fashion, Like Fútbol, Has No Borders
There are fashion shows, and then there are events that transcend the category entirely, moments where the clothes are almost beside the point because what is happening around them is so alive, so specific, and so genuinely felt that the runway becomes a vessel for something larger. KidSuper’s Resenha, presented at Miami’s Nu Stadium during […]

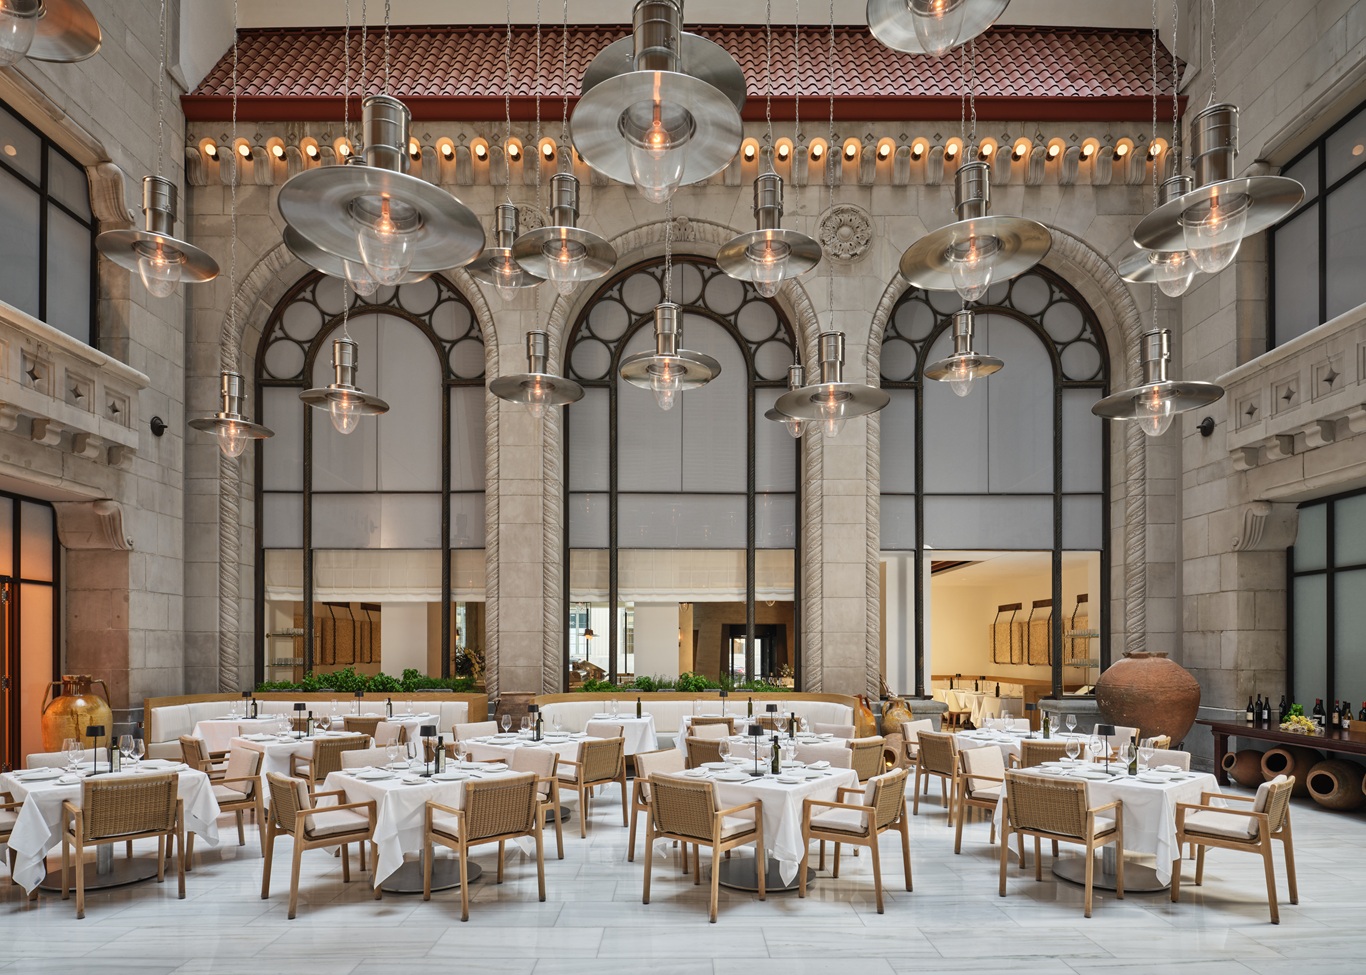
PS Reserve and the Former Pan Am Headquarters Are Bringing the Golden Age of Travel Back
There was a time when flying meant something. When the airport was not a gauntlet to be survived but a threshold to be crossed. A place that understood that the journey was as important as the destination. That era had a name, and that name was Pan American Airways. And now, inside the very building where […]
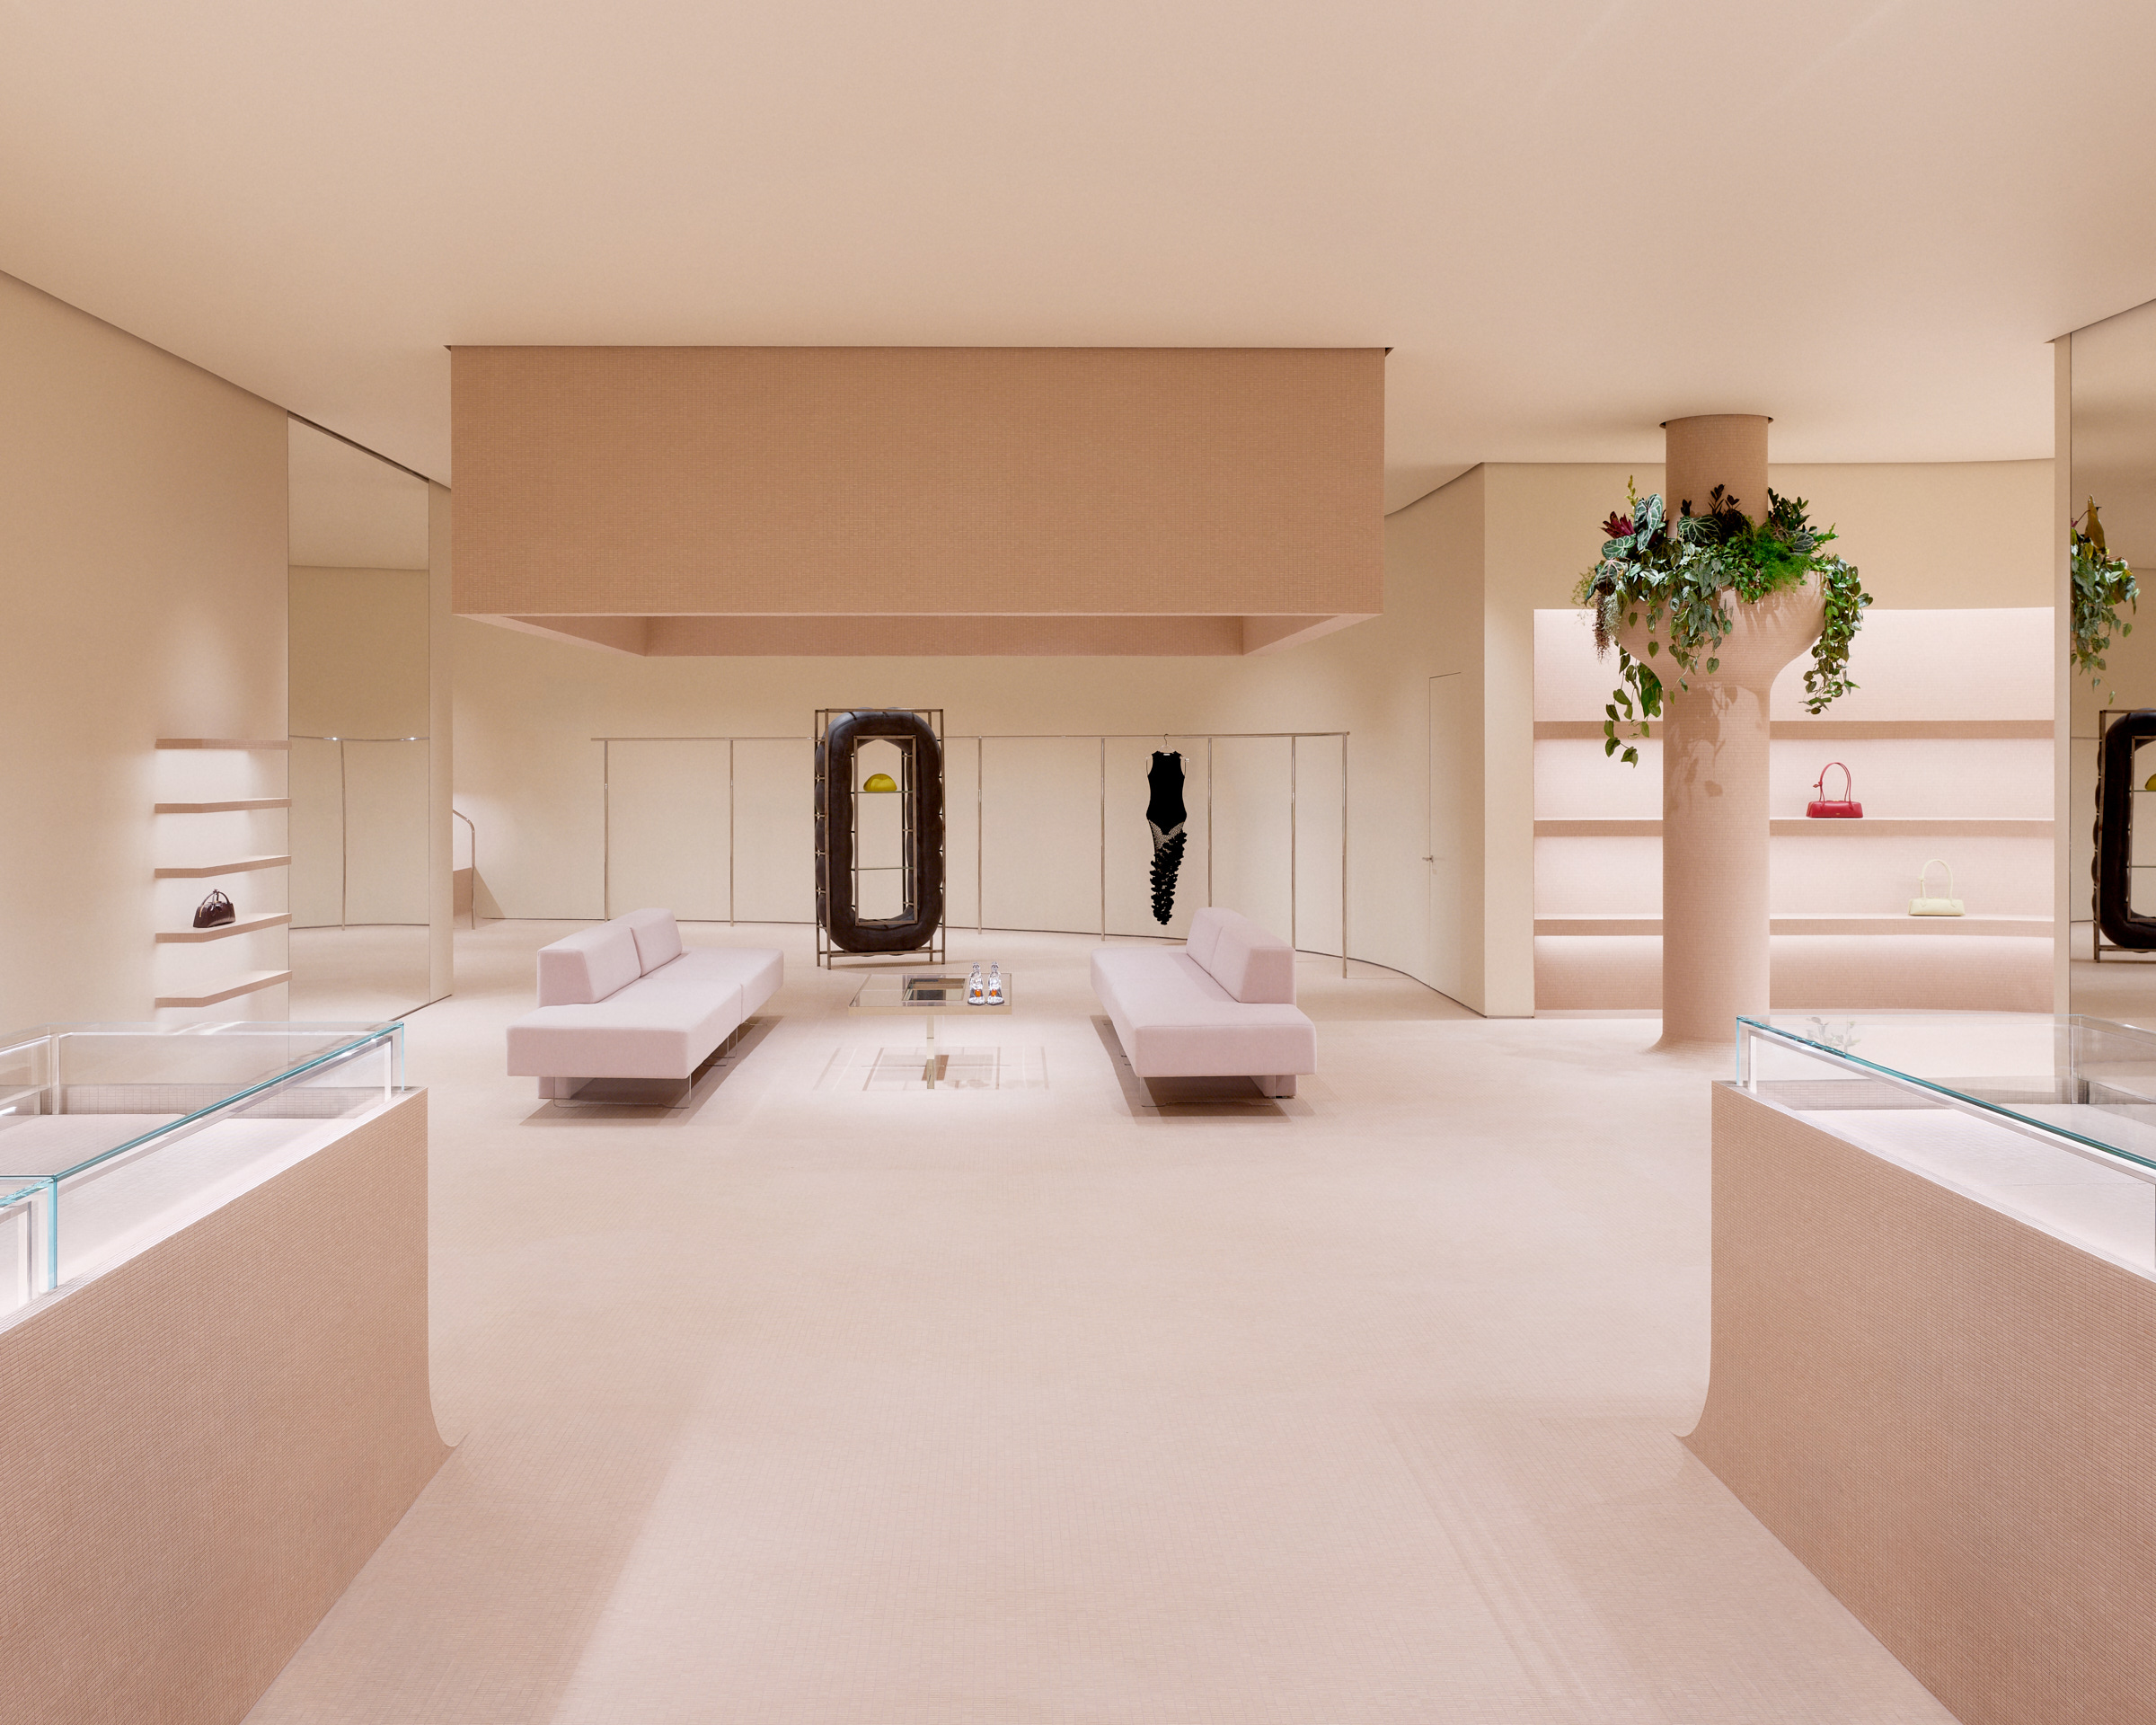
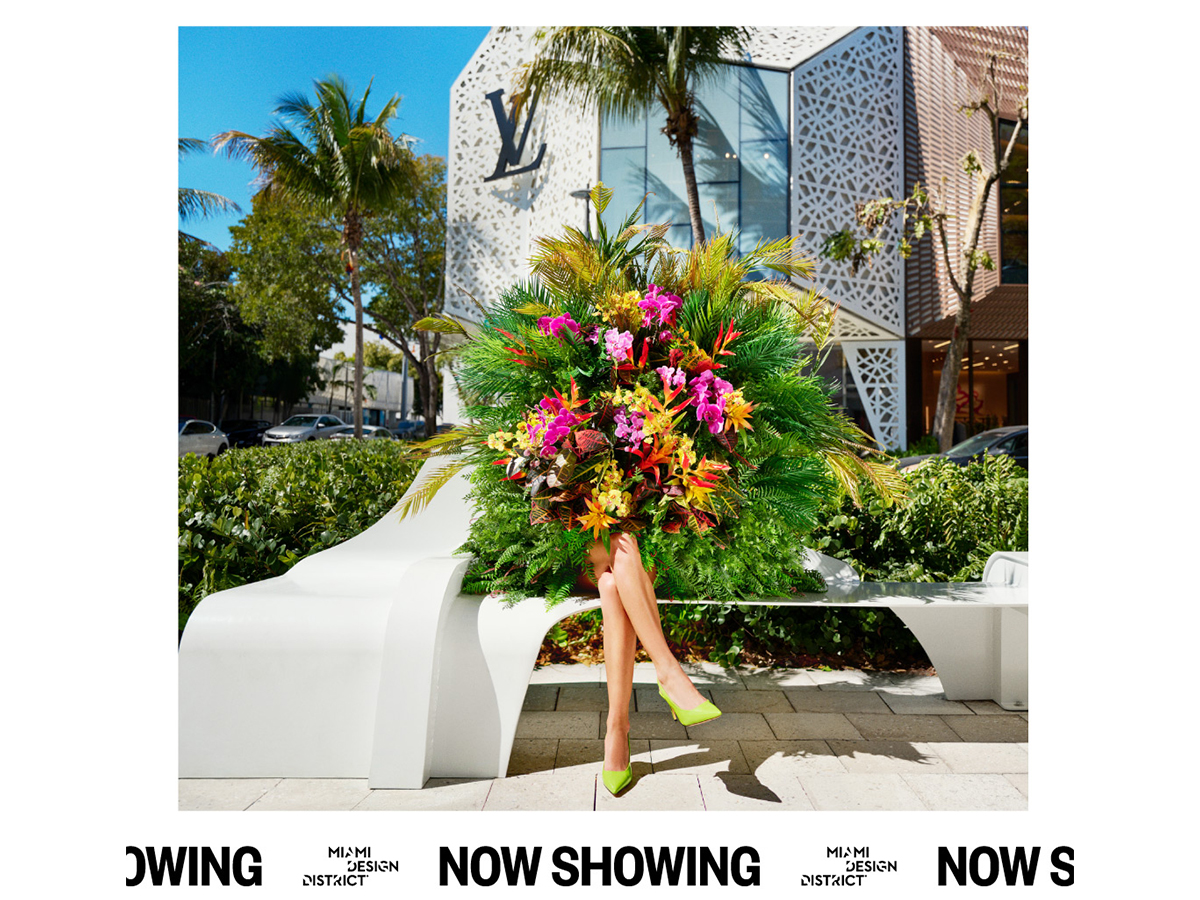
Alaïa Debuts First Miami Boutique in the Miami Design District
Alaïa has opened its first Miami boutique in the Miami Design District, designed by Swedish architecture studio Halleroed
Latest Stories
Trending Articles
Related Articles
The Feel-Good Formula for Summer
Discover easy summer wellness habits, from fitness and skincare to nutrition and style, for a healthier, more enjoyable season.
STAND: A New Japanese Café From the Team Behind SHINGO
Miami’s most celebrated omakase restaurant just made way to a more accessible sibling. The team behind Michelin-starred SHINGO has opened STAND, a Japanese café on Miracle Mile in Coral Gables, on Thursday, June 4, and shaped up to be one of the city’s most anticipated daytime openings of the year. Photo Credit: Salar Abduaziz From […]
Niño Gordo Miami: Inside Wynwood’s Most Unique Dining Experience
There is a particular kind of restaurant that does not so much open in a neighborhood as detonate inside it. Niño Gordo, the cult Buenos Aires import that landed in Wynwood in May 2025, is exactly that kind of place. It is loud, maximalist, and unapologetically theatrical, the type of restaurant where the décor alone […]
KidSuper’s Resenha Proved That Fashion, Like Fútbol, Has No Borders
There are fashion shows, and then there are events that transcend the category entirely, moments where the clothes are almost beside the point because what is happening around them is so alive, so specific, and so genuinely felt that the runway becomes a vessel for something larger. KidSuper’s Resenha, presented at Miami’s Nu Stadium during […]
PS Reserve and the Former Pan Am Headquarters Are Bringing the Golden Age of Travel Back
There was a time when flying meant something. When the airport was not a gauntlet to be survived but a threshold to be crossed. A place that understood that the journey was as important as the destination. That era had a name, and that name was Pan American Airways. And now, inside the very building where […]
Alaïa Debuts First Miami Boutique in the Miami Design District
Alaïa has opened its first Miami boutique in the Miami Design District, designed by Swedish architecture studio Halleroed
Subscribe to Haute Living
Receive Our Magazine Directly at Your Doorstep
Embark on a journey of luxury and elegance with Haute Living magazine. Subscribe now and have every issue conveniently delivered to your home. Experience the pinnacle of lifestyle, culture, and sophistication through our pages.


Haute Black Membership
Your Gateway to Extraordinary Experiences
Join Haute Black and unlock access to the world's most prestigious luxury events