
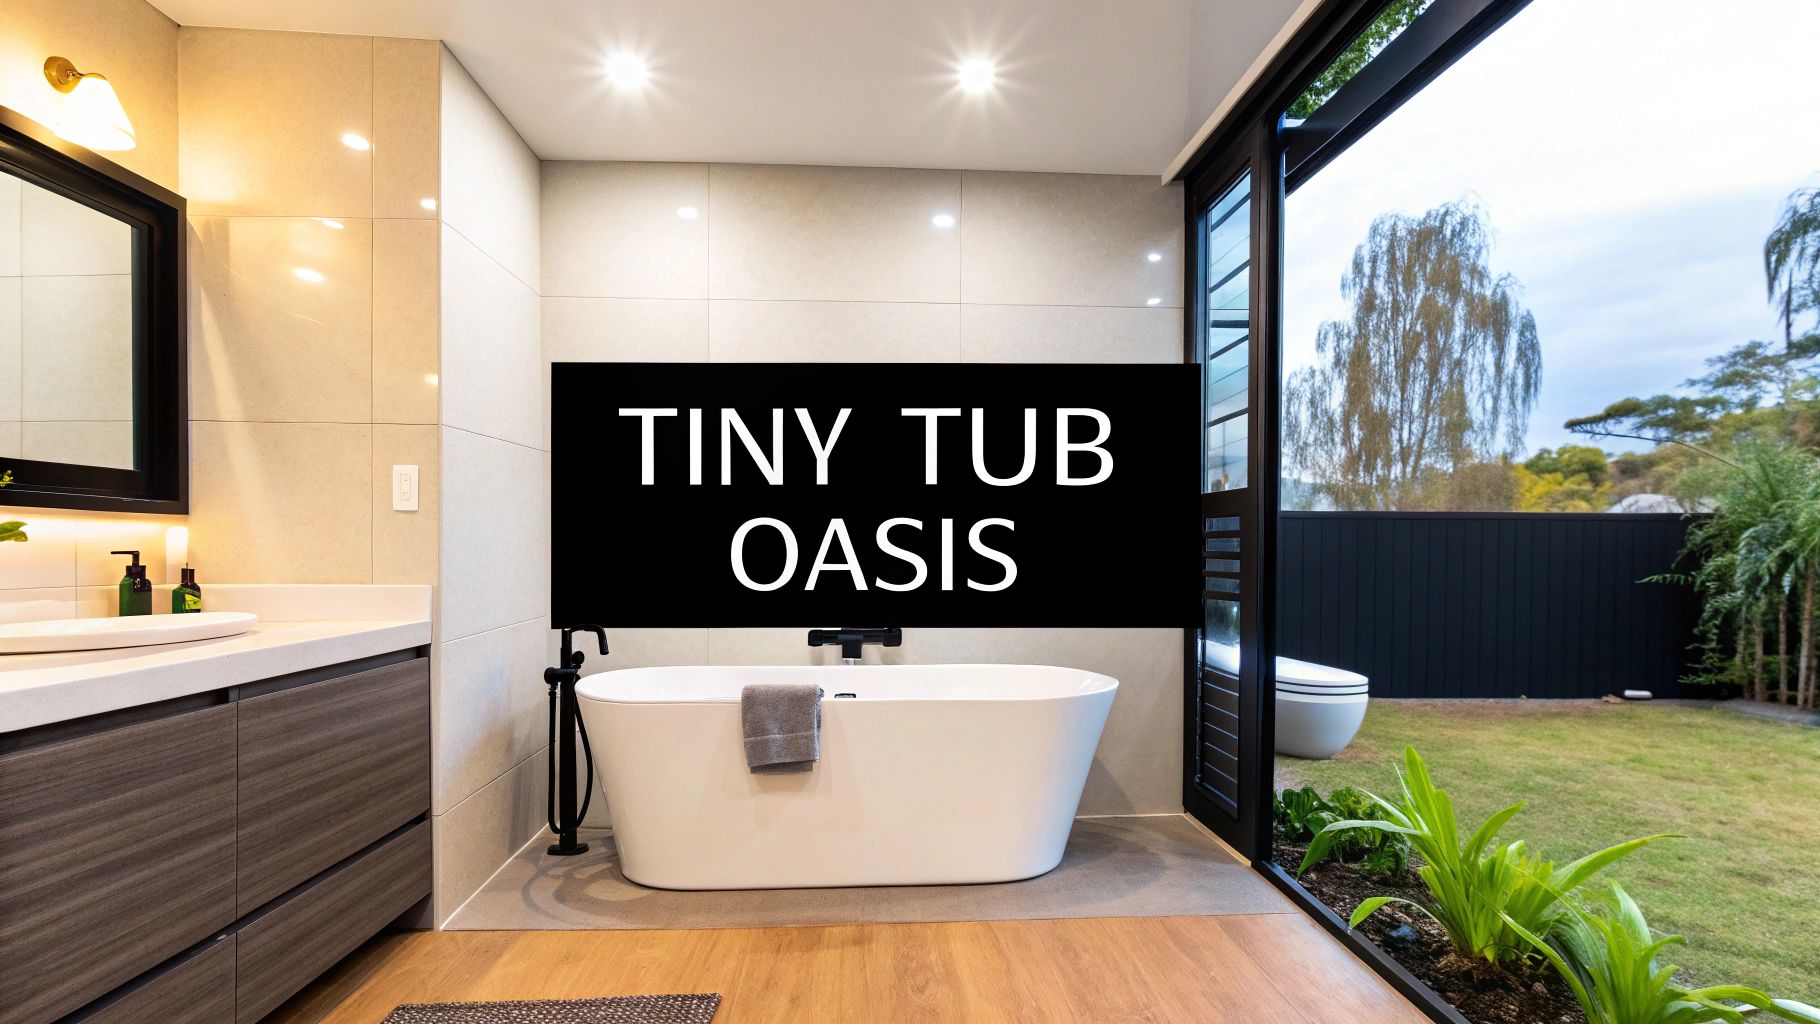
It’s a design myth I hear all the time: freestanding tubs are only for sprawling, oversized bathrooms. The truth is, you can absolutely create that stunning, spa-like focal point with a stand alone tub in a compact space. The trick is to stop thinking about limitations and start seeing the potential. Modern, compact tub designs are specifically engineered for smaller footprints, turning what seems like a challenge into your greatest design asset.
Rethinking the Small Bathroom with a Stand Alone Tub
When you picture a luxurious, sculptural bathtub, you probably imagine a massive master suite. That’s an outdated image. I’ve seen countless designers and homeowners prove that a small bathroom with a stand alone tub is not just doable—it’s a game-changer. It adds serious value and creates a personal sanctuary in even the most modest of spaces. Getting it right comes down to smart planning, a strategic layout, and, most importantly, choosing the perfect tub.
Instead of seeing your bathroom’s small size as a problem, look at it as a design opportunity. A freestanding tub instantly transforms the room from a purely functional box into a personal retreat. This is really a shift in mindset. You have to ask yourself what you want from your bathroom. Is it just a place for a quick shower, or is it a space where you can unwind? If you’re aiming for the latter, then that tub becomes a non-negotiable anchor piece worth designing around.
Why Freestanding Tubs Work in Compact Layouts
The industry has caught on to this desire for luxury in smaller homes. Manufacturers now offer an incredible variety of compact tubs designed specifically to fit where you thought they never could. And these aren’t just shrunken-down versions of larger models; they are thoughtfully engineered pieces that preserve deep soaking depths and ergonomic comfort within a much smaller footprint.
From my experience, here’s why they work so well:
- Visual Lightness: A bulky, built-in tub creates a solid, heavy block in a room. A freestanding tub, often raised on feet or a pedestal, lets you see the floor underneath. This simple trick creates an illusion of more space and makes the room feel lighter and more open.
- Placement Flexibility: You aren’t stuck with the traditional three-wall alcove. You can place a freestanding tub against a stunning feature wall, angle it in a corner to open up traffic flow, or even position it under a window to soak up natural light.
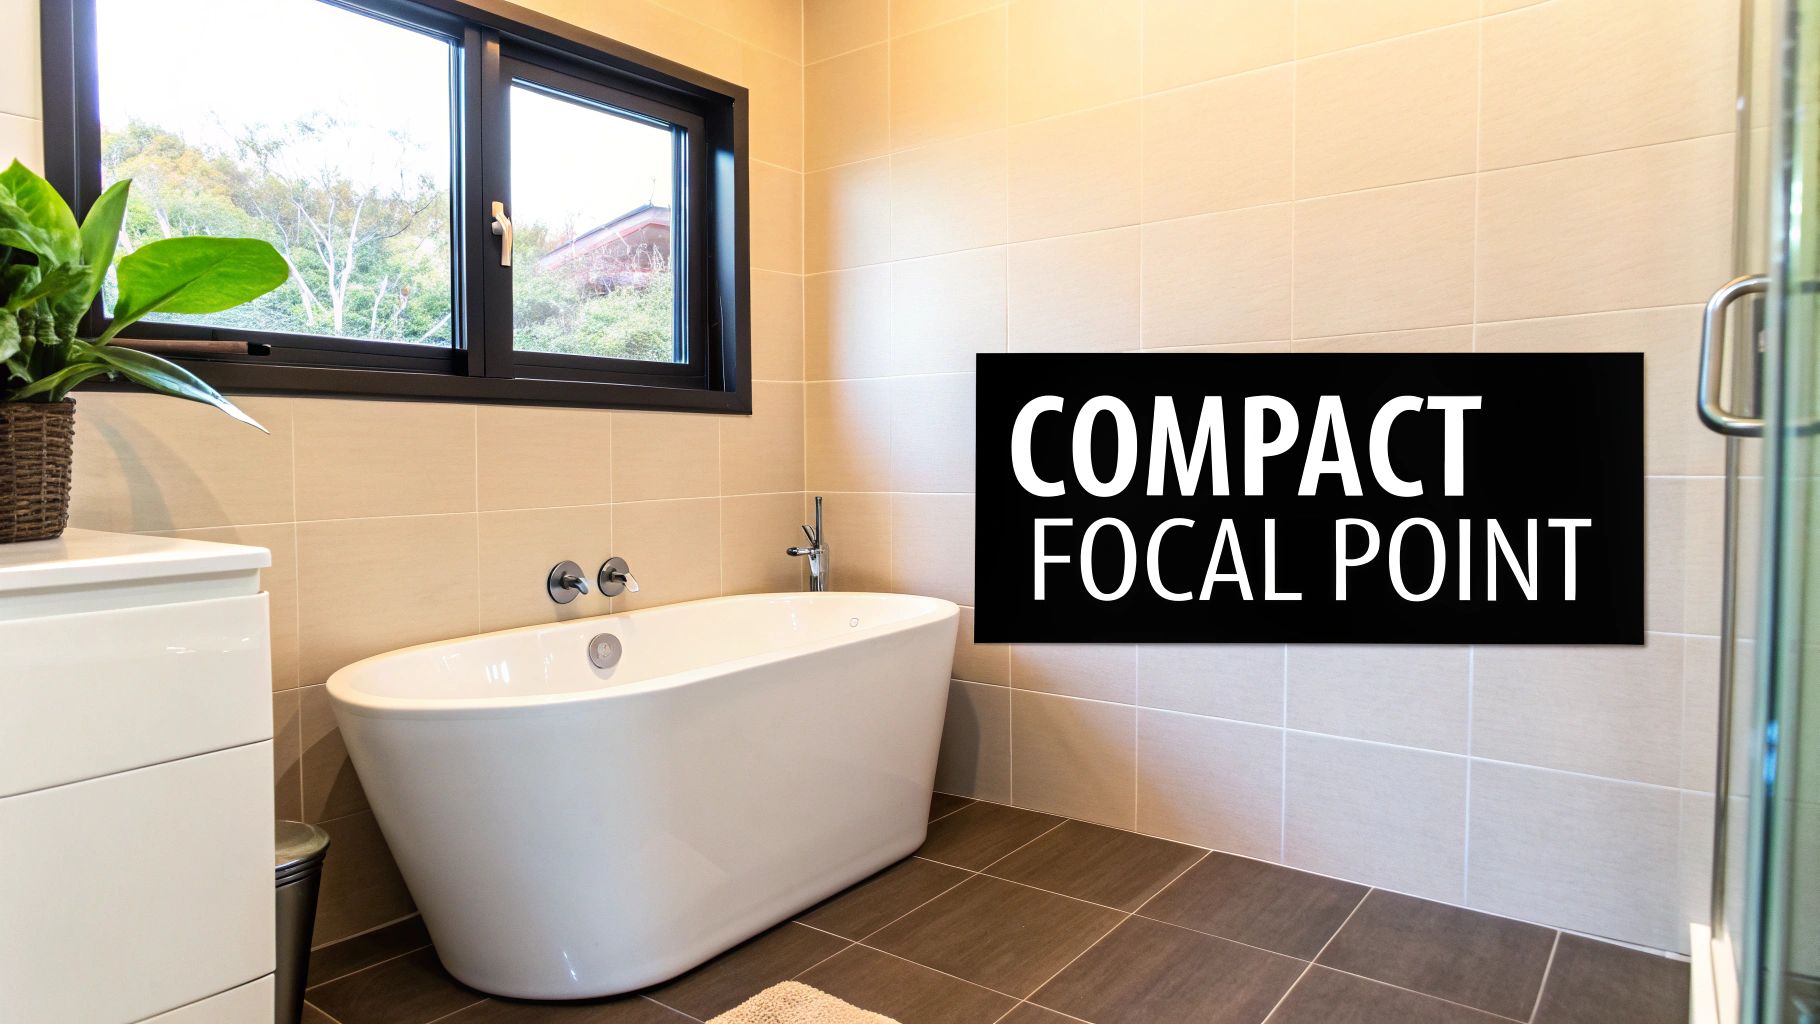
- Instant Focal Point: In a small room, one beautiful object can define the entire design. The tub becomes the undisputed star, which actually simplifies all your other decisions for tile, fixtures, and vanities.
This isn’t just a niche trend; it’s a significant shift in design. Freestanding bathtubs are turning small bathrooms into high-value retreats, with some reports showing 70% of recent remodels incorporating them as a primary upgrade. Industry insiders also note that 65% of designers expect demand for these tubs to keep growing, especially for rooms as compact as 40-60 square feet. You can dig deeper into these freestanding bathtub insights from Badeloft to see just how popular they’ve become.
Before diving in, it’s crucial to assess the practicalities. This table breaks down the most important factors to consider when planning your installation.
Key Considerations for Small Bathroom Tub Installation
| Factor | Key Action | Why It Matters |
|---|---|---|
| Space & Clearance | Measure the room and proposed tub location meticulously. Ensure at least 4-6 inches of clearance on all sides for cleaning and access. | Prevents the room from feeling cramped and ensures you can easily clean around the tub. Tight clearances can make installation difficult and maintenance a nightmare. |
| Plumbing & Drains | Consult a plumber early to assess existing drain locations. Determine if you’ll need a floor-mounted or wall-mounted faucet. | Relocating plumbing is a significant cost. Knowing your options upfront helps manage the budget and prevents surprises during construction. |
| Floor Structure | Confirm your floor joists can support the weight of the tub, water (8.3 lbs per gallon), and an occupant. This is especially critical on upper floors. | A full cast iron or stone resin tub can be incredibly heavy. A structural assessment prevents catastrophic floor failure and ensures long-term safety. |
| Tub Dimensions | Choose a tub model specifically designed for small spaces—typically under 60 inches long. Pay attention to both length and width. | A tub that’s too large will overwhelm the room, negate the feeling of openness, and create an impractical, cluttered layout. |
Thinking through these elements is the difference between a project that looks great on paper and one that works beautifully in real life. It ensures your dream tub becomes a practical and beloved feature, not a daily frustration.
Choosing the Right Tub for Your Space
This is where the vision for your small bathroom really starts to come to life. Picking the right freestanding tub isn’t about shoehorning in the biggest model you can find; it’s about selecting a piece that genuinely complements the room’s scale. Getting this right comes down to two things: meticulous measurements and a clear-eyed view of how the tub will coexist with everything else in the bathroom.
Before you even think about browsing tub styles, grab a tape measure. And I don’t just mean getting the room’s overall length and width. You need to map out every functional element. Pinpoint the door’s location and its swing. Mark the distance from the walls to the center of your toilet drain and sink plumbing. These are your non-negotiables—the fixed boundaries you have to respect.
Mastering Your Measurements
One of the most common mistakes I see is people forgetting to account for “breathing room.” A tub jammed right up against a vanity or toilet doesn’t just look cramped; it’s an absolute pain to clean around. The golden rule here is to leave a bare minimum of six inches of clearance on all sides of the tub. It might not sound like much, but that small gap creates a visual break that makes the entire room feel more spacious and intentional.
To really get a feel for how a tub will fit, you need to go beyond the numbers. Make a physical template. Once you’ve zeroed in on a tub model you like, use painter’s tape to outline its exact footprint right there on your bathroom floor. This little trick is a game-changer. It lets you physically walk around the “tub,” check the traffic flow, and make sure you can still get to the sink and toilet without issue.
A tub’s dimensions on paper can be incredibly deceiving. A 55-inch tub might sound compact, but when you see that outline on the floor of a 5×8 foot bathroom, you realize it can offer a truly luxurious, deep soak without eating up the whole room. Visualizing the footprint is a step you can’t afford to skip.
This hands-on approach takes your plan from an abstract idea to a real-world simulation, helping you sidestep costly mistakes before they happen.
Selecting Compact Tub Styles
Thankfully, the days of limited options are over. The market for compact freestanding tubs has exploded, driven by homeowners who refuse to compromise on luxury just because of square footage. This isn’t just a niche trend; the global freestanding bathtub market is expected to jump from USD 3.85 billion in 2025 to a staggering USD 6.53 billion by 2035.
Leading the charge are acrylic tubs, which captured 54% of the market share in 2023. Their popularity in smaller projects makes perfect sense—they’re lightweight, come in a huge variety of shapes, and are easier to maneuver into tight spaces. You can dig deeper into the growing bathtub market trends at Business Research Insights.
When you start shopping, focus your search on models specifically engineered for smaller footprints. Here are a few styles that consistently work well:
- Shorter, Deep-Soaking Tubs: Often hovering around the 55-inch mark, these tubs make up for their shorter length with generous depth. They provide that full-immersion soak you’re after without dominating the floor plan.
- Oval Tubs: The gentle curves of an oval tub visually soften its profile. Unlike a boxy rectangular tub, the rounded edges feel less imposing and make navigating a tight room feel much more fluid.
- Slipper Tubs: With one end gracefully raised for back support, a single slipper tub adds instant elegance. Its asymmetrical form naturally draws the eye upward, creating a sense of height that can make a small bathroom feel surprisingly grand.
- Pedestal Tubs: A tub that rests on a solid base or pedestal feels grounded yet visually lighter than one sitting flat on the floor. That subtle elevation preserves the illusion of open floor space underneath, which is critical in a compact room.
I recently worked on a classic 5×9 foot bathroom where the client wanted a true statement piece. We immediately ruled out the standard 60-inch tubs that would have left things feeling tight. Instead, we found a stunning 54-inch deep-soaking oval tub. By placing it against a dramatic, dark-tiled feature wall, it became the undeniable star of the show. The shorter length opened up crucial floor space by the door, while its deep design delivered the spa-like experience the client dreamed of. It’s a perfect case study in how a slightly smaller, but smarter, choice can lead to a far more successful design.
Effective Layouts for Compact Bathrooms
You’ve found the perfect freestanding tub—that’s a huge win. But the real art is in deciding where to put it. The right layout can make a small bathroom feel surprisingly open and luxurious, while a poor choice can leave you with a cramped, awkward space you’ll regret.
Placement is so much more than just making the tub fit. It’s about creating a natural flow for movement, establishing a stunning focal point, and making sure the bathroom still works for your everyday life.
Before you get carried away with design ideas, it all starts with a tape measure. This simple flowchart nails it—your layout decisions have to be grounded in the real dimensions of your room.
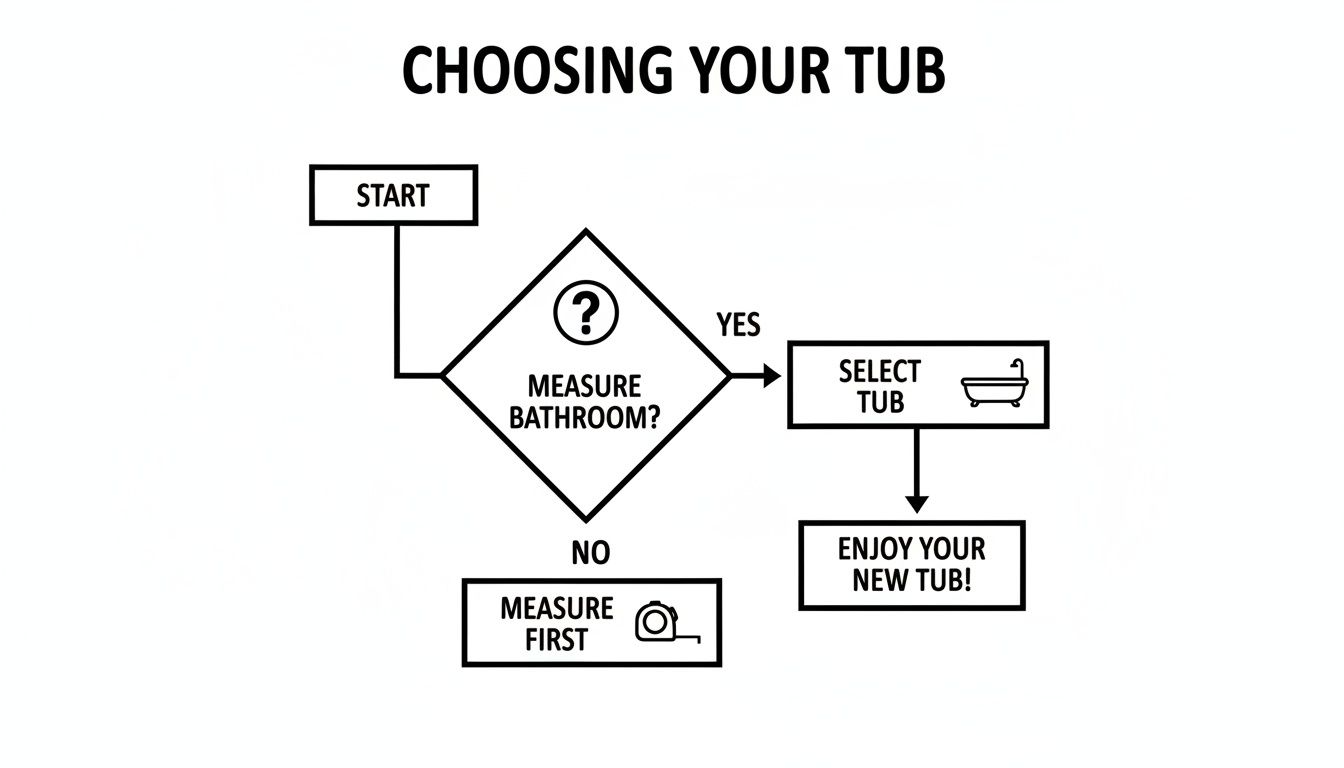
As you can see, every successful project starts with good measurements. Once you have those numbers, you can start exploring some of the most effective layouts I’ve seen work in tight spaces.
The Feature Wall Focal Point
One of my favorite strategies is to set the tub against a feature wall. This instantly elevates the tub from a simple fixture to a piece of sculpture and gives the entire room a clear, confident focus. Think of the wall behind the tub as your canvas.
You can go bold with dramatic tile, a deep paint color, or even a section of waterproof wallpaper to create contrast that pulls you in. This approach is especially powerful if the tub is the first thing you see when you walk into the bathroom. It makes a strong first impression and can even make the room feel longer, particularly if you use the wall farthest from the door. This layout works beautifully in rectangular bathrooms with a long, uninterrupted wall to show off.
The Space-Saving Corner Tuck
In smaller, more square-ish bathrooms, tucking the tub into a corner can be a stroke of genius. It might feel strange to “hide” a statement piece, but this move can free up an incredible amount of central floor space, making the room feel larger and much easier to get around in.
This doesn’t mean just cramming any old tub into the corner. You’ll want to look for models specifically designed for this, which often have one side that’s shaped to nestle right in. I’ve also had great success angling a standard oval tub into a corner; it breaks up the boxy feel of the room and creates softer, more interesting lines. This layout often leaves more space for a decent-sized vanity or a clear path to the toilet, solving a common headache in compact bathrooms.
A common mistake is assuming a freestanding tub has to float in the middle of a room. In a small bathroom, smart placement against a wall or in a corner is not a compromise—it’s a sophisticated design choice that prioritizes both beauty and practicality.
The Integrated Wet Room Design
For the most seamless, space-efficient solution, you can’t beat integrating your tub into a wet room design. A wet room is a fully waterproofed bathroom where the shower isn’t enclosed, which means the whole space is designed to get wet. This completely eliminates the need for a bulky shower stall, which is often the biggest space-hog in a small bathroom.
With this layout, the tub and shower share one open, unified zone. You can place the tub right near the showerhead, creating a truly luxurious bathing experience. The aesthetic is clean, minimalist, and incredibly efficient. It’s also a fantastic option for accessibility since there are no curbs or doors to worry about. A wet room does require meticulous waterproofing and a properly sloped floor for drainage, but the payoff is a bathroom that feels remarkably open and functional. For a closer look at these kinds of layout principles, this interior design space planning guide offers some great foundational knowledge.
Plumbing and Faucet Placement
Your layout choice will have a direct impact on your plumbing and faucet options. In a small space, this decision is critical.
- Floor-Mounted Fillers: They look incredible, no doubt. These tall, elegant faucets create a serious “wow” factor, but they need plumbing to come up through the floor. They also eat up precious floor space and can be a pain to clean around when every inch counts.
- Wall-Mounted Faucets: This is a fantastic space-saving move. Wall-mounted fillers keep the floor completely clear and contribute to a clean, modern aesthetic. Just know they require careful planning to make sure the spout has enough reach and that your wall can accommodate the in-wall plumbing.
- Deck-Mounted Faucets: These faucets are mounted right onto the rim (or “deck”) of the tub itself. This is often the most practical and fuss-free choice for a small bathroom. It keeps all the plumbing contained with the tub and doesn’t demand any extra floor or wall space for fixtures.
In the end, the best layout is the one that works with your room’s unique dimensions while still letting your personal style shine. By thinking through these proven configurations, you can create a small bathroom with a freestanding tub that is both stunning and smartly designed.
Getting the Plumbing and Installation Right
Let’s be honest, the plumbing and installation aren’t the glamorous parts of a bathroom remodel, but they are absolutely where the project succeeds or fails. A freestanding tub plays by a different set of rules than your standard built-in model, especially when you’re working with a small bathroom with stand alone tub. The plumbing is often out in the open, which means it has to be perfect.
Unlike an alcove tub that tucks its pipes away in the walls, a freestanding tub requires the drain and supply lines to come right up through the floor. This is a game-changer. It means you have to plan for this from day one, ideally before your beautiful new tile goes down. Getting this right often involves opening up the floor to run new lines—a job that adds a layer of complexity and cost but is the only way to achieve that clean, high-end finish.
Picking the Perfect Faucet
The tub filler—your faucet—is much more than just a functional piece. It’s a major design element that’s directly tied to your plumbing plan and can dramatically affect how a small space feels. Each style comes with its own set of installation quirks you’ll need to think through.
Choosing the right faucet for a freestanding tub is a critical decision in a small bathroom. Your choice impacts not only the aesthetic but also the available floor space and installation complexity. Here’s a breakdown of the most common options to help you decide.
Freestanding Tub Faucet Comparison
| Faucet Type | Pros for Small Bathrooms | Cons for Small Bathrooms | Best For… |
|---|---|---|---|
| Floor-Mounted | Creates a dramatic, luxurious focal point. Offers placement flexibility around the tub. | Consumes valuable floor space. Can make cleaning more difficult. Requires under-floor plumbing access. | Homeowners who want to make a bold design statement and have planned the layout with precision. |
| Wall-Mounted | Saves 100% of floor space, making the room feel larger. Creates a clean, minimalist look. | Requires the tub to be placed against a wall. The wall must be thick enough for plumbing. Spout reach is critical. | Maximizing every square inch of a compact bathroom and achieving an uncluttered, modern aesthetic. |
| Deck-Mounted | Faucet is attached directly to the tub rim. Keeps plumbing contained and off the floor. | Only works with tubs that have a wide enough rim and pre-drilled holes. Can feel a bit dated. | Bathrooms where wall and floor plumbing is not feasible, or for a more traditional, integrated appearance. |
Ultimately, the faucet you choose is a balance of style and practicality. While a floor-mounted filler delivers that “wow” factor, a wall-mounted version is often the more sensible choice for tight quarters, keeping the floor clear and the room feeling more open.
Don’t Forget About the Weight
It’s easy to get caught up in the look of the tub and forget about the physics. Water is incredibly heavy—weighing in at about 8.3 pounds per gallon. A relatively small 50-gallon tub can easily top 500-600 pounds once it’s filled with water and has a person in it.
All that weight is concentrated on a few small feet, putting a huge amount of stress on your floor joists. This is a massive red flag for older homes or bathrooms on an upper floor. Before you even think about bringing that tub inside, you absolutely must have a professional assess your floor’s structural integrity. Sometimes, reinforcing the joists is necessary to prevent the floor from sagging or—worst-case scenario—failing completely.
To keep track of all these moving parts, using a detailed bathroom renovation checklist can be a lifesaver.
Talk to Your Plumber: Key Questions to Ask
Great communication with your plumber is the single best way to prevent expensive headaches down the road. Before any work starts, sit down with them and get clear answers to these questions.
- What’s the most direct and cost-effective route for the new drain and supply lines?
- Do you need to open the ceiling below to access the plumbing? If so, is the repair work included in your quote?
- Given my subfloor, do you see any issues with installing a floor-mounted faucet so it’s perfectly stable?
- Can you double-check that the final height of the plumbing will align exactly with my specific tub and faucet models?
Nailing down these details upfront transforms the installation from a source of stress into a smooth, predictable process. It’s the final technical hurdle before you can finally enjoy the soak you’ve been dreaming of.
Design Strategies to Maximize Your Space
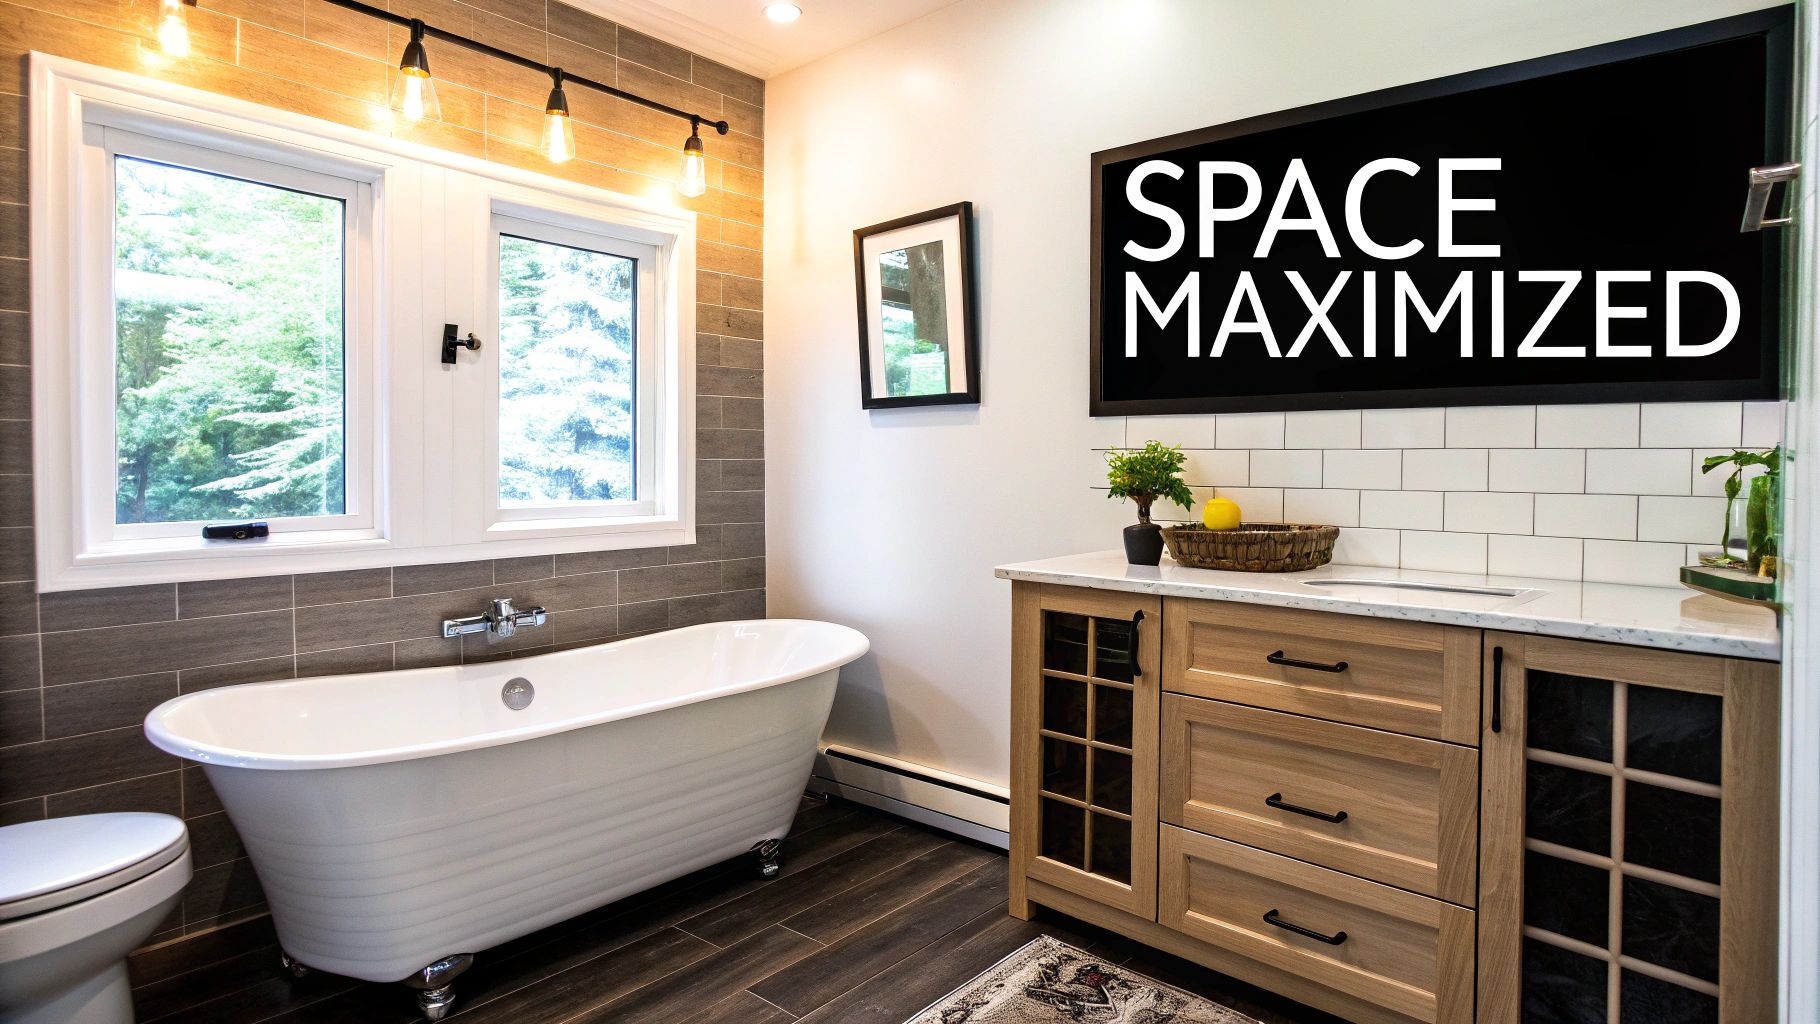
With the tub perfectly placed and plumbed, we get to the fun part—styling the room to feel cohesive and far more spacious than its footprint suggests. This is where your small bathroom with a stand alone tub truly comes to life.
This isn’t just about picking pretty finishes. It’s a strategic exercise in visual manipulation. We’re going to use color, light, and texture to trick the eye and craft an environment that feels open, airy, and genuinely luxurious.
Embrace a Light and Monochromatic Palette
Color is easily the most powerful tool in your arsenal for expanding a space. Dark, heavy colors can make walls feel like they’re closing in, but a light, monochromatic palette does the exact opposite. It creates an airy, seamless look that lets the eye travel without interruption, making the whole room feel larger.
Think in tones of soft whites, gentle grays, or even muted pastels. When you use varying shades of the same color for your walls, tiles, and vanity, you effectively blur the lines where one surface ends and another begins. This visual continuity is what creates that expansive, serene feeling, ensuring your freestanding tub remains the undisputed star of the room.
The financial upside here is significant. Compact freestanding tubs are making a huge impact on urban design, with the mini bathtub market projected to hit USD 5 billion by 2025. Even better, homes with these tubs can command up to 12% higher sale prices, a clear indicator of their strong ROI. In fact, industry reports show that 60% of professionals now specify freestanding models for small baths, proving this wellness trend has serious staying power.
Master the Art of Layered Lighting
A single, harsh overhead light is one of the biggest design mistakes you can make in a small bathroom. It casts unflattering shadows and does absolutely nothing to set a relaxing mood. The solution is layered lighting, a technique that combines multiple light sources to create an atmosphere that’s both functional and inviting.
First, you need good general illumination from a stylish flush-mount or semi-flush-mount fixture. Then, layer in task lighting. Wall sconces placed on either side of your vanity mirror are perfect for this, providing even, flattering light for daily routines.
Finally, bring in ambient lighting. A dimmer switch on your main fixture is a non-negotiable for setting a relaxing mood. You could even consider a small, waterproof recessed light directly above the tub to highlight it as the room’s centerpiece.
Great lighting makes a small space feel more open and alive. It eliminates dark corners, enhances the beauty of your chosen materials, and allows you to completely shift the room’s energy from bright and functional to calm and restorative with the flip of a switch.
Choose Tile That Enhances the Space
Your tile selection can either work for you or against you. To create an illusion of space, there are a couple of tried-and-true principles I always follow.
Go for large-format tiles. Using bigger tiles—think 12×24 inches or even larger—for your floors and walls means fewer grout lines. Minimizing this visual “noise” results in a cleaner, more continuous surface that feels much more expansive.
Another trick I love is to run the floor tile right up a feature wall, usually the one behind the tub. This draws the eye upward, creating a sense of height and cohesion. That seamless transition makes the entire room feel like one unified, thoughtfully designed space.
Integrate Smart and Stylish Storage
Clutter is the enemy of a small, luxurious bathroom. The final piece of the design puzzle is putting storage solutions in place that are both practical and discreet, keeping surfaces clear so your stand alone tub can really shine.
- Floating Vanities: Mounting a vanity to the wall is a game-changer. It exposes more floor space, which instantly makes the room feel larger and less boxed in.
- Recessed Niches: Instead of a clunky caddy, build a recessed niche into the wall beside your tub or in the shower. It provides a sleek, built-in spot for soaps and shampoos without encroaching on your physical or visual space.
- Vertical Storage: Don’t forget to look up! A tall, narrow cabinet or a few elegant floating shelves can provide a ton of storage without taking up a significant footprint.
By combining these design strategies, you create a space that’s not just beautiful but also incredibly functional. For more inspiration, our article on how to maximize small spaces for a stylish home has even more ideas to get you started.
Common Questions About Small Bathroom Tubs
Even the most well-thought-out plans hit a few snags, and questions always surface when you’re tackling a project this specific. Fitting a freestanding tub into a tight spot isn’t your everyday renovation, so it pays to get ahead of any potential headaches. Here are some straightforward answers to the questions I hear most often from homeowners.
Getting these details ironed out early on is the key to a smooth project. It helps you avoid those costly surprises and ensures the finished space is every bit as functional as it is beautiful. Let’s clear up some of the biggest uncertainties.
What Is the Minimum Bathroom Size for a Stand Alone Tub?
There isn’t a single magic number, but from my experience, a bathroom around 40-50 square feet—think a standard 5×8 or 6×8 layout—is a good starting point for a compact freestanding tub. Honestly, though, the total square footage isn’t nearly as important as how you use it.
The real trick is selecting a smaller tub model, usually something in the 55-60 inch range. Just as critical is leaving at least six inches of open space around all sides of the tub. This isn’t just a suggestion; it’s essential for cleaning and for creating that airy, uncluttered look that makes the design feel intentional. In really tight quarters, you might even consider a wet room design to gain even more layout flexibility.
Is It More Expensive to Install a Freestanding Tub?
In a word, yes. The installation for a freestanding tub typically costs more than a standard built-in alcove tub. While the price of the tub itself can vary, the real cost driver is the plumbing.
Most freestanding tubs require a floor-mounted faucet and a drain that isn’t tucked against a wall. This almost always means your plumber has to open up the floor to reposition the drain and run new water supply lines. It’s a much bigger job than simply hooking up an alcove tub to the existing wall plumbing. You absolutely need to budget for these specific plumbing modifications from the get-go.
How Do You Clean Behind a Freestanding Tub in a Small Bathroom?
This is probably the most practical question I get, and for good reason! The secret is all in the initial planning. That minimum of six inches of clearance I mentioned earlier is your best friend when it comes to maintenance.
With that small gap, you can easily get a mop, a vacuum wand, or a long-handled duster back there. It’s the only way to prevent that impossible-to-reach collection of dust and hair from building up.
Here’s a pro tip: Your faucet choice makes a difference, too. A wall-mounted faucet or one that’s deck-mounted right on the tub rim is much easier to clean around than a floor-mounted filler, which just adds another obstacle. Always think about the daily cleaning routine when you’re finalizing your layout.
Can I Have a Shower with My Stand Alone Tub?
Of course! You don’t have to give up a quick shower for a long soak. There are a few really smart ways to make it work, even in a small bathroom.
- Separate Walk-In Shower: If you have the room, this is the gold standard. A dedicated, glass-enclosed shower creates two distinct, functional zones and gives the bathroom a polished, high-end feel.
- Wet Room Concept: When space is truly at a premium, a full wet room is a game-changer. The entire space is waterproofed, allowing the tub and an open shower to share the floor without any barriers.
- Ceiling-Mounted Curtain: You can also hang a circular or oval shower curtain ring from the ceiling. It’s a functional solution, but I find it can sometimes make a small space feel a bit cluttered.
No matter which path you take, I always recommend a tub filler that includes a handheld shower wand. It’s invaluable for rinsing off, bathing kids, or just cleaning the tub itself.
At Haute Design, we connect discerning clients with the nation’s premier interior designers and architects who specialize in creating luxurious, functional spaces. Discover professionals who can transform your bathroom into an extraordinary retreat by visiting Haute Design.