
Building the perfect outdoor shower begins with a solid plan. It’s about getting the fundamentals right—location, regulations, and style—before you even think about materials. The goal is to seamlessly blend practicality with your aesthetic vision, ensuring the final result is as functional as it is beautiful.
Getting Started on Your Outdoor Shower Project

Before a single shovel hits the dirt, the success of your outdoor shower hinges on thoughtful planning. This isn’t just about picking a cool showerhead; it’s about making the critical decisions that define the entire project. You’re creating a lasting addition that should feel like a natural extension of your home.
This isn’t a fleeting trend. It reflects a bigger shift toward creating more luxurious and useful outdoor spaces. The global market for outdoor showers near pools was valued at roughly USD 290 million in 2023 and is expected to climb to USD 450 million by 2032. This tells you a lot about how homeowners are investing in amenities that fuse high-end design with everyday function. You can explore more market insights on this growing demand.
Finding the Ideal Location
Choosing the right spot is probably the single most important decision you’ll make. A great location perfectly balances convenience, privacy, and the practical realities of plumbing and drainage.
First, think about how you’ll actually use it. Is it mainly for rinsing off after a swim? Then placing it right next to the pool makes the most sense. If it’s for hosing down muddy pets or sandy kids after a day at the beach, a spot near the back door or mudroom is a game-changer.
When scouting your yard, keep these factors top of mind:
- Plumbing Access: The closer you are to existing water lines, the simpler and cheaper the installation. Tapping into the plumbing on an exterior wall of a bathroom or kitchen is often the path of least resistance.
- Sun Exposure: A location that gets a good dose of morning or afternoon sun will help the shower area dry out quickly. This prevents mildew and makes the whole experience much more pleasant.
- Privacy Needs: Actually stand in your proposed spot and look around. Can your neighbors see more than you’d like? You can use existing trees, fences, or even the architecture of your house to create natural privacy.
Pro Tip: Think about drainage from day one. The ground should slope away from your home’s foundation. The last thing you want is water pooling and causing potential issues down the road.
Understanding Codes and Permits
It’s tempting to skip this part, but trust me, checking local regulations now will save you from major headaches later. A simple, cold-water shower hooked up to a garden hose probably won’t require a permit, but anything more permanent almost certainly will.
Permanent installations, especially those tied into your home’s main plumbing and drainage systems, typically fall under local building codes. Your city or county might have specific rules about:
- Setbacks: How far the structure must be from your property lines.
- Drainage: Specific requirements for how wastewater is managed (e.g., directing it to a French drain vs. the sewer).
- Plumbing: Ensuring all hot and cold water connections meet official plumbing codes.
A quick phone call to your local building department is always time well spent. It will clarify exactly what’s needed and ensure your beautiful new shower is 100% compliant.
Choosing Your Outdoor Shower Style
Finally, it’s time for the fun part: deciding on the type of shower that best fits your needs, property, and budget. Here’s a quick look at the three main outdoor shower types to help you decide which is the right fit for your backyard.
Comparing Outdoor Shower Styles
| Shower Type | Best For | Installation Complexity | Typical Cost Range |
|---|---|---|---|
| Wall-Mounted | Small spaces, poolside rinse stations, or homes with convenient exterior plumbing access. | Low to Moderate | $300 – $1,500 |
| Freestanding | Creating a focal point, larger yards, or when placing the shower away from the house. | Moderate to High | $1,000 – $5,000 |
| Portable/Kit | Renters, budget-conscious projects, or for simple, cold-water-only needs. | Very Low | $150 – $600 |
As you can see, each style serves a different purpose. A simple wall-mounted unit is fantastic for pure utility, while a thoughtfully designed freestanding model can become a true architectural statement, turning a forgotten corner of your yard into a spa-like retreat.
Designing Your Perfect Outdoor Oasis
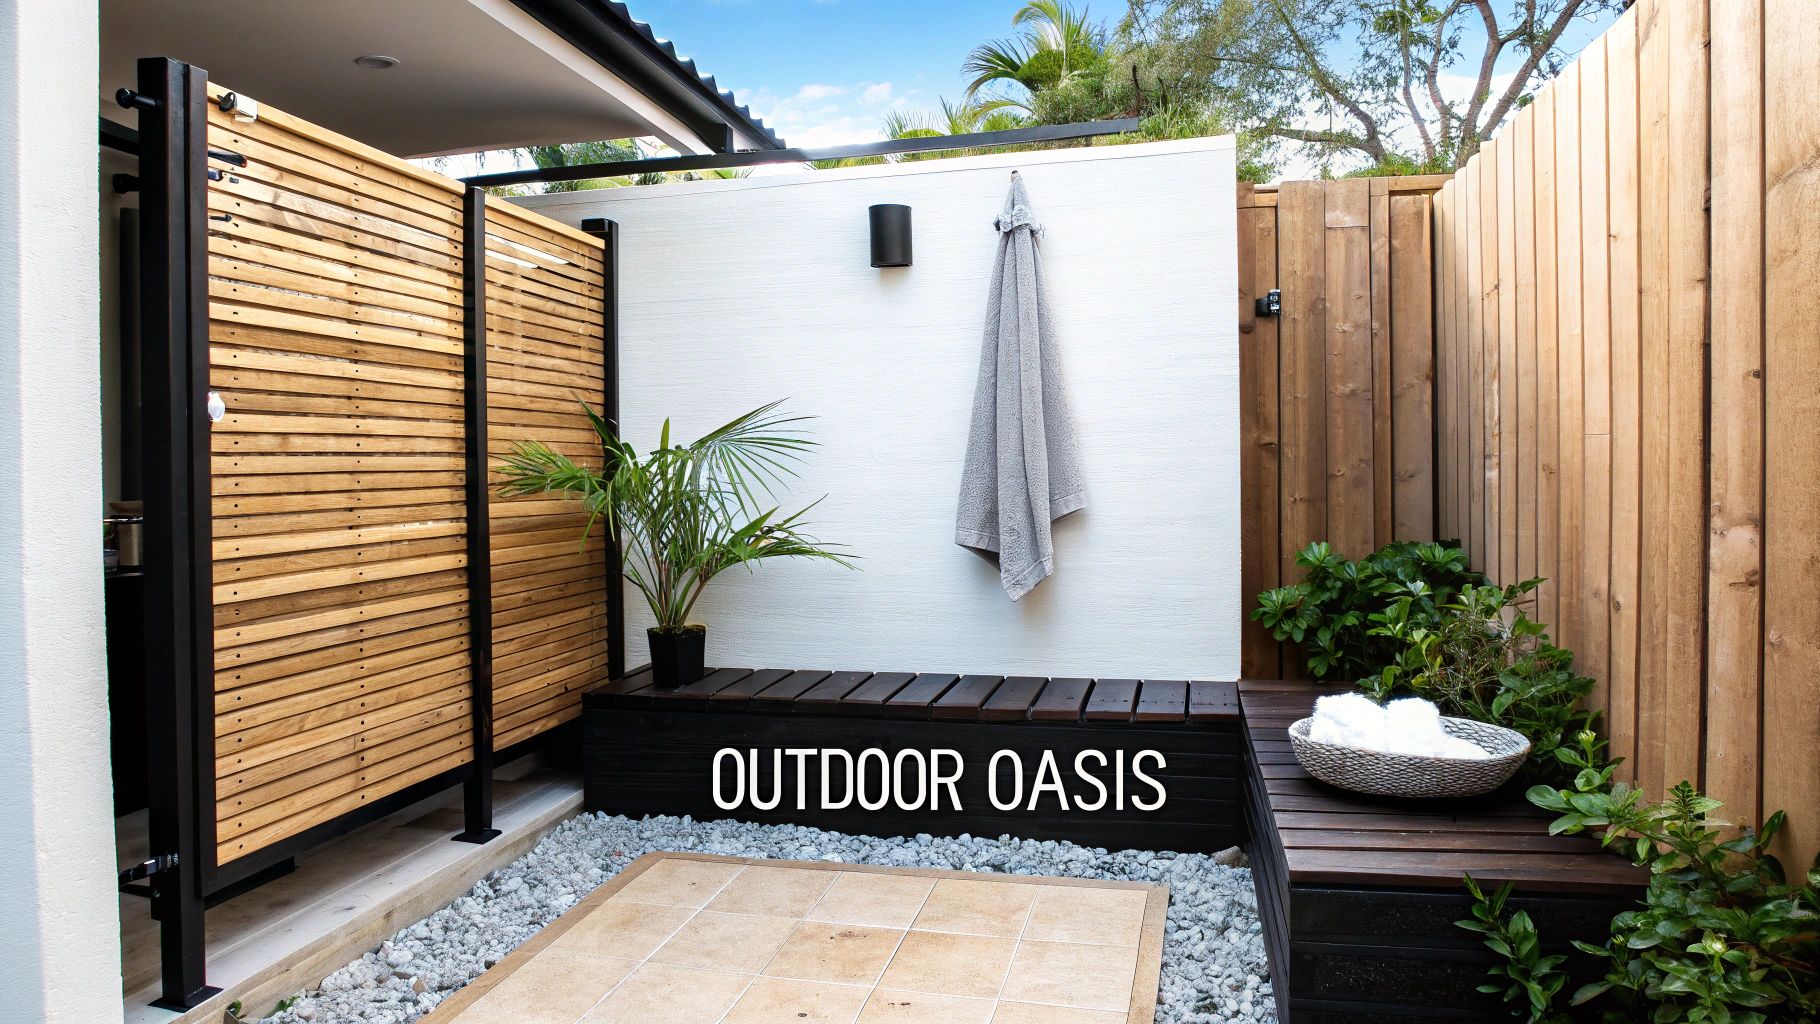
With the foundational work out of the way, we get to the fun part. This is where your plans for outdoor showers start to feel less like a construction project and more like creating a personal sanctuary. It’s about blending the practical with the personal to build something that feels like a true backyard escape.
The real magic happens when the shower feels like it belongs in its surroundings, not just dropped into place. Think about how it can flow with your garden, complement the patio, or integrate with the pool deck. A cohesive design is what transforms a simple rinse-off spot into an experience.
Crafting Privacy with Style
Privacy is non-negotiable, but that doesn’t mean you’re stuck with a drab, boxy enclosure. The best designs I’ve seen use privacy elements that are part of the landscape, making the space feel secluded without being confining.
Here are a few ways to get creative with it:
- Living Walls: Forget plain old fences. A trellis covered in climbing jasmine or clematis creates a lush, green screen that offers both privacy and an incredible fragrance.
- Strategic Landscaping: A dense row of fast-growing bamboo or tall ornamental grasses can form a natural barrier that moves with the breeze, adding to that tranquil, spa-like vibe.
- Architectural Screens: I’m a big fan of using materials like laser-cut metal panels, horizontal wood slats, or even frosted glass. They serve as modern privacy screens that are also stunning design features in their own right.
The trick is to layer these elements. A well-placed screen paired with thoughtful planting gives you total privacy while keeping things feeling open and airy.
Selecting the Right Flooring
The floor underfoot is more important than you might think. It needs to be safe, durable, and comfortable, all while standing up to water, sun, and changing temperatures. A slip-resistant surface is a must, and your choice here really sets the tone for the entire shower area.
From my experience, these materials offer the best balance of looks and practicality:
- Natural Stone: You can’t go wrong with large flagstone or smooth river rocks. They create a beautifully organic feel, provide fantastic drainage, and feel great on bare feet.
- Wood Decking: Teak, ipe, and cedar are classic choices for a reason—they’re naturally resistant to rot and insects. Wood slats let water drain through easily and give off a warm, spa-like ambiance.
- Composite Materials: If low maintenance is your goal, composite decking is an excellent choice. It gives you the look of wood without the yearly sealing, and it won’t splinter.
A design trick I love is to create a slightly recessed shower floor filled with smooth pebbles. It looks incredible, but it also does a great job of containing water and improving drainage, so you don’t end up with a muddy mess around the shower.
Adding Functional Luxury Features
It’s the little details that take an outdoor shower from good to truly memorable. Think about those small amenities you’d find at a high-end resort—those are the things that add convenience and a real sense of indulgence.
Consider integrating elements like these:
- A Built-In Bench: A simple stone or wood bench gives you a place to sit, set down a towel, or just relax for a moment.
- Storage Nooks: Carving recessed shelves into the enclosure walls is a brilliant way to store soaps and shampoos. It keeps things tidy and within easy reach.
- Hooks and Hangers: Don’t forget stylish, weather-resistant hooks for towels and robes. A simple detail that makes a huge difference.
- Integrated Lighting: Low-voltage landscape lighting can transform the space for evening showers. Try uplighting a nearby tree or washing a wall with soft light for a magical effect.
Thinking through these elements makes the shower highly functional and beautifully organized. This level of detail is a core principle when you design an outdoor space that feels both luxurious and genuinely livable. After all, a well-designed outdoor shower isn’t just a feature; it’s an experience that adds immense value and enjoyment to your home.
Choosing Materials Built to Last
An outdoor shower lives a tough life. It’s constantly bombarded by sun, rain, humidity, and wild temperature swings. This is why your choice of materials isn’t just about looks—it’s a critical decision that dictates how long your shower will last and how much work it’ll take to maintain.
My advice? Invest in high-quality, weather-resistant components right from the start. Spending a bit more now will save you a world of headaches and costly repairs down the road. You want your shower to look just as inviting in its fifth year as it did on day one.
Enclosure and Wall Materials
The enclosure is what gives your shower its personality and privacy. This choice really sets the visual tone, so you have to find that sweet spot between aesthetics and pure, rugged durability.
- Pressure-Treated Wood: A popular, budget-friendly option. Just know it comes with homework—it needs to be sealed or stained annually to keep rot and warping at bay, especially in damp climates.
- Naturally Resistant Woods: Now we’re talking. Cedar, teak, and ipe are the champions here. Their natural oils make them incredibly resistant to moisture and pests, meaning far less maintenance for you.
- Composite Materials: If you want the look of wood without the upkeep, composites are your answer. Made from a mix of wood fibers and plastic, they won’t rot, splinter, or ever need sealing. A true “set it and forget it” solution.
- Stone and Tile: For that ultimate, high-end spa vibe, nothing beats stone veneer or outdoor-rated porcelain tiles. They’re completely waterproof and create a stunning, permanent structure. You can dive deeper into creating this atmosphere by exploring the elements of serene, spa-inspired bathrooms.
Flooring That Is Safe and Stylish
When it comes to the shower floor, safety is non-negotiable. A slippery surface is a serious hazard, so you need a material with excellent grip, even when it’s soaking wet. Great drainage is just as important to prevent standing water and slimy buildup.
I’m a big fan of slatted wood floors made from teak or ipe. The gaps let water drain instantly, and the wood feels warm and comfortable underfoot. Another fantastic approach is a bed of smooth river stones or large flagstones set in gravel—it creates a beautiful, natural surface that handles water perfectly.
Expert Takeaway Whatever flooring you go with, make sure the ground underneath is graded properly. You need a gentle slope leading away from your house’s foundation to ensure water runs off and doesn’t cause moisture problems.
Plumbing Fixtures Made for the Outdoors
This is one area where you absolutely cannot cut corners. I’ve seen people try to use standard indoor fixtures, and it’s a recipe for disaster. They will rust, corrode, and fail in no time.
When you’re shopping for plumbing, look specifically for these features:
- Material: Stick with fixtures made from stainless steel (304 or 316 grade), brass, or bronze. These materials are built to resist corrosion.
- Finish: A PVD (Physical Vapor Deposition) finish is your best friend. It’s incredibly tough and resists scratching and fading much better than standard chrome.
- Valves: If you live anywhere that sees freezing temperatures, a frost-proof valve is an absolute must. It allows you to shut off and drain the pipes completely, preventing them from bursting in the winter.
Eco-Friendly and Regional Considerations
Thinking sustainably is becoming a bigger part of modern design. Solar water heaters, for example, can be a brilliant addition, using the sun to provide hot water and cutting down your energy bills. They are especially effective in sun-drenched locations.
It’s also interesting to see how local trends and climates shape these projects. In Europe, the Middle East, and Africa, there’s a big push toward solar-heated and modular showers, largely driven by environmental regulations. Over in the Asia-Pacific region, especially at beach destinations, you’ll see more natural bamboo finishes and high-capacity showers built for hotels and resorts.
Getting the Plumbing and Drainage Right
The real magic of a great outdoor shower is hidden away. It’s in the plumbing and drainage—the stuff you don’t see that makes the whole experience work without a hitch. Get this part right, and you’ll have a reliable, refreshing escape. Get it wrong, and you’re looking at a muddy, unusable mess. Let’s break down how to get water to your shower and, just as importantly, how to get it away.
Whether you’re planning a simple spot to rinse off after a swim or a full-blown spa setup, the core principles don’t change. Good planning here is all about ensuring your shower is safe, reliable, and feels like a natural extension of your home, not an afterthought.
Tapping Into Your Home’s Water Supply
The most straightforward way to get water to your shower is by tying into your home’s existing plumbing. I’ve found the best approach is usually to tap into the hot and cold lines on an exterior wall, often from a nearby bathroom or kitchen. A good plumber can spot the ideal tie-in point in minutes, making this a pretty efficient and cost-effective route.
If you live anywhere that sees freezing temperatures, this next part is crucial. You absolutely must install shut-off valves and a drainage system inside your house. Before that first frost hits, you’ll turn off the water leading to the shower and open the outdoor taps. This lets every last drop of water drain out, which is the only way to prevent your pipes from freezing, expanding, and bursting over the winter.
Smart Drainage Solutions to Avoid a Swamp
Let me be clear: proper drainage isn’t optional. Without a solid plan, you’re just creating a pool of standing water. That’s a welcome mat for mosquitoes, a potential risk to your home’s foundation, and a slippery hazard waiting to happen. The right drainage solution really depends on how often you’ll be using the shower and what your local building codes say.
Here are the three main ways I see this handled on projects:
- French Drain or Dry Well: This is my go-to recommendation for showers that will only see occasional use. You basically dig a pit under the shower floor, line it with landscape fabric, and fill it with gravel. Water simply filters down through the gravel and is slowly absorbed back into the ground.
- Connecting to Your Main Wastewater System: If you plan on using the shower daily, especially with soaps and shampoos, you’ll likely need to connect its drain to your home’s sewer or septic system. Most local codes require this. It’s a more involved job, for sure, but it’s the correct way to handle a high-use shower.
- Greywater Recycling System: This is a fantastic, eco-friendly option that’s getting more popular. A greywater system captures the relatively clean water from your shower and diverts it to your garden or lawn for irrigation. Just remember, you’ll need to stick to biodegradable, plant-safe soaps.
The outdoor shower market is really changing, driven by a bigger focus on sustainability and homeowners wanting smarter features. People now expect things like app-controlled temperatures, efficient heating, and even greywater recycling. For a deeper dive, check out this report on the evolving outdoor shower market from researchandmarkets.com.
Considering Modern Plumbing Innovations
As you’re laying out your plumbing and drainage, don’t overlook some of the newer tech available. Today’s fixtures go way beyond basic spigots; they can add some serious efficiency and a touch of luxury to your setup.
For example, installing a small, dedicated tankless water heater for the outdoor shower gives you instant hot water on demand. This is a game-changer if the shower is a long way from your home’s main water heater. Another upgrade I always recommend is a thermostatic valve. It lets you set an exact water temperature and holds it there, so you never get those shocking blasts of icy cold or scalding hot water. It’s a small detail that makes a world of difference in the experience. Thinking about these elements from the start is how you build an outdoor shower that you’ll love using for years.
Bringing Your Shower Plans to Life
You’ve got the design nailed down and the materials are ready to go. Now comes the best part: turning those plans for outdoor showers into a reality. This is where your vision truly takes shape, transforming a patch of your backyard into a retreat. The trick to a smooth construction process is to be methodical, moving deliberately from the ground up.
Building an outdoor shower is more than just assembly; it’s about creating a structure that’s durable, safe, and genuinely a pleasure to use. A well-executed build ensures your shower not only looks incredible but functions perfectly for years.
Preparing a Solid Foundation
You can’t build a lasting structure on a flimsy base. The very first thing you need to do is prepare the site, creating a stable, level foundation that can handle both the structure and the water. The right foundation really depends on your design and the ground you’re working with.
- For Simple Setups: If your shower floor is just loose material like pea gravel or smooth river stones, your main job is leveling the area and creating a gentle slope for drainage. Just dig out a few inches of soil, lay down some landscape fabric to keep weeds out, and fill it in with your chosen material.
- For Permanent Structures: A more substantial enclosure, especially one built from heavy wood or stone, demands a proper foundation. This usually means pouring a small concrete pad or, my personal preference for a warmer feel, building a low-profile deck frame. Concrete offers unmatched stability, but a well-built wood frame is often more approachable for a DIY project.
No matter which path you choose, grab a level and use it constantly. A perfect base prevents shifting down the road, which can throw everything else out of whack.
Constructing the Enclosure
This is where things get exciting—when the walls go up, and the shower’s personality starts to shine through. Whether you’re using a pre-fabricated kit or building a custom design from scratch, the same principles of solid construction apply.
If you bought a kit, stick to the manufacturer’s instructions like glue. They’ve been engineered for a reason. For a custom build, your detailed plans are your bible. I always build and secure the main frame or corner posts first before even thinking about attaching the wall panels. This ensures the entire structure is square and rigid from the start.
A Pro Tip on Assembly: I always recommend assembling the walls on a flat surface like a driveway before moving them into place. It’s so much easier to check for squareness and make small adjustments there than when you’re squeezed into the final spot.
Installing Plumbing Fixtures Securely
Connecting the plumbing is where precision becomes non-negotiable. This is where you’ll be installing the shower valve, the showerhead arm, and the head itself. Leaks are the number one enemy, so slow down and get this part right.
Use plumber’s tape (Teflon tape) on every single threaded connection. This is your best friend for creating a watertight seal. Wrap it clockwise around the male threads 3 to 5 times before screwing the pieces together. When you tighten fittings with a wrench, don’t go crazy—overtightening can crack a fixture or strip the threads. You’re aiming for snug, not Herculean.
This is also a great opportunity to add a little luxury. A simple upgrade to a rainfall showerhead or a handheld sprayer can completely change the experience. For some incredible inspiration on elevating your space, see how top-tier designers are creating a new era in outdoor luxury.
Before you call the plumbing done, turn the water on and check every joint for drips. Finding and fixing a tiny leak now is infinitely easier than dealing with it after the walls are finished.
The infographic below is a great visual for thinking through water runoff, which is a key part of the construction process.
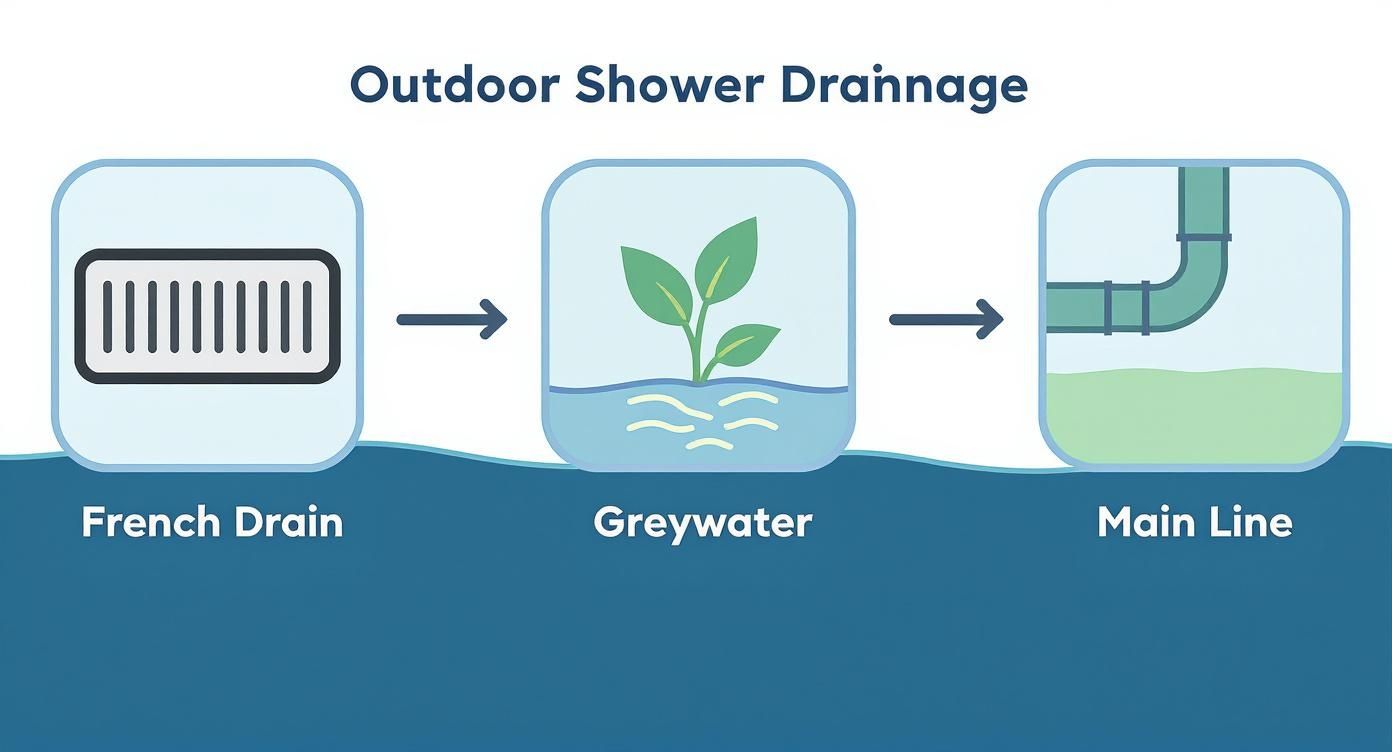
As you can see, whether you opt for a simple French drain, a sustainable greywater system, or a direct tie-in to your home’s plumbing, planning for drainage is fundamental to a successful build.
Sample Project Timeline and Checklist
Staying on track is crucial for any project. This simple timeline and checklist can help you organize the workflow and ensure no critical steps are missed, from the initial brainstorming all the way to that first refreshing rinse.
| Phase | Key Tasks | Estimated Time |
|---|---|---|
| 1. Planning & Design | Finalize location, sketch design, select materials, check local codes. | 1-2 Weeks |
| 2. Site Preparation | Clear and level the area, excavate for foundation, run plumbing and electrical lines. | 1-3 Days |
| 3. Foundation Work | Pour concrete pad or build deck frame, install drainage system. | 2-4 Days |
| 4. Construction | Assemble enclosure frame and walls, install flooring. | 2-5 Days |
| 5. Plumbing & Fixtures | Install shower valve, showerhead, and any additional fixtures. Test for leaks. | 1 Day |
| 6. Finishing Touches | Stain or seal wood, add hooks and shelves, integrate landscaping and lighting. | 1-2 Days |
This timeline is just a guide, of course. A complex custom build might take longer, while a simple kit could be done over a weekend. The key is to map out your own plan before you start digging.
Applying the Finishing Touches
With the heavy lifting behind you, it’s the final details that truly complete the project. I’ve always said the last 10% of the work makes 90% of the difference.
- Sealing and Protection: If you used a beautiful natural wood like cedar or even just pressure-treated pine, don’t skip the sealant. A quality outdoor stain or sealer is your first line of defense against moisture and UV rays, keeping the wood from fading and rotting.
- Adding Accessories: Now for the fun stuff. Install hooks for towels, a small shelf or niche for soap and shampoo, and maybe that built-in bench you designed. These are the small touches that make the shower so convenient to use.
- Landscaping and Lighting: Finally, blend the shower into its environment. A few fragrant, water-loving plants nearby can make the space feel lush and private. Adding some subtle, low-voltage landscape lighting can also create a magical atmosphere for a shower under the stars.
Frequently Asked Questions About Outdoor Showers
As you get closer to breaking ground on your outdoor shower, a few key questions almost always come up. Getting these answers sorted out early on saves a lot of headaches and potential rework down the line. Let’s walk through the most common things homeowners ask when planning this kind of project.
Most people start by wondering what this is all going to cost. The truth is, the budget can swing wildly depending on what you have in mind.
A simple, unheated shower hooked up to your garden hose might only set you back a few hundred dollars for a kit and some basic materials. On the other hand, if you’re envisioning a custom-built retreat with hot and cold running water, professional plumbing, beautiful teak walls, and a stone floor, you could easily be looking at a range of $2,000 to $8,000—or even more. The biggest factors driving the price are the fixtures you choose, how complex the plumbing is, and the quality of the materials for the enclosure and flooring.
Do I Really Need a Permit for This?
This is a big one, and the answer is a classic “it depends.” If you’re just setting up a portable unit that doesn’t permanently connect to your house’s plumbing, you’re almost certainly in the clear. No permit needed.
But the moment you decide to build a permanent structure, the rules change. As soon as your plans include tapping into your home’s hot and cold water supply and running a dedicated drain, you will almost definitely need a permit. Every local building department has its own codes for plumbing, proper drainage, and how far the structure needs to be from your property line. The best thing you can do is make a quick call to your local planning office before you buy a single part. It’s the easiest way to make sure you’re doing everything by the book from day one.
A detail that often gets missed is how the shower’s location can affect the permit process. Tucking it right next to your house where exterior plumbing already exists can sometimes make things simpler. A standalone shower farther out in the yard might fall under a different set of rules.
What’s the Smartest Way to Handle Drainage?
Good drainage is non-negotiable. Without it, you’ll have a permanent mud pit that can cause issues for your yard and even your home’s foundation.
For a shower that you’ll only use occasionally, like rinsing off after a swim, a simple dry well or a French drain usually does the trick. This is basically just an underground pit filled with gravel that lets the water slowly and naturally soak back into the ground.
If you plan on using the shower daily with soaps and shampoos, things get more serious. Your local health codes will likely mandate a direct connection to your home’s main sewer or septic system. A great, eco-conscious option is a greywater system, which redirects the runoff to water your garden. Just remember, if you go this route, you have to commit to using biodegradable, plant-safe soaps to keep your landscape healthy.
At Haute Design, we specialize in connecting discerning homeowners with the elite architects and builders who can bring an outdoor oasis to life. To find the right expert for your project, explore our network of top-tier professionals.