
So, you’re ready to renovate. The most successful projects don’t start with demolition; they begin with a clear, well-thought-out vision. This is where you translate those daydreams and abstract ideas into a concrete, actionable plan that will become the north star for every decision you make down the line.
Translating Your Renovation Dream into a Plan

Before you fall in love with a single tile or faucet, the first—and most important—question to ask is, “Why are we really doing this?” The answer to that question is the anchor for your entire project. It’s what keeps you grounded when you’re faced with a thousand different choices.
Is the goal to finally have a functional kitchen that can handle a growing family? Or are you craving a serene master suite that feels like a genuine retreat from the world? Getting crystal clear on your core motivation is the first step. Write it down. This “why” becomes the ultimate measure of your project’s success.
Defining Your Needs Versus Wants
One of the most critical exercises I walk clients through is separating the absolute “needs” from the desirable “wants.” It sounds simple, but this is where budgets are made or broken.
Needs are the non-negotiables. They’re the elements that solve a real problem. Think fixing a chronically leaky roof, adding a much-needed second bathroom to ease morning chaos, or upgrading dangerously outdated wiring. These are the functional cornerstones of your renovation.
Wants, on the other hand, are the beautiful upgrades that elevate the space but aren’t strictly essential. That stunning quartz countertop, the indulgent steam shower, or the custom floor-to-ceiling cabinetry—these are fantastic, but they also represent areas of flexibility if you need to rein in the budget later.
A common mistake is treating every “want” like a “need.” By creating a physical list and categorizing each item, you build a realistic framework that protects your budget and prevents “scope creep”—the gradual expansion of a project beyond its original goals.
To make this tangible, try using a simple framework to organize your thoughts.
Needs vs Wants Prioritization Matrix
This matrix helps you visualize your priorities, forcing a clear-eyed assessment of what truly matters versus what would simply be nice to have. It’s an invaluable tool for guiding conversations with your design and build team.
| Feature/Element | Category (Need/Want) | Impact on Daily Life | Estimated Cost Impact |
|---|---|---|---|
| New, larger kitchen island | Need | Essential for meal prep and family gatherings | High |
| Heated floors in master bath | Want | Luxury comfort, not essential for function | Medium |
| Relocate laundry to main floor | Need | Solves major daily inconvenience | High |
| Professional-grade gas range | Want | Desirable upgrade, but standard model is functional | Medium-High |
| Energy-efficient windows | Need | Addresses drafts and high utility bills | High |
By mapping everything out, you create a logical hierarchy that makes tough decisions far easier when they inevitably arise.
Gathering Smart Inspiration
With your “why” firmly in place, it’s time for the fun part: gathering inspiration. But there’s a right way and a wrong way to do this. Platforms like Pinterest and Houzz are incredible, but they can also be overwhelming.
The key is to be strategic. Instead of just saving every beautiful image you see, create curated, specific boards.
Try organizing your ideas this way:
- Overall Aesthetic: A mood board that captures the general feeling you want—calm and airy, dark and moody, warm and traditional.
- Color Palettes: Pin specific combinations of paint, trim, and accent colors that resonate with you.
- Material Selections: Create a collection of flooring, tile, countertop, and textile examples.
- Layout Ideas: Save floor plans or photos that showcase clever and functional interior design space planning guide.
This approach transforms a jumble of images into a powerful design brief you can share with your architect or designer. It’s a visual language that ensures everyone is on the same page from day one.
Thinking About Long-Term Value
A renovation is far more than a cosmetic touch-up; it’s a major financial investment. As you refine your plans, it’s smart to consider how your choices will impact your home’s long-term value.
The global home remodeling market was valued at around USD 950 billion in 2023 and is on track to hit nearly USD 1,450 billion by 2032. Much of this growth is fueled by a rising demand for sustainability and energy efficiency.
Weaving in elements like high-performance insulation, better windows, or smart home technology doesn’t just lower your monthly utility bills—it makes your home more attractive to future buyers. This initial planning phase isn’t just about creating a beautiful space for today; it’s about making a wise investment for tomorrow.
Crafting a Realistic Renovation Budget

Once your vision starts taking shape, it’s time to ground those dreams in financial reality. A detailed, realistic budget is the single most important tool in your renovation arsenal—it’s what will keep the project on track and minimize stress down the line. It’s easy to get caught up in the exciting costs like materials and labor, but a truly solid budget accounts for the entire financial picture.
To build a budget that can withstand the realities of a major renovation, you need to think beyond the obvious line items. The difference between a smooth, controlled project and one that spirals into a financial mess often comes down to this early planning.
Looking Beyond the Obvious Costs
The gap between a rough guess and a working budget is filled with details. I’ve seen countless projects get derailed not by the price of the marble countertops, but by a series of smaller, unbudgeted expenses that add up fast. Spotting these ahead of time is critical.
Some of the most commonly overlooked costs include:
- Professional Fees: Your architect, interior designer, and structural engineer provide essential expertise, and their fees need to be factored in from day one.
- Permits and Inspections: Every municipality charges for building permits, and you’ll have various inspections along the way. These fees can easily run from hundreds into the thousands of dollars.
- Temporary Living Expenses: If your kitchen or primary bathroom is out of commission, will you need to move out? Even just budgeting for more restaurant meals can make a difference.
- Waste Disposal: That demolition debris has to go somewhere. Renting a dumpster is a necessary cost that’s easy to forget.
- Utility Spikes: All those power tools and temporary climate control systems can lead to a noticeable jump in your energy bills during construction.
When you account for these items upfront, your budget transforms from a hopeful estimate into a reliable roadmap. This level of detail is also what separates you as a serious, organized client when you start searching for the right home builders and remodelers.
The Non-Negotiable Contingency Fund
Here’s a hard truth about renovations: no matter how perfectly you plan, there will be surprises. When we open up a wall, we might find anything from old, faulty wiring to hidden water damage that has to be addressed. Your contingency fund is the safety net for these moments.
Expert Insight: Think of your contingency fund not as “extra” money, but as an essential, non-negotiable part of the budget. It’s your planned response to the unplanned problems that are virtually guaranteed to pop up.
A good rule of thumb is to set aside 15-20% of your total project cost for this fund. If you’re working on an older home where the odds of uncovering issues are higher, I’d strongly advise leaning toward that 20% figure. Remember, this money is strictly for unforeseen necessities—not for a last-minute decision to upgrade your faucet.
Getting Smart About Contracts and Financing
As you start talking to contractors and getting bids, you’ll mainly see two types of pricing structures.
- Fixed-Price Contract: This gives you a total, locked-in price for the project based on a highly detailed scope of work. It offers cost certainty, but making changes can be more complicated and expensive.
- Cost-Plus Contract: Here, you agree to pay the actual costs for labor and materials, plus a predetermined fee or percentage for the contractor’s profit and overhead. It’s a more transparent and flexible model, but the final price tag is less predictable.
The home improvement market is incredibly active right now. With around 48% of U.S. homeowners planning renovations, total spending is projected to hit nearly $593.8 billion. This high demand makes it even more crucial to have a clear contract and your financing locked down before you start.
Look into smart financing options like a home equity line of credit (HELOC) or a home equity loan, and get pre-approved early. When you find the perfect team and are ready to sign, having your funding secured means you can move forward without a single delay.
Assembling Your Professional Renovation Team

With a clear vision and a working budget, you’ve laid the groundwork. Now comes the single most important decision you’ll make: choosing the people who will bring it all to life. I’ve seen countless projects succeed or fail based on the team, and I can’t stress this enough—your renovation’s success hinges entirely on the expertise and integrity of the professionals you hire.
Think of it this way: you’re not just hiring contractors, you’re building a partnership. These are the people you’ll be trusting with a massive investment in your home. Rushing this stage is a classic mistake, one that often leads to budget blowouts, frustrating delays, and a final result that just doesn’t hit the mark.
Who’s Who on a High-End Renovation
Before you even start looking, you need to know who you’re looking for. The scale of your project will dictate the key players you need on your team.
- Architect: If you’re planning on moving walls, building an addition, or altering the core structure of your home in any way, an architect is absolutely essential. They’re the ones who create the technical blueprints that ensure your vision is safe, structurally sound, and compliant with all local building codes.
- Interior Designer: This is your aesthetic and functional visionary. A great designer goes far beyond picking paint colors; they master the flow of your home, source the perfect materials, design custom cabinetry, and orchestrate every detail from lighting to furniture. They ensure the final look is cohesive and truly reflects your style. If you’re not sure where to start, you can often find a designer with a portfolio that speaks to you.
- General Contractor (GC): Your GC is the on-the-ground commander of the entire operation. They are responsible for hiring and managing all the trades—the electricians, plumbers, tilers, and painters. They orchestrate the daily workflow, keep the project on schedule, and act as your main point of contact once construction is underway.
For a simple cosmetic refresh, a top-notch GC might be all you need. For a major overhaul, having all three of these experts working in sync is the key to a seamless project.
Finding and Vetting Your Dream Team
Now for the real work: finding the right people. This is where your due diligence will pay off in spades. Don’t just go with the first name someone gives you; a thorough vetting process is non-negotiable.
I always advise clients to shortlist at least three candidates for each key role. Tap into your network for recommendations, but also dig into professional directories and online reviews to cast a wider net. Once you have a few names, it’s time to get serious.
A stunning portfolio is a great start, but it’s only half the story. The best professionals have impeccable credentials, rave reviews from recent clients, and a communication style that gives you complete confidence.
First things first: verify that every single person you’re considering is fully licensed and insured. Ask to see their certificates for both general liability and worker’s compensation. This isn’t just a formality; it protects you from any liability if an accident or damage occurs on your property.
The Interview: Asking the Questions That Matter
The interview is your chance to look beyond the portfolio and assess how they operate. A good working relationship is built on trust and crystal-clear communication, so you need to see if your styles will mesh.
Come prepared with a sharp list of questions for every candidate:
- How do you typically communicate with clients? Are we talking weekly site meetings, daily texts, or a formal project management portal?
- Walk me through your process. What happens when an unexpected issue or a change order comes up?
- What specific systems do you have in place to keep a project on schedule and on budget?
- Could I speak with the clients from your last three projects?
- What does your payment schedule look like, and what milestones trigger each payment?
Pay close attention to their answers. Do they sound organized and transparent, or are they vague? A professional who is patient and thorough with your questions is likely to be the same way with your project. At the end of the day, you’re choosing a team you need to trust implicitly. It’s the most critical step toward a renovation you’ll love for years to come.
Bringing Your Vision to Life: The Design and Permitting Phase
Now that your dream team is in place, we move from big ideas to the nitty-gritty details. This is where your vision gets translated into a concrete, buildable plan. It’s the most critical stage for getting things right on paper, which is far cheaper and less stressful than trying to make changes once the sledgehammers come out.
Think of this phase as your project’s single source of truth. Every decision, from the exact placement of a light switch to the finish on a doorknob, gets locked in. Nailing down these specifics now is your best defense against the dreaded mid-project changes that blow up budgets and timelines. Your architect and designer are essentially writing the script; your contractor is there to direct the performance flawlessly.
From Blueprints to Building Codes
The first order of business is developing a full set of architectural drawings. Your architect will take your initial concepts and flesh them out into highly detailed plans that cover everything—structural modifications, new plumbing lines, updated electrical layouts, you name it. These aren’t just floor plans; they’re the technical language the entire construction crew will follow to the letter.
At the same time, you and your interior designer will be finalizing every last material and finish. This is the fun part, but it requires decisiveness. We’re talking about:
- Flooring: Selecting the specific hardwood, stone, or tile and its pattern.
- Cabinetry: Approving the final designs, wood species, and paint or stain colors.
- Countertops: Visiting the stone yard to tag the exact slab of marble or quartzite for your kitchen.
- Fixtures & Hardware: Choosing every faucet, sink, light fixture, and cabinet pull.
- Tile: Picking out the materials for backsplashes, shower walls, and bathroom floors.
Each of these choices is meticulously documented on the plans, leaving no room for guesswork once construction begins.
Demystifying the Building Permit Process
With a complete set of architectural plans, the next step is submitting them to your local building department. The permit process can feel like a bureaucratic headache, but it’s an essential protection for your investment and your family’s safety. It’s the city’s way of ensuring all work adheres to current building codes and structural standards.
A lot of people think permits are optional for interior projects. The reality is that any renovation involving structural, electrical, plumbing, or mechanical system changes legally requires a permit. Skipping this can result in hefty fines, major issues when you go to sell your home, and, in worst-case scenarios, an order to tear out all the unpermitted work.
Your general contractor will almost always handle the permit submission and navigate the back-and-forth with city inspectors. This is a huge part of their value; an experienced contractor knows the local process inside and out and can prevent unnecessary delays.
The path from initial design to move-in day involves a sequence of carefully orchestrated steps. This sample timeline provides a high-level look at how the different phases of a renovation project connect and depend on one another.
Renovation Project Timeline And Dependencies
| Phase | Key Activities | Typical Duration | Dependencies |
|---|---|---|---|
| 1. Planning & Design | Vision, Budget, Team Assembly, Concept Design | 4–8 Weeks | Homeowner availability, team selection. |
| 2. Design Development | Detailed Drawings, Material Selections | 6–12 Weeks | Completed concept design, final decisions on finishes. |
| 3. Permitting | Submit Plans, Await City Approval | 4–16+ Weeks | Completed architectural drawings. |
| 4. Procurement | Order Long-Lead Items (Windows, Cabinets) | 2–20+ Weeks | Finalized material selections. |
| 5. Construction | Demolition, Framing, MEP, Drywall, Finishes | 4–12+ Months | Approved permits, material availability on site. |
| 6. Punch List & Closeout | Final Walk-Through, Minor Fixes, Final Payment | 1–3 Weeks | Substantial completion of construction. |
As you can see, a significant portion of the project timeline occurs before any construction even starts, highlighting the importance of thorough upfront planning.
Ordering Materials and Managing Lead Times
While you’re waiting for the city to approve your permits, the focus shifts to procurement. This is a step you absolutely cannot afford to get wrong. Many high-end and custom items have surprisingly long lead times—it’s not uncommon for custom windows to take 12-16 weeks or for designer appliances and imported tile to take months to arrive.
Your team will create a procurement schedule to get these long-lead items ordered right away. The goal is to have everything arrive on-site just as the construction crew is ready for it, preventing costly downtime.
This proactive strategy is more important than ever. With annual home improvement spending projected to hit $509 billion, the demand for materials and skilled labor is intense. According to the latest economic forecast for the home improvement industry, this trend isn’t slowing down. By planning ahead and ordering early, you insulate your project from supply chain snags and keep the momentum going.
Managing Construction Through Completion
So, your plans are locked in and the permits are approved. Now the real action starts. This is where the vision you’ve spent months refining begins to take physical shape, and your role shifts from dreamer to on-site manager. Navigating this phase successfully is all about steering the project, ensuring the incredible detail on paper translates perfectly to your home—on time and on budget.
The absolute bedrock of a smooth construction phase is communication. Your general contractor is your key partner on this journey, and setting up a solid communication rhythm from the very beginning isn’t just a good idea; it’s essential. This simple step is what stops tiny misunderstandings from snowballing into expensive delays.
Establishing a Communication Rhythm
You need a communication plan that works for you and your contractor. In my experience, the most successful projects are the ones where we establish a predictable schedule for updates, leaving no room for guesswork.
A good system might include:
- Weekly Site Meetings: Carve out a specific time each week to walk through the property together. It’s the best way to see progress firsthand, compare it to the schedule, and tackle any decisions that are on the horizon.
- Shared Digital Tools: We’re not talking about anything complicated. A project management app like Builder-trend or even a simple shared photo album can be a game-changer for tracking daily progress and asking quick questions.
- End-of-Day Updates: A quick text or email from the site supervisor can make all the difference. Just a brief note on what they finished today and what’s next on the list for tomorrow keeps you completely in the loop.
The exact method doesn’t matter as much as the consistency. When information flows predictably, it builds trust and keeps the entire team perfectly aligned. This is one of the most important parts of planning a home renovation that doesn’t go off the rails.
Handling Change Orders the Right Way
Let’s be realistic: no matter how perfectly you plan, things will change. Once the walls are open, you might spot an opportunity for a new window, or the crew might uncover a structural issue that needs a new approach. These adjustments are handled through something called a change order.
A change order is simply a formal document that spells out any deviation from the original plan, along with the impact on cost and timing. Here’s the golden rule: get every single change in writing. A casual “yes” on a loud, busy job site is a recipe for a budget dispute down the road.
Think of a change order not as a hassle, but as a critical tool for keeping control of your budget. A proper one will detail the new work, the exact cost for labor and materials, and any effect on the project timeline. Always review and sign it before the new work begins.
Preparing Your Home and Managing Disruptions
Construction is messy and disruptive. There’s no way around it. But you can make it far more manageable by preparing for the reality of it all. If you plan on living in the house during the work, collaborate with your contractor to create a containment strategy for dust and debris.
This usually involves using heavy-duty plastic sheeting to seal off work zones and designating specific entry and exit points for the crew. Be upfront about house rules—things like working hours, bathroom access, or where to park. A little bit of courtesy and some clear boundaries go a long way toward maintaining a great relationship with the people transforming your home.
From Final Inspection to Final Payment
As the dust settles and the project nears its end, a few crucial steps remain. Your contractor will get the city inspectors out for the final sign-offs to make sure everything is up to code. Once you have that green light, you’ll do a final walk-through with your contractor.
This is your moment to create the punch list—a detailed list of every little thing that needs fixing or finishing. We’re talking about minor paint touch-ups, a cabinet handle that’s slightly off-kilter, or a light switch that isn’t working perfectly. Don’t be shy; be thorough.
The final payment should only be made after every single item on that punch list has been completed to your satisfaction. That last check is your leverage to ensure the job is 100% complete. Handing it over marks the successful end of your project and the start of life in your beautifully renovated home.
Answering Your Renovation Questions
Even with the best roadmap in hand, questions are bound to come up. Undertaking a major home renovation is a huge commitment, so it’s completely normal to have a few concerns before you get started. Let’s walk through some of the most common questions we hear from homeowners.
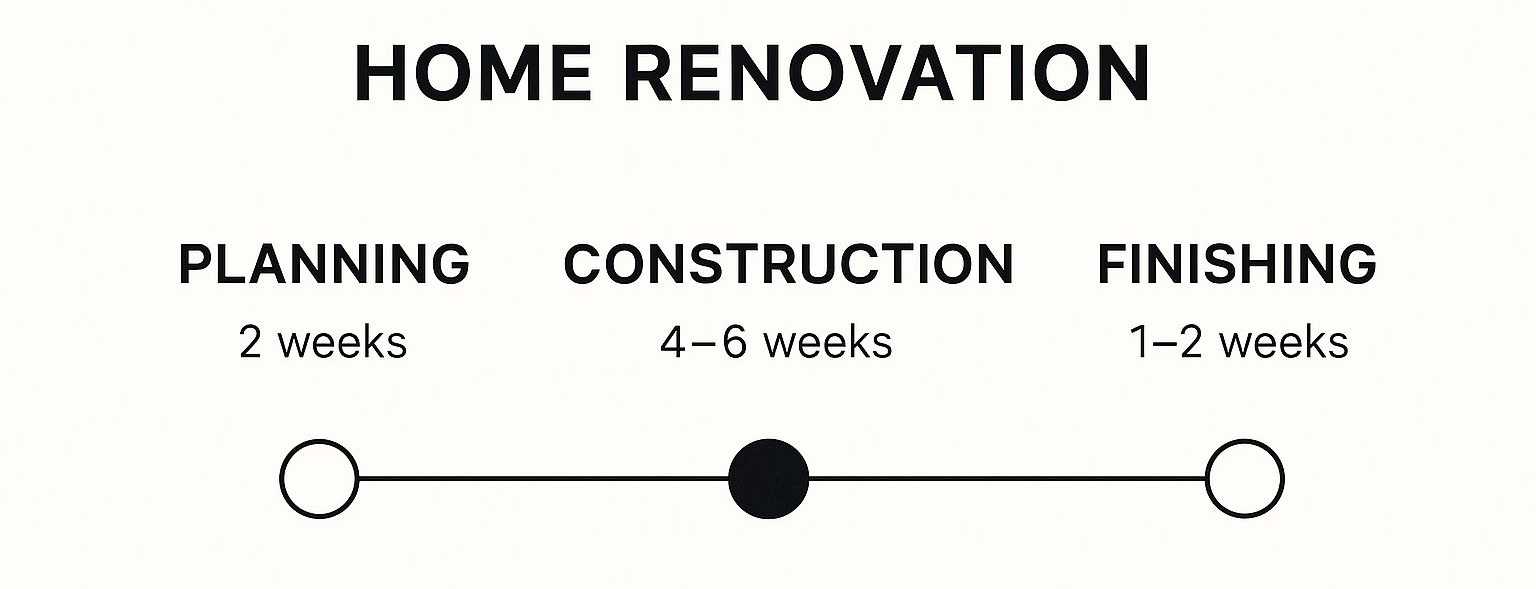
How Long Does It Really Take to Plan a Renovation?
This is one of the biggest unknowns for most homeowners, and the answer is almost always “longer than you think.” It’s a common misconception that planning is a quick prelude to the main event. In reality, a thoughtful, well-executed planning phase often takes just as long as the construction itself—sometimes longer.
For a substantial project, like a full kitchen gut and remodel, you should set aside 3 to 6 months just for planning. That timeline covers everything from initial brainstorming and budgeting to hiring your team, developing detailed drawings, and getting final approvals. If you’re planning a large-scale addition or a whole-home renovation, that can easily stretch to a year.
The time you invest upfront is your best insurance policy against costly mistakes. Every decision finalized on paper is infinitely cheaper and less disruptive than a change order made after the walls have come down.
How Do I Find a General Contractor I Can Trust?
Your general contractor is the quarterback of your project, so this is arguably the most important hire you’ll make. Finding a great one goes far beyond a quick online search; it requires genuine due diligence.
Start by asking for recommendations from people whose judgment you trust. Your architect or designer is an excellent source, as are friends who have gone through a similar renovation. You can also look to professional organizations like the National Association of the Remodeling Industry (NARI), which maintain directories of vetted members.
Once you have a shortlist, it’s time to dig deeper:
- Verify Their Credentials: This is non-negotiable. Ask for a copy of their current license and proof of insurance—both general liability and worker’s compensation. This protects you from day one.
- Check Their References: Don’t just get a list of names; actually call them. Talk to at least three recent clients and ask specific questions about communication, how they handled problems, and if they stuck to the budget and timeline.
- Review Their Work: A picture is worth a thousand words. Look through their portfolio for projects that have a similar scope and feel to what you envision. You need to know their capabilities and aesthetic align with yours.
Finally, always get detailed, written bids from at least three contractors. This isn’t just about finding the lowest price—it’s about comparing the level of detail, professionalism, and understanding they bring to your specific project.
How Much Should I Budget for a Contingency Fund?
Let’s be clear: a contingency fund isn’t “just in case” money. It’s a non-negotiable part of your budget. Surprises are a given in any renovation, especially when you start opening up walls.
The industry standard is to set aside 15-20% of your total construction cost for your contingency fund. For example, on a $200,000 project, that means having $30,000 to $40,000 ready for the unexpected.
If you’re renovating an older home, you should absolutely lean toward that 20% mark. The odds of uncovering things like old wiring, hidden plumbing issues, or structural quirks are just much higher. This fund is your safety net for genuine problems—not for last-minute upgrades or changing your mind on tile.
Are Building Permits Really Necessary?
The short answer? Yes. For almost any project that involves changing your home’s structure, moving electrical wiring, or re-routing plumbing, you will legally need a building permit. This covers everything from moving a wall to adding a new window or reconfiguring your kitchen.
The permit process can feel like a bureaucratic headache, but it exists for your protection. It ensures the work is done safely and meets current building codes, which is critical for your family’s safety, your homeowner’s insurance, and the future resale value of your property. Unpermitted work can become a massive red flag and a deal-breaker for potential buyers down the road.
Your general contractor should manage this entire process for you. Navigating the local building department, submitting plans, and scheduling inspections are all key parts of their job.
At Haute Design, we connect discerning homeowners with the industry’s most distinguished architects, designers, and builders to bring extraordinary visions to life. Discover a curated network of professionals ready to elevate your home by visiting us at https://hauteliving.com/designnetwork.