
Before a single piece of wood is cut, the most important work happens on paper. This is where you move your idea for a wine cabinet from a dream to an actionable blueprint, saving yourself from costly mistakes down the line. It’s all about asking the right questions to dial in the scope, function, and style of your future build.
Planning Your Perfect Custom Wine Cabinet

With the global wine market projected to hit nearly USD 400.65 billion in 2025, more people are starting to take their collections—and their storage—seriously. A custom cabinet isn’t just a place to put bottles; it’s a critical tool for protecting your investment and a centerpiece for home enjoyment.
Defining Your Collection’s Needs
First things first, get a real sense of your collection. How many bottles do you have right now? And, more importantly, where do you see your collection in the next five or ten years? I always tell my clients to plan for growth. A good rule of thumb is to build for 25-50% more capacity than you currently need. It’s far better to have a little extra room than to outgrow your beautiful new cabinet in a year.
Don’t just count the bottles, either. Think about their shapes. If your collection is all standard 750ml Bordeaux bottles, your life is simple. But if you collect Champagne, Burgundy, or large-format magnums, your racking needs to be designed to accommodate those different sizes.
Selecting the Ideal Location
Where you put your cabinet is just as important as how you build it. The perfect spot is far from enemies of wine: direct sunlight, heat sources like ovens and radiators, and areas with heavy vibrations from appliances like a washing machine.
I’ve seen clients successfully place cabinets in all sorts of clever spots:
- A formal dining room alcove
- A converted pantry or under-used closet
- Tucked beautifully under a staircase
- As a full-blown feature wall in a finished basement
Basements are a popular choice for a reason—they’re naturally cool and stable, which means your cooling unit won’t have to work nearly as hard. Once you think you’ve found the right spot, double-check that you have easy access to a dedicated electrical outlet. For a deeper dive, this interior design space planning guide is a great resource.
A great wine cabinet is more than just storage; it’s a piece of furniture that reflects your passion. The best designs are those that feel like a natural extension of the room they inhabit, blending functionality with the home’s existing aesthetic.
Freestanding vs. Built-In Designs
Now for a big decision: freestanding or built-in?
A freestanding cabinet is essentially a high-end piece of furniture. It offers great flexibility—if you move, you can take it with you. From a construction standpoint, it’s often the more straightforward path.
On the other hand, a built-in cabinet delivers that seamless, architectural look that feels completely integrated with your home. It’s a more complex project, for sure, but it maximizes every inch of space and can be a serious value-add for your property. This choice really comes down to your budget, your long-term plans, and how comfortable you are with a more involved build.
Here’s a quick way to think through these initial, foundational decisions.
Core Design Decisions for Your Cabinet
This table breaks down the fundamental factors you need to consider before you start sketching designs or buying materials.
| Design Factor | Key Questions to Ask Yourself | Expert Recommendation |
|---|---|---|
| Capacity | How many bottles do I have now? How many will I have in 5 years? | Plan for 25-50% more space than your current collection to allow for growth. |
| Bottle Types | Do I collect mostly standard bottles, or a mix of magnums, splits, etc.? | Measure your largest bottles and ensure racking dimensions can accommodate them. |
| Location | Where can I find a spot away from heat, light, and vibration? | Basements are ideal, but any cool, dark, stable location with electrical access works. |
| Cabinet Style | Do I want a flexible, movable unit or a permanent, integrated feature? | Freestanding is simpler and portable; built-in offers a premium, custom look. |
Thinking through these points methodically will give you a rock-solid foundation for the entire project, ensuring the final piece is both beautiful and perfectly suited to your needs.
Choosing Materials for Longevity and Performance
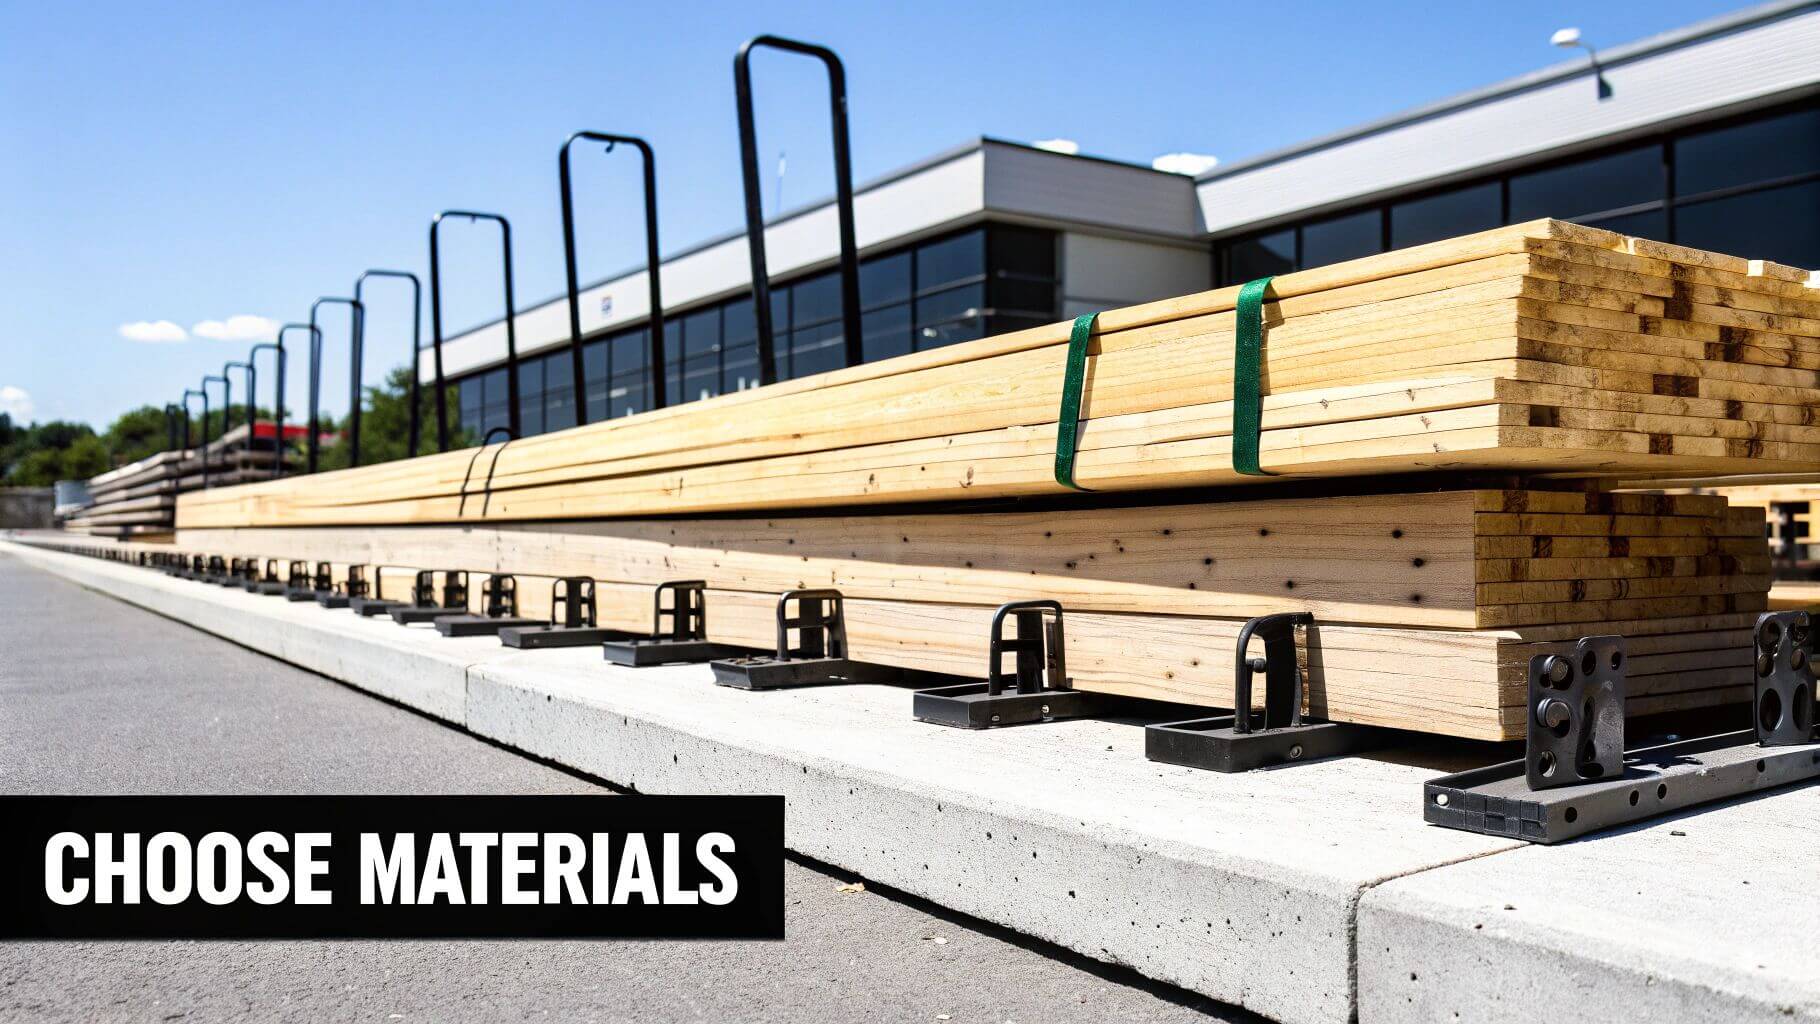
The materials you choose are the very heart of your wine cabinet. They do more than just determine the final look—they’re what will create a stable, protective environment for your collection for decades to come. Getting this part right means selecting components that work together flawlessly to resist moisture, maintain temperature, and support your bottles securely.
Selecting the Right Wood for the Exterior
The wood on the outside of your cabinet is what everyone sees, so aesthetics are obviously a big deal. But for a high-humidity environment like a wine cabinet, performance is king. You need a wood that’s known for its natural resistance to moisture and decay.
- Mahogany: This is a classic choice for a reason. It has a beautiful, rich grain and is exceptionally stable, which means it’s far less likely to warp or swell in humid conditions.
- Redwood: Think about where you see redwood used—saunas, decks, outdoor furniture. Its natural resilience to moisture and rot makes it a fantastic candidate for a wine cabinet.
- White Oak: Known for its dense grain and sheer durability, white oak offers excellent moisture resistance. Just be sure it’s white oak, as its cousin, red oak, is much more porous and not suitable for this job.
If you’re building the cabinet into a prominent spot like a kitchen or dining room, it’s often worth consulting with experienced kitchen and bath designers. They can be a huge help in matching wood grains and finishes to your existing decor for a seamless look.
The Unseen Heroes: Insulation and Vapor Barriers
Frankly, what happens inside the walls of your cabinet is even more important than the wood on the outside. You absolutely cannot skimp on high-performance insulation and a perfectly sealed vapor barrier. Without them, your cooling unit will run nonstop, and you’ll be fighting a losing battle against condensation that can ruin both the cabinet and your wine.
For a project like this, you really have two main choices. Rigid foam board is a common DIY-friendly option, but you have to be meticulous about sealing every single seam. For truly superior performance, though, closed-cell spray foam is the professional standard. It expands to fill every tiny crack and crevice, creating a single, unbroken shell that acts as both insulation and a vapor barrier in one shot.
Think of it this way: you’re essentially building a high-end cooler. Any air leak is a point of failure where moisture gets in and temperature fluctuates, completely undermining the whole purpose of the cabinet.
No matter which insulation you use, you must install a vapor barrier on the “warm” side—the exterior side—of the cabinet walls. This is typically a 6-mil plastic sheeting, carefully wrapped and sealed at all seams with specialized tape. This crucial layer prevents warm, moist air from the room from reaching the cold interior surfaces and turning into condensation.
Choosing Your Interior Wine Racking
Inside, the racking system is what cradles your prized collection. The decision here is a blend of aesthetics and pure function. This is a big deal for collectors, and the market reflects it. The global wine racks market was valued at around USD 1.5 billion in 2025 and is projected to hit USD 2.56 billion by 2035. That growth tells you how seriously people take their storage.
Here are the two most popular material choices:
| Racking Material | Key Advantages | Best For |
|---|---|---|
| Wood | Provides a classic, warm aesthetic. Can be left unfinished or sealed. All-heart redwood and premium pine are top-tier choices. | Creating that traditional, cellar-like feel. It’s also fantastic for custom layouts that need to be built on-site. |
| Metal | Delivers a modern, sleek appearance. Maximizes the visibility of your bottle labels. Highly durable and requires no finishing. | Achieving a contemporary or industrial look. Metal is the clear winner for minimalist designs where the bottles are the star. |
The Importance of the Right Door
Don’t forget the door. It’s your cabinet’s window to the world and, if you’re not careful, its biggest weakness. A standard interior door or a piece of single-pane glass will completely sabotage all your hard work on insulation and climate control.
You have to use an exterior-grade, fully insulated door. If you want a glass door, it must be double-paned (or even triple-paned) and UV-protected. This isn’t just for show; it prevents harmful UV rays from aging your wine prematurely and provides the thermal break needed to keep the cold air in. A perfect seal is also non-negotiable, so invest in quality weatherstripping and a solid latch to ensure it closes airtight, every single time.
Creating the Ideal Climate for Your Wine
You can build the most stunning cabinet in the world, but without precise climate control, it’s just an expensive piece of furniture. The whole point is to create a rock-solid environment, holding a consistent temperature around 55°F (13°C) and maintaining humidity between 50-70%. This is where the cooling unit becomes the functional heart of your entire project.
Choosing the right unit can feel overwhelming. It really just boils down to understanding the three main types and figuring out which one fits your specific cabinet design, its location in your home, and your budget. Get it wrong, and you’re in for a world of hurt—an undersized unit will run constantly, driving up energy bills before it burns out, while an oversized one will short-cycle and fail to manage humidity properly. This choice is non-negotiable for protecting your wine investment.
Understanding Your Cooling System Options
Every cooling system strikes a different balance between installation complexity, noise level, and aesthetics. It’s like picking an engine for a car; the right one depends entirely on the vehicle it’s powering and where you plan to drive it.
Let’s break down the three main contenders:
- Self-Contained (Through-the-Wall) Units: These are the most straightforward and usually the most budget-friendly. The whole unit installs right through an opening in the cabinet, venting warm air into an adjacent room or space.
- Split Systems: Here, the noisy, heat-producing condenser is separated from the quiet evaporator that lives inside your cabinet. They’re connected by a line set, which gives you more placement flexibility and keeps things whisper-quiet where it counts.
- Ducted Systems: This is the top-tier option for a truly seamless look. The entire unit can be placed up to 25 feet away, delivering cold air and pulling out warm air through insulated ductwork. This makes the system virtually invisible and silent within the room.
A self-contained unit might be perfect for a smaller, freestanding cabinet that backs up to a well-ventilated utility room. But for a high-end, built-in cabinet in a formal dining room? A split or ducted system is the only way to achieve that silent, fully integrated finish.
Calculating Your Cabinet’s Thermal Load
Before you can even think about picking a unit, you have to calculate your cabinet’s thermal load. This calculation is what tells you how much cooling power (measured in BTUs) you actually need. Whatever you do, don’t just rely on a manufacturer’s generic “cubic feet” rating—it’s almost always based on ideal, perfectly insulated conditions you won’t have.
To get a real-world estimate, you need to account for a few critical factors:
- Cabinet Volume: First, calculate the interior cubic feet (Length x Width x Height).
- Insulation R-Value: This is huge. The higher the R-value of your walls, ceiling, and door, the less cooling power you’ll need. A cabinet with R-19 walls will hold its temperature far better than one with just R-11.
- Ambient Temperature: The bigger the temperature difference between the room and your target of 55°F, the harder the unit has to work. A cabinet in a cool basement has a much lower thermal load than one in a warm, sunny living room.
- Glass Surfaces: Glass is a terrible insulator. A beautiful, large glass door will dramatically increase the thermal load, so you have to account for it.
Many cooling unit manufacturers offer online calculators to help you figure this out. Using one is a crucial step. From my experience, it’s always better to slightly oversize your unit than to undersize it. You want it to handle the hottest days of the year without breaking a sweat.
Critical Installation Details
Once you’ve selected and sized your unit, a successful installation really comes down to two things: proper ventilation and drainage.
For a self-contained unit, the room it vents into must be at least as large as the cabinet itself and have good air circulation. Venting it into a tiny, sealed closet will cause the unit to overheat and fail in no time. Split and ducted systems also need adequate airflow around their condenser, no matter where you end up placing it.
Finally, all cooling units produce condensation as they pull moisture from the air. That water has to go somewhere, which is what the drain line is for. This is usually just a flexible tube that runs from the unit to a nearby drain. You absolutely must ensure the line has a continuous downward slope to prevent water from backing up, which can cause leaks and mold. It’s a small detail, but it’s one of the most common points of failure in a DIY wine cabinet build. Give it the attention it deserves.
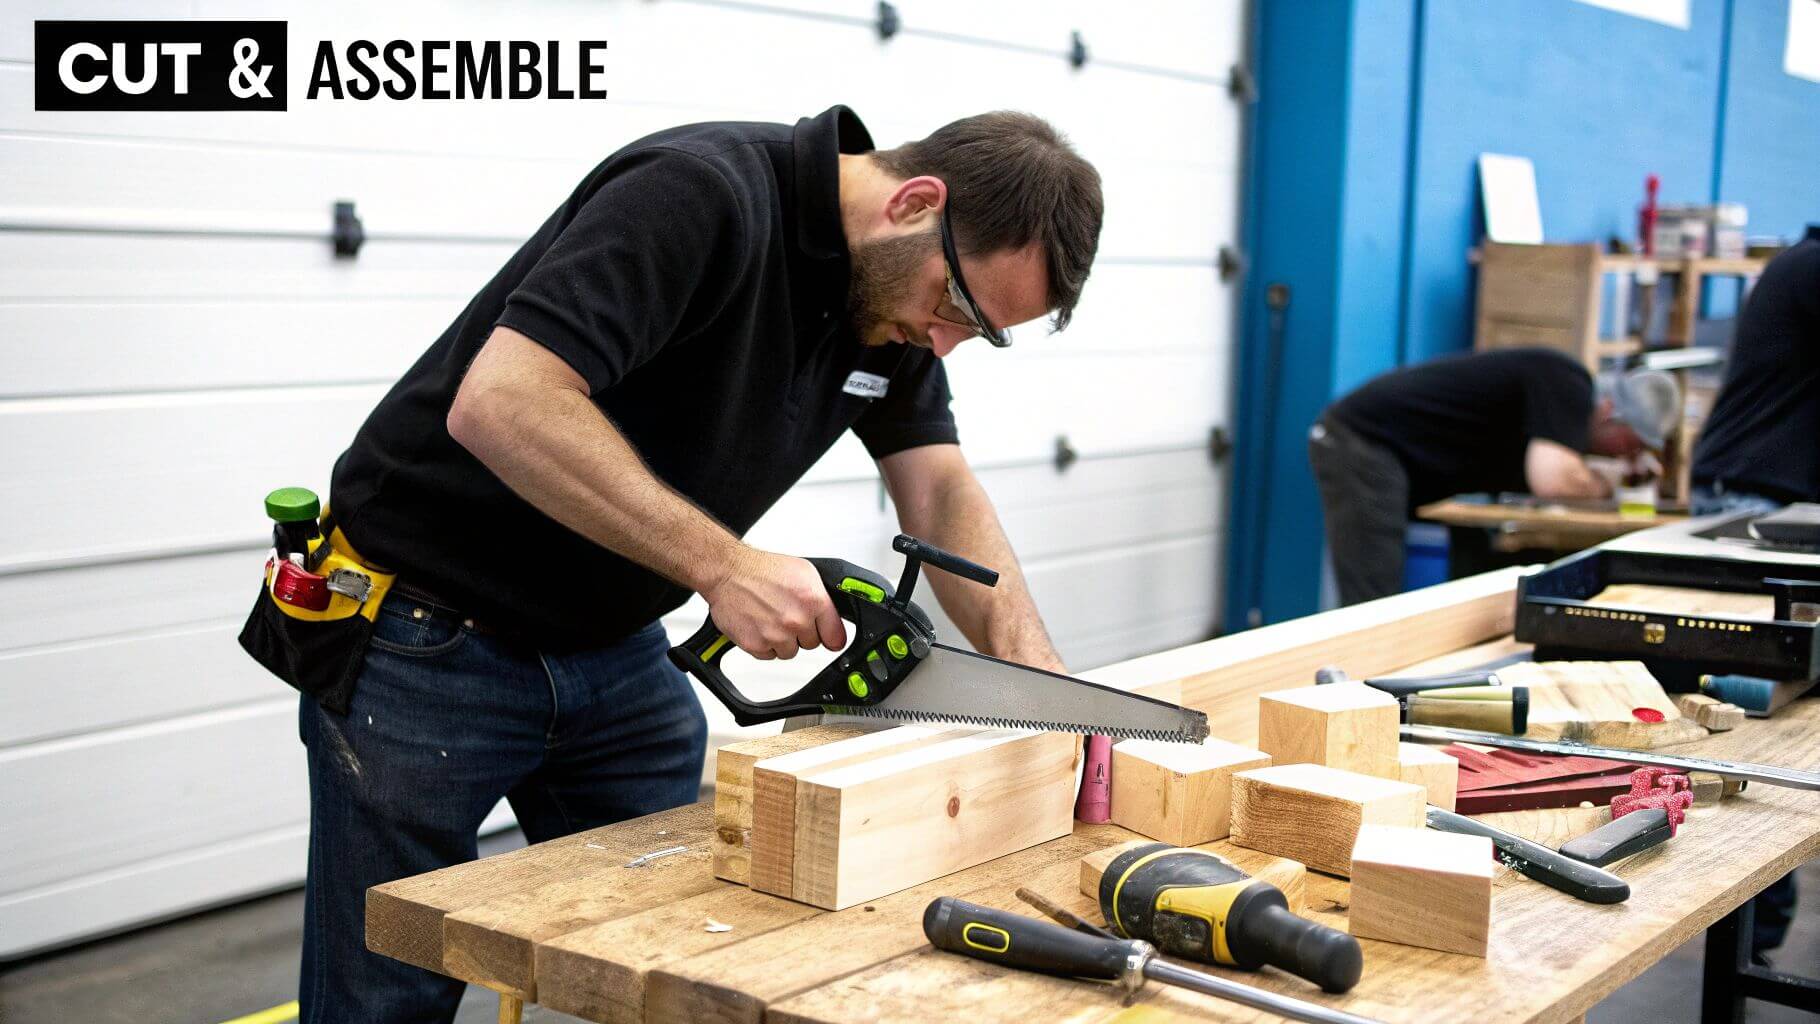
Assembling Your Wine Cabinet
With your design finalized and materials on hand, it’s time to bring your vision to life. This is the stage where meticulous craftsmanship transforms raw materials into a functional work of art. Patience and precision are your best allies here, ensuring every joint is solid, every seal is perfect, and the final cabinet is something you’ll be proud of for decades.
The whole process starts with the core structure. A square, solid frame is the bedrock of a successful build.
Constructing The Cabinet Frame
Think of this part as precision puzzle-building. You’ll want to assemble the floor, wall, and ceiling panels separately on a perfectly flat surface. I always recommend using a high-quality wood glue and screws for this—skip the nails entirely, as they just don’t offer the same structural integrity.
Your carpenter’s square is indispensable here. Before driving a single screw, check that every corner is a perfect 90-degree angle. Once the panels are ready, you can join them to create the cabinet box. It’s a good idea to have a friend help you hold things steady during this step. Take your time and keep checking that the entire structure is square and level as you go.
I’ve seen it happen too many times: a rushed frame assembly. Even a slightly out-of-square frame creates massive headaches later. The door won’t hang right, the interior racking will be a nightmare to fit, and the whole project will look off. Measure twice, cut once, and check for square constantly.
Installing Insulation And The Vapor Barrier
With a solid frame built, the next job is to create the climate-controlled envelope that will safeguard your wine collection. If you’re using rigid foam boards, they need to be cut to fit snugly between the frame studs. Even the smallest gap can compromise the cabinet’s thermal performance, so be meticulous. Seal every seam between the boards with a specialized sealant or high-quality tape.
Next up is the non-negotiable 6-mil plastic vapor barrier. This critical layer goes on the “warm” side of the insulation—meaning the exterior of the cabinet. You’ll want to wrap the entire interior, making sure to overlap any seams by at least six inches and seal them thoroughly with vapor barrier tape. This is your primary defense against condensation, which is the enemy of any wine cellar and can lead to mold and rot.
To get the job done right, you’ll need the proper equipment. I’ve put together a quick checklist of the essentials for the construction phase.
Essential Tools and Materials Checklist
| Category | Item | Recommended Specification |
|---|---|---|
| Cutting & Shaping | Circular Saw & Miter Saw | Fine-tooth blades for clean cuts in plywood and hardwoods. |
| Joining & Fastening | Drill/Driver & Screws | High-torque cordless drill. Use corrosion-resistant screws. |
| Wood Glue | Titebond II or similar high-strength, water-resistant wood glue. | |
| Measurement & Layout | Tape Measure & Level | 25-foot locking tape. A 4-foot level is ideal for checking panels. |
| Carpenter’s Square | A must-have for ensuring perfect 90-degree angles. | |
| Insulation & Sealing | Rigid Foam Insulation | Minimum 2-inch thickness for R-10 value or higher. |
| Vapor Barrier & Tape | 6-mil polyethylene sheeting. Use specific vapor barrier tape. | |
| Sealant/Caulk/Foam | Low-expansion spray foam and high-quality silicone caulk. | |
| Door Hardware | Hinges & Weatherstripping | Heavy-duty, adjustable hinges. Q-Lon or magnetic weatherstripping. |
Having these items ready before you start will make the entire process smoother and help you avoid unnecessary interruptions.
Building And Hanging An Airtight Door
The door is often the weakest link in a wine cabinet if not built correctly. It needs to be just as insulated as the walls and engineered to resist warping over time, which is a common issue with temperature and humidity differentials.
The key to a perfect seal is high-quality weatherstripping installed around the entire door jamb. When you close the door, it should compress the stripping evenly on all four sides. I recommend using robust, adjustable hinges; they let you fine-tune the fit as the cabinet settles, ensuring it stays completely airtight. A well-hung door will have a bit of resistance when you close it, ending with a soft “whoosh” of air.
Installing Racking And The Cooling Unit
Now for the rewarding part—bringing the interior to life. Fitting the racking system is where you really start to see the cabinet’s personality emerge. This infographic provides a great overview of a simple installation process.
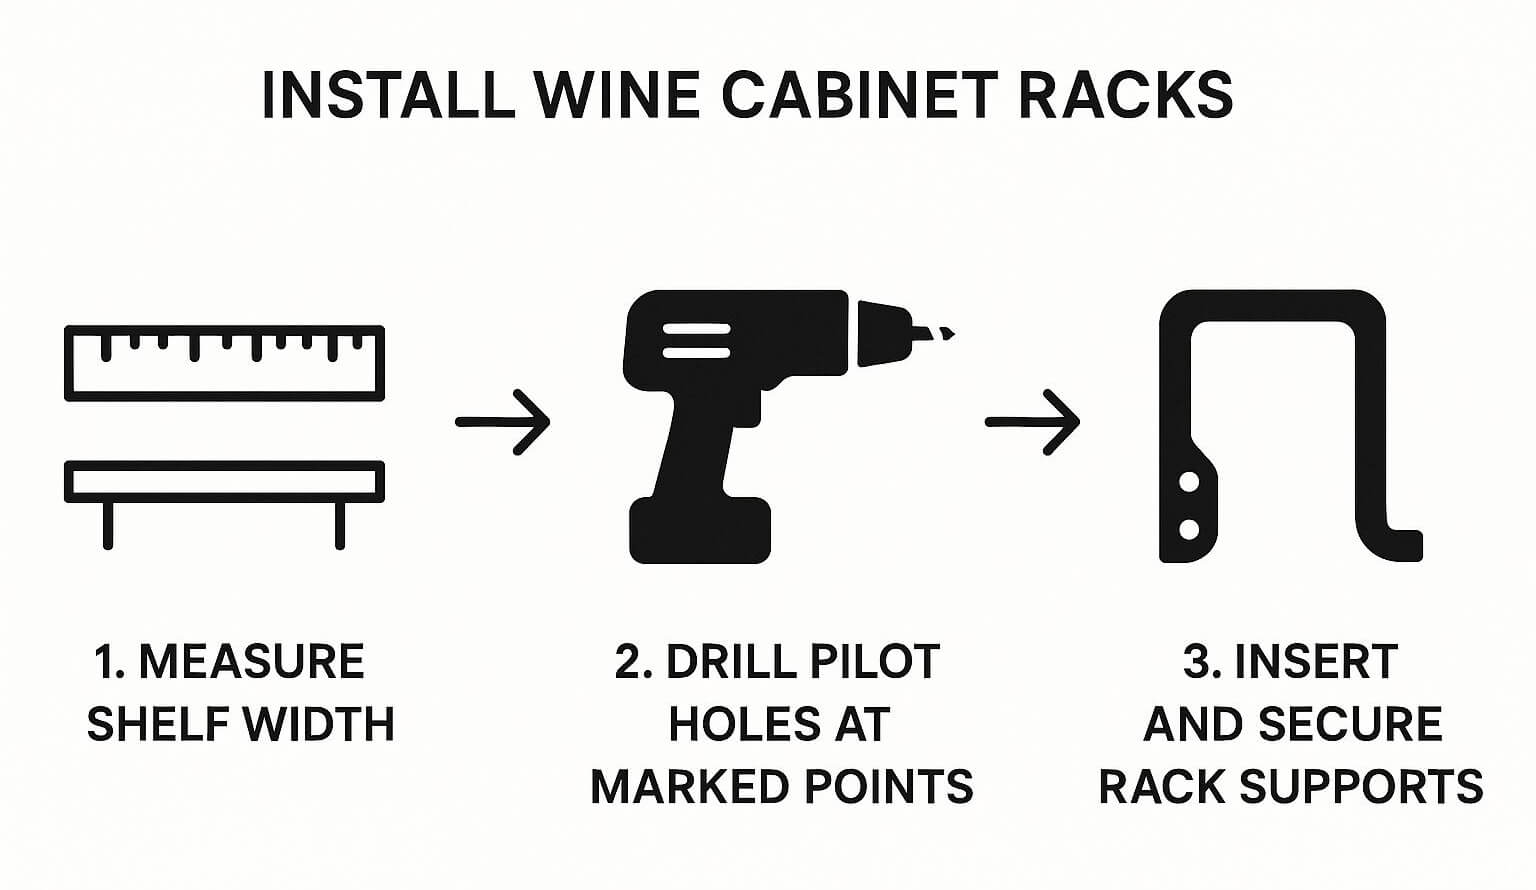
This visual breaks down the essentials for making sure your racks are level and securely supported, which is crucial for holding the considerable weight of a full wine collection.
Whether you’ve chosen classic wood or modern metal racks, follow the manufacturer’s guide closely. The process usually involves mounting horizontal rails and then attaching the racking components. Keep your level handy and check your work at every step to ensure your bottles will rest perfectly.
This is also the time to integrate your cooling unit and any planned lighting. You’ll need to cut precise openings for the unit, its ductwork, and the electrical wiring. It is absolutely essential to seal around every single one of these penetrations with spray foam or caulk. Any breach in your vapor barrier can compromise the entire system.
This level of detail is what separates a DIY project from a professional-grade installation, a distinction reflected in the high-end built-in wine cabinet market. Top manufacturers justify prices ranging from $2,900 to $5,800 based on this commitment to superior materials and flawless construction.
Applying the Finishing Touches
Now for the part where true craftsmanship really comes into play. The heavy construction is done, but these final details will transform your project from a well-made box into a piece of fine furniture. This is where we refine, polish, and perfect, adding the aesthetic touches and making the final calibrations that ensure your cabinet performs flawlessly for years.
The exterior finish you choose does more than just define the cabinet’s style; it’s a critical protective layer. This is where your vision truly materializes, whether you’re aiming for something classic and rich, sleek and modern, or warm and rustic.
Choosing the Right Exterior Finish
When you’re finishing a wine cabinet, the absolute top priority is using a product with low or zero volatile organic compounds (VOCs). I can’t stress this enough. Standard paints, stains, and varnishes can release chemical odors for weeks, sometimes months. Those fumes can easily penetrate corks and completely ruin your wine. After all this work, that’s a disaster you want to avoid.
From my experience, water-based stains and finishes are the way to go. They provide fantastic durability and come in a huge range of colors, all without the harsh, lingering smells you get from oil-based products.
- Stain: This is your best bet for showing off the beautiful natural grain of woods like oak, walnut, or mahogany. It lets the material itself be the star.
- Paint: Paint gives you a clean, contemporary look and is perfect for matching the cabinet to existing trim or furniture in the room. If you’re going this route, learning how to choose paint colors can make a world of difference in the final aesthetic.
- Varnish/Polyurethane: A clear topcoat is non-negotiable. It protects the wood from scuffs, spills, and moisture. Again, stick with a water-based, low-VOC formula.
Always apply your finish in a well-ventilated space. And be patient with the curing time. Let it cure completely before you even think about closing the door. This can often take longer than the instructions on the can suggest—I always give it at least 72 hours in a dry, temperate area just to be safe.
Selecting Hardware and Lighting
Think of the hardware as the jewelry for your cabinet. The handles, hinges, and locks you choose should feel like a natural extension of the overall design. For a modern build, I lean toward sleek stainless steel or matte black hardware. If the piece is more traditional, something like oil-rubbed bronze or antiqued brass feels right. Don’t skimp on quality here—choose heavy-duty hinges that can easily support the weight of your insulated door without sagging over time.
Lighting is what turns your wine storage into a stunning display, but you have to choose it carefully.
The only lighting you should ever put inside a wine cabinet is LED (Light Emitting Diode). Let me be clear: traditional incandescent or halogen bulbs produce far too much heat, which will literally cook the wine in the bottles closest to the light. They also emit UV rays, which are notorious for degrading wine.
I like to use low-voltage LED ribbon or puck lights to cast a warm, inviting glow. The key is to aim for indirect lighting that gently washes over the bottles, rather than shining a harsh spotlight on them. A pro tip is to connect the lights to a door-activated switch. It’s a simple touch that feels incredibly high-end, turning the lights on when you open the door and off when you close it, so you never have to worry about leaving them on by mistake.
Calibrating Your New Climate
With the cabinet fully assembled and finished, it’s time for the final, most critical step: commissioning the cooling unit and getting the environment just right. Resist the urge to load it up with your precious bottles right away.
First, power up your cooling unit and set it to your target temperature—for most collections, that’s right around 55°F (13°C).
Next, place a reliable digital hygrometer inside to track both temperature and humidity. Let the unit run undisturbed for a solid three days, keeping an eye on the readings. It’s completely normal for the temperature and humidity to fluctuate a bit at first as the unit works to cool the cabinet’s interior mass.
You’ll likely need to make small tweaks to the thermostat until it consistently holds your target temperature. Once it’s stable, do one last check on that door seal. The old-school paper test works perfectly: close the door on a piece of paper. If you can pull it out with little to no resistance, the seal isn’t tight enough and needs adjustment.
After you’ve confirmed a stable climate for several days, your handcrafted wine cabinet is finally ready. You can now stock it with your collection, knowing you’ve built a beautiful, perfectly controlled environment where your wine can mature gracefully.
Common Questions About Building a Wine Cabinet
Taking on a project like this for the first time will naturally bring up a lot of questions. Getting the details right is what separates a functional work of art from a very expensive mistake. Let’s walk through some of the most common things people ask when figuring out how to build a wine cabinet.
The first thing on everyone’s mind is usually the cost. A DIY wine cabinet can range from a few thousand dollars on the low end to well over $10,000 for something truly ambitious. The final number really comes down to your choice of wood, the cabinet’s overall size, and, most importantly, the cooling unit you install.
Do I Need a Building Permit?
This really depends on the scope of your project and, of course, your local building codes. In most cases, a simple, freestanding cabinet that just plugs into an existing wall outlet won’t require a permit.
However, if you’re planning significant structural work—like knocking down a wall, running new electrical circuits, or installing complex plumbing for a ducted cooling system—you almost certainly will. It’s always best to check with your local building office before you start.
My advice is simple: if you are touching existing wiring, plumbing, or structural walls, make the call. It’s a five-minute check that can save you from major headaches and ensure your project is fully compliant with safety codes.
How Long Does a DIY Build Take?
The timeline for building your own wine cabinet can vary quite a bit. If you’re a seasoned woodworker with a solid plan, you could probably knock out a smaller freestanding cabinet in about 40-60 hours. That’s a few solid weekends of work.
For a larger, built-in project, the timeline can easily stretch to 100 hours or more. This is especially true when you factor in all the finishing work, curing times, and the final climate calibration. A detailed plan is your best tool for keeping the project moving and avoiding those frustrating delays.
Managing My Collection During the Build
So, what do you do with your wine while its new home is under construction? It’s a crucial question because the last thing you want is to expose your prized bottles to poor conditions for weeks on end.
- Small Collections: If you just have a dozen or so bottles, a small wine fridge is a perfectly fine temporary home.
- Medium to Large Collections: For anything more substantial, I’d strongly suggest renting a small unit at a professional, climate-controlled wine storage facility. The peace of mind is well worth the modest monthly fee.
This simple step ensures your investment is protected while you focus on the build. It also means you won’t be tempted to rush the job and compromise the quality of your finished cabinet.
Building a custom piece of this caliber is a significant undertaking. For those seeking to connect with top-tier professionals for luxury home projects, Haute Design is the premier network for distinguished architects, builders, and interior designers. Explore our curated community at https://hauteliving.com/designnetwork.