

Any successful luxury renovation is built on a solid foundation long before the first hammer swings. This is where the real work begins—translating your vision into a practical, actionable plan that will steer every single decision you make from here on out. Nail this, and you’re setting the project up to stay on schedule and on budget.
Laying the Groundwork for Your Renovation

Orchestrating a high-end home renovation is a lot like conducting a symphony. You have dozens of moving parts—designers, contractors, materials, timelines—that all need to come together in perfect harmony. Success isn’t about luck; it’s about meticulous, thoughtful planning right from the start. Before you even think about interviewing a contractor or browsing tile samples, your first job is to get crystal clear on what you want to achieve and why.
The drive to improve and personalize our homes is a powerful one. Projections show Americans are on track to spend a staggering $513 billion on home renovations in 2025. A big part of this is driven by necessity; with nearly half of all homes in the U.S. built before 1980, updates aren’t just a luxury, they’re essential.
Defining Your Renovation Vision
First things first, you need to conduct a serious needs assessment. This isn’t just a simple wish list. It’s about diving deep into your family’s lifestyle, your daily flow, and what you’ll need from your home in the years to come.
Start by drawing a clear line between your “must-haves” and your “nice-to-haves.” For instance, if you have a growing family, an open-concept kitchen that connects to the main living area might be a non-negotiable for functionality. A high-end, built-in espresso machine? That’s probably a “nice-to-have” you can add if the budget has room to breathe. Knowing the difference early on makes those tough trade-off decisions much easier down the road.
A well-defined scope is your best defense against the dreaded “scope creep,” where small, unplanned additions slowly blow up your timeline and your budget. By locking in your priorities now, you create an anchor for every decision that follows.
Translating Ideas into a Concrete Scope
With your vision clarified, it’s time to create a detailed scope of work. This document is the absolute cornerstone of effective project management for home renovation. It needs to be incredibly specific, leaving zero room for interpretation.
Don’t just write “update the master bathroom.” A professional scope looks more like this:
- Fixtures: Replace the existing single vanity with a 72-inch double vanity (Model XYZ). Install a freestanding soaking tub (Model ABC) and replace all faucets and showerheads with brushed brass fixtures.
- Tile: Install large-format porcelain tile on the floor and floor-to-ceiling marble subway tile in the walk-in shower.
- Lighting: Add two sconces flanking the new vanity mirrors and replace the central overhead fixture with a modern LED chandelier.
This kind of detail is what allows you to get accurate, apples-to-apples quotes from contractors. It ensures everyone, from the plumber to the painter, is working from the same playbook. For a deeper dive into this process, this guide on how to plan a home renovation for success offers some fantastic insights.
Navigating Permits and Regulations
Finally, don’t overlook the red tape. The initial groundwork must include a thorough check of local building codes and permit requirements. Any project involving structural changes, electrical, or plumbing work will almost certainly require permits from your local municipality.
Skipping this step can lead to hefty fines, stop-work orders, and the nightmare of having to tear out finished work. Researching these regulations early allows you to build the time and cost for permits directly into your project plan, preventing frustrating and entirely avoidable delays. It’s a professional approach that sets the right tone for the entire renovation.
To help you get started, here’s a quick checklist of the essential first steps.
Core Renovation Planning Checklist
This table summarizes the foundational actions you need to take to ensure your project gets off to a strong, organized start.
| Planning Phase | Key Action | Why It Matters |
|---|---|---|
| Vision & Goals | Define “must-haves” vs. “nice-to-haves.” | Prevents scope creep and helps with budget trade-offs. |
| Scope of Work | Create a highly detailed list of all tasks, materials, and finishes. | Ensures accurate quotes and that everyone shares the same vision. |
| Permits & Codes | Research local building permit requirements for your specific project. | Avoids legal trouble, fines, and costly delays down the line. |
Getting these core elements right isn’t just about ticking boxes; it’s about creating the strategic blueprint that will guide your project to a successful and stunning conclusion.
Crafting a Realistic Renovation Budget

With a clear vision in hand, we can turn to the financial foundation of your project. A solid budget is far more than a ballpark guess—it’s your detailed financial roadmap. This is where we account for every material, every hour of skilled labor, and, most importantly, the surprises that inevitably pop up. Honing this financial plan is a critical discipline in project management for home renovation.
The first step is to move past vague estimates by sourcing multiple, detailed quotes from trusted contractors. Never, ever settle for a single bid. I always advise my clients to get at least three itemized proposals for the full scope of work. This lets you compare not just the bottom-line price, but also how each contractor breaks down the costs for demolition, framing, plumbing, and those final finishes.
This level of detail is more critical than ever, as both project costs and homeowner expectations are on the rise. Recent data shows the median spend for small kitchen remodels shot up 9% to $35,000, while even small primary bathroom projects saw a 13% increase to $17,000 in 2024. For a high-end, large-scale kitchen renovation, it’s not uncommon for budgets to start around $55,000. You can dig into more current home remodeling facts and figures to get a better feel for the market.
The All-Important Contingency Fund
One of the most common—and costly—mistakes I see is a budget that allocates every last dollar to planned expenses. That leaves zero room for error. A professional approach always includes building a contingency fund of 15% to 20% of your total project cost.
This isn’t just “extra” money for a last-minute upgrade. Think of it as a dedicated safety net for the unknowns lurking behind the drywall—like discovering the house has ancient knob-and-tube wiring that needs a complete overhaul, or finding hidden water damage once demolition starts. These are the budget-killers a contingency fund is designed to absorb without derailing your entire project.
For older homes, always lean toward the 20% mark. The chances of uncovering structural or systemic issues are significantly higher, and being financially prepared is your best defense against project-stopping stress.
Tracking Every Dollar to Make Smart Decisions
Once your quotes are in and the contingency is set aside, meticulous tracking becomes your best friend. You don’t need sophisticated accounting software; a simple shared spreadsheet is an incredibly powerful tool.
I recommend setting up columns for:
- Item/Task: A specific description (e.g., “Kitchen Cabinetry,” “Plumbing Labor”).
- Budgeted Cost: The amount you allocated from your approved quote.
- Actual Cost: The final number from the invoice.
- Difference: The variance between the two.
This live tracking gives you a constant, clear view of your financial health. If you decide to splurge on those stunning quartz countertops, you’ll immediately see that you need to find savings elsewhere—perhaps by choosing a more cost-effective backsplash tile to balance things out.
Understanding Your Financing Options
How you’ll pay for the renovation is just as important as how you budget for it. There are several paths you can take, and each comes with its own set of pros and cons.
Common Financing Avenues:
| Financing Method | Pros | Cons |
|---|---|---|
| Cash Reserves | No debt, no interest payments, complete control. | Drains savings, may limit project scope. |
| Home Equity Loan | Fixed interest rate, predictable monthly payments. | Adds a second mortgage, lengthy approval process. |
| HELOC | Flexible access to funds, only pay interest on what you use. | Variable interest rates, potential for overspending. |
The right choice really depends on your personal financial situation, your comfort with risk, and the overall scale of your project. I often suggest clients have a chat with a financial advisor to get clarity and make a decision that aligns with their long-term goals. This thoughtful financial planning is what ensures your beautiful renovation is a source of joy, not a financial burden.
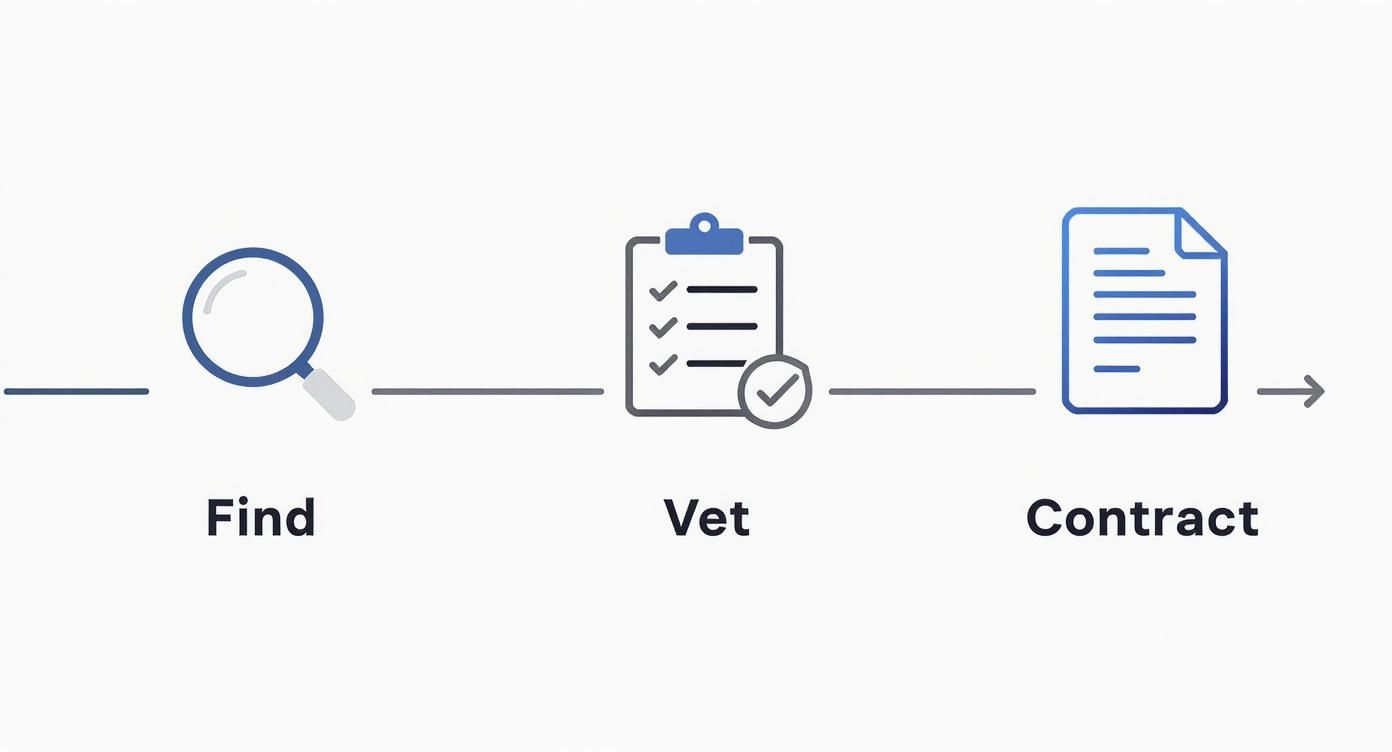
Assembling Your Renovation Dream Team
Let’s be blunt: the success of your renovation rests almost entirely on the shoulders of the people you hire. The craftsmanship, the day-to-day process, and the final look all come down to your team. This is the heart of project management for home renovation. Just Googling “contractor near me” and hoping for the best is a surefire way to end up with a mess. Building a true dream team takes a much smarter approach.
First, look beyond the usual search results. Check out local chapters of respected professional organizations like the National Association of the Remodeling Industry (NARI) or the National Kitchen & Bath Association (NKBA). These groups maintain directories of members who are vetted, credentialed, and bound by a strict code of ethics. Even better? A word-of-mouth referral from a friend whose home you admire. Nothing beats seeing the quality of a team’s work with your own eyes.
Vetting Your Candidates
Once you’ve got a shortlist of three to five potential partners—your architect, designer, and general contractor—it’s time to dig in. This isn’t just a casual chat; it’s a series of interviews where you’re the one in charge. You need to get a feel for their process, their communication style, and their real-world expertise.
Don’t go in cold. Arm yourself with specific questions that get to the heart of how they work:
- Past Projects: “Can we walk through a portfolio of at least three projects that have a similar scope and style to what I’m planning?”
- Team Structure: “Who will be my dedicated project manager, and how often can I expect to see them on-site?”
- Subcontractors: “Do you have a consistent crew of subcontractors you trust, or do you farm out jobs to the lowest bidder?”
Always ask for at least three recent references. And here’s the most important part: actually call them. Ask past clients how the team handled communication, if they stuck to the budget, and—most revealingly—what happened when something went wrong. This one step can save you from a world of frustration later.
A word of caution: never, ever hire based on the lowest bid. A price that seems too good to be true almost always is. It’s a massive red flag that can signal cheap materials, unskilled labor, or a desperate contractor who will inevitably cut corners.
Verifying Credentials and Insurance
Before a contract is even on the table, you must verify that every single professional is properly licensed and insured. It’s non-negotiable. Ask for a copy of their state contractor’s license and take a moment to check its status with your local licensing board online.
Insurance is just as critical. Your contractor absolutely must carry liability insurance to cover any damage to your property and workers’ compensation insurance to cover injuries to their crew. If they don’t, you could be held financially responsible for any accidents that happen on your property. Requesting a certificate of insurance isn’t awkward; it’s standard operating procedure for any true professional.
Crafting an Ironclad Contract
The contract is the single most important document you will sign. Think of it as the legal blueprint for your entire project—it protects your investment and makes sure everyone is on the same page. A handshake deal just won’t cut it.
A thorough, professional contract should spell out everything in detail:
- Full Scope of Work: A granular, itemized list of every single task, referencing the architectural plans and specific material selections.
- Payment Schedule: A clear breakdown of payments tied to project milestones (e.g., foundation complete, framing inspection passed), not arbitrary dates on a calendar.
- Project Timeline: An estimated start and completion date, including clauses that address how potential delays will be handled.
- Change Order Process: A formal system for how any changes to the original plan will be priced, approved, and documented in writing.
- Dispute Resolution: The agreed-upon steps for what happens if you disagree, like mediation or arbitration.
Putting together the right team is an intensive process, but it’s the most critical investment you’ll make in your renovation. For specialized roles, you can learn more about how to hire an interior designer to ensure you find someone whose vision aligns perfectly with yours. This foundational work sets the stage for a renovation that isn’t just beautiful, but is managed professionally from day one.
Creating Your Master Project Timeline
If your budget is the financial roadmap, then your project timeline is the GPS. Without a detailed, realistic schedule, even the most meticulous plans can spiral into chaos, leading to costly delays and a whole lot of frustration. Building out this master timeline is one of the most critical parts of project management for home renovation. It’s how you turn a dizzying list of tasks into an orderly, predictable series of events.
The secret to a reliable schedule is realizing that a renovation isn’t just one big job. It’s a cascade of smaller, interconnected phases. Each step depends on the one before it being completed. You simply can’t hang drywall until the electrical and plumbing rough-ins hidden behind it are inspected and signed off. This logical sequencing is the very backbone of your project.
Mapping Dependencies and Milestones
To get started, sit down with your general contractor and break down the entire renovation into major phases. This isn’t just a simple to-do list; it’s a strategic workflow. The best approach is to map everything out from demolition to the final punch list, flagging every critical milestone along the way.
For a high-end kitchen remodel, that sequence often looks something like this:
- Phase 1: Demolition & Prep: Tearing out old cabinets, flooring, and appliances.
- Phase 2: Structural & Systems: Making any framing changes and handling the rough-ins for electrical, plumbing, and HVAC.
- Phase 3: Closing Up: Installing insulation and drywall, followed by taping, mudding, and initial priming/painting.
- Phase 4: Core Installations: Laying down the new flooring and installing the cabinetry.
- Phase 5: Countertops & Backsplash: Templating, fabricating, and installing countertops, then moving on to the backsplash.
- Phase 6: Final Connections: Installing appliances and hooking up the final plumbing (sinks, faucets) and electrical (outlets, lighting).
- Phase 7: Finishing Touches: Applying the final coats of paint, installing trim, and adding all the hardware.
Laying the project out this way helps you clearly see the dependencies and spot potential bottlenecks before they happen. For instance, you’ll realize that a delay in your custom cabinet delivery will bring the entire job to a screeching halt—you can’t template for countertops until those base cabinets are perfectly in place. This foresight lets you plan accordingly and manage everyone’s expectations.
This process highlights how a solid team is built on a methodical approach, not a rushed decision—and that team is essential before you can even begin building a realistic timeline.
Using Simple Tools for Complex Schedules
You don’t need complex, expensive software to manage your timeline. For most residential projects, simple, accessible tools are more than enough—and far more practical.
A shared digital calendar, like Google Calendar, is an excellent starting point. Your contractor can populate it with key dates for trade arrivals, inspections, and material deliveries. This gives everyone a central, real-time view of the schedule that you can check from anywhere.
For a more visual way to track how tasks depend on each other, a Gantt chart is an invaluable tool. It might sound technical, but a simple version can be created right in a spreadsheet. The chart uses horizontal bars to show how long each task will take, making it incredibly easy to see how one delay will affect everything that comes after it.
Pro Tip: When you’re building the timeline, always add a buffer. From my experience, I recommend padding the schedule by at least 15%. This contingency accounts for the inevitable—weather delays, unexpected inspection issues, or a subcontractor getting held up on another job. A little buffer keeps one small hiccup from causing a major ripple effect.
A Real-World Kitchen Remodel Scenario
Let’s put this into practice with our kitchen remodel example. Say your contractor estimates a 10-week timeline. Looking at your Gantt chart, you see that the custom cabinetry has an 8-week lead time from the day you place the order.
This immediately tells you that the cabinet order must be finalized and placed no later than Week 2 of the project if you want it to arrive for installation around Week 10. If you waver on the cabinet style and don’t place the order until Week 4, you’ve just pushed your completion date back by two full weeks before a single hammer has been swung on the installation.
That’s the real power of a master timeline. It shifts your role from reacting to problems to proactively preventing them. You’re empowered to make timely decisions because you understand the consequences, helping you keep the project’s momentum moving forward from start to finish.
Managing On-Site Operations and Quality Control

This is where the rubber meets the road. All that meticulous planning—the budgeting, team selection, and timeline creation—now comes to life on-site. Effective on-site management isn’t just about watching the work happen; it’s the hands-on part of project management for home renovation where you ensure the vision becomes reality, and to the highest standard.
Your presence and oversight are more valuable than you might think. While you’ve hired a team of professionals, no one is as invested in the final outcome as you are. This stage requires a delicate balance: trusting your contractor’s expertise while actively verifying that the progress and quality meet your expectations.
The Power of Regular Site Visits
Scheduled, purposeful site visits are non-negotiable. I recommend setting up at least one dedicated walkthrough with your general contractor each week. Try to schedule it for the same day and time to create a consistent rhythm of communication and accountability.
Think of these meetings as your primary tool for staying aligned and spotting potential issues before they escalate. This isn’t just a casual stroll through a construction zone. You’re there to compare the work in progress against the project plan. Is the plumbing rough-in completed on schedule? Does the tile installation match the exact pattern you signed off on? These check-ins keep everyone on the same page.
This proactive approach is especially critical right now. Recent industry data shows a significant rebound in residential remodeling, with a notable 20-point increase in project inquiries in late 2025. With contractors busier than ever, your active participation ensures your project gets the focused attention it deserves.
What to Look for During Key Phases
Different stages of a renovation demand a different kind of scrutiny. Knowing what to inspect at each milestone is the secret to effective quality control.
During Demolition and Framing:
- Property Protection: Is the rest of your home properly sealed off from dust and debris? Check that non-renovated floors, furniture, and fixtures are thoroughly protected.
- Structural Integrity: Look closely at the new framing. Does it appear straight, solid, and perfectly aligned with the architectural plans?
After Electrical and Plumbing Rough-Ins (Before Drywall):
- Outlet and Fixture Placement: This is your last easy chance to make changes. Verify that every outlet, switch, and lighting box is exactly where you specified.
- Plumbing Lines: Are the water supply lines and drains located correctly for your vanity, shower, and toilet? It’s much harder to fix after the walls are closed.
A crucial takeaway: Document absolutely everything. I tell all my clients to take photos and videos during every site visit, especially before the walls are closed up. This visual record of what’s behind the drywall can be invaluable for future maintenance or troubleshooting.
Formally Managing Change Orders
Scope creep is the number one enemy of your budget and timeline. Its primary cause? The informal change order. A casual, “Hey, while you’re at it, could you also…” can have massive cost implications down the line. To maintain control, you must insist on a formal change order process for any deviation from the original plan.
A proper change order isn’t a verbal agreement; it’s a written document that clearly outlines:
- A detailed description of the requested change.
- The exact cost for the additional materials and labor.
- The impact on the project timeline, showing any necessary extension.
Both you and your contractor must sign this document before any new work begins. This simple process eliminates financial surprises and creates a clear, agreed-upon record of every change. The discipline this requires starts with your initial contract, which is why a professional interior design contract template guide is such an essential tool for any major project.
By combining regular on-site check-ins with rigorous documentation and a formal change order system, you transform from a passive observer into an active, engaged manager of your own renovation. This is the ultimate form of quality control, ensuring the final result is a true reflection of your vision.
Answering Your Biggest Home Renovation Questions
Even the most meticulously planned renovation will have its share of questions and unexpected turns. That’s just the nature of the beast. An experienced project manager knows this and plans for it. Let’s walk through some of the most common questions homeowners have, so you can navigate the process with the confidence of a pro.
How Much Should I Really Have in a Contingency Fund?
A contingency fund is the one thing you hope you never need, but you’ll be incredibly glad you have it. Don’t make the common mistake of skimping here.
The rule of thumb in the industry is to set aside 15% to 20% of your total project cost. This isn’t just an arbitrary number; it’s a realistic buffer for the surprises that almost always surface when you start opening up walls.
If you’re working on an older home, I always advise clients to lean toward the 20% mark. You just have a much higher chance of finding things like old knob-and-tube wiring, hidden plumbing issues, or structural quirks that need to be brought up to code. Treat this fund like a locked box, meant only for true, unforeseen issues—not for deciding you want more expensive tiles halfway through the project.
What’s the Best Way to Track All the Renovation Expenses?
Forget complicated accounting software. The most effective way I’ve seen this done combines a simple digital tool with consistent communication. A shared spreadsheet, like Google Sheets, is more than powerful enough to give you and your team total financial clarity.
Set up a sheet where you can log every single cost. I recommend creating columns for:
- Item/Task: Get specific. Not just “bathroom,” but “Master Bathroom Floor Tile.”
- Budgeted Amount: The number from your contractor’s approved quote.
- Actual Cost: What the final invoice says.
- Variance: The +/- difference between the two.
The key is to update this spreadsheet in real-time as invoices come in and payments go out. This simple habit gives you a live look at where every dollar is going. Combine this with weekly on-site meetings with your contractor to review the numbers and talk about what expenses are coming up next.
A live expense tracker isn’t just for accounting—it’s your best decision-making tool. It shows you where you can make smart trade-offs, like splurging on that dream countertop because you found a way to save on lighting, all without blowing the budget.
How Do I Deal with Disagreements with My Contractor?
Disagreements can feel tense, but the best approach is to be calm, quick, and contractual. Your signed agreement is your single source of truth. It spells out the scope of work, materials, costs, and payment schedule. When a dispute arises, always go back to the contract first.
For small misunderstandings, a direct, professional conversation is usually all it takes. But if you’re dealing with a bigger issue, like the quality of work or something you feel was missed, you need to bring evidence. Document everything with photos and dated notes from your site visits.
A great habit to get into is following up any important conversation with a quick email summarizing what you both agreed to. This creates a paper trail that can be invaluable later. If you still can’t find a resolution, your contract should have a clause that outlines the next steps, like mediation, to help you move forward.
When Is It Okay to Make the Final Payment?
This is a big one: never release that final check until the project is 100% finished and you are completely happy with the result. The last phase of the project is all about the “punch list.”
A punch list is simply a detailed list of all the minor fixes and finishing touches required to call the job done. You should walk through the entire space with your general contractor and create this list together. Think of things like paint touch-ups, a cabinet door that doesn’t hang quite right, or a missing piece of trim.
That final payment, which is usually about 10% of the total contract, acts as your leverage. It should only be handed over after:
- Every single item on your punch list has been completed to your satisfaction.
- You have the certificates from all passed final inspections from your local building department.
- You’ve received lien waivers from the contractor and their key subcontractors, which protect you from any future payment claims.
Holding onto that final payment is what good project management for home renovation is all about. It ensures the job is finished with the quality and attention to detail you signed up for.
Finding the right professionals who can deliver on your vision is the most critical part of any luxury renovation. Haute Design connects you with a curated network of the nation’s top interior designers, architects, and builders who specialize in creating extraordinary living spaces. Explore our network to find the perfect partner for your project.