
Interior design space planning is really where the magic begins. It’s the process of figuring out the absolute best way to use a space for the people living in it. This means carefully arranging furniture, carving out distinct functional zones, and making sure you can walk around easily. It’s the essential blueprint that makes a room both beautiful and livable.
The Foundation of a Well-Designed Room
Before you even think about paint colors or start browsing for that perfect sofa, you have to get the space plan right. This goes way beyond just decorating; it’s about digging into the core functionality of a room. Think of it as choreographing the room’s flow and defining its purpose first. This foundational step ensures every single piece has a job to do and contributes to the overall look and feel.
To do this effectively, you need to put on a designer’s hat. Look at the room’s existing architecture—the windows, doors, and any awkward corners. Define what you truly need the space to do, and consider the daily habits of everyone who uses it. It’s all about asking the right questions before you start making decisions.
The Core Principles in Action
At its heart, space planning comes down to a few key ideas that dictate how a room feels and functions. Getting these right is what elevates a layout from simply “okay” to professionally designed.
- Scale and Proportion: This is all about how furniture pieces relate to one another and to the size of the room itself. Ever seen a massive, bulky sectional crammed into a tiny living room? It feels overwhelming. On the flip side, tiny furniture can get lost in a cavernous, open-plan space.
- Balance: Creating visual equilibrium is crucial. You can achieve this with symmetrical design, where things are mirrored on either side of a central point. Or you can go for an asymmetrical layout, which feels more dynamic, balancing different-sized objects that have equal visual weight.
- Rhythm and Flow: This is about creating clear pathways for movement, what designers call circulation paths. A good layout guides you through the room naturally, without you having to dodge tables or squeeze past chairs.
The real goal of great space planning is to create a layout so intuitive that you don’t even notice it. The room just works. It feels comfortable, logical, and effortless to be in.
Why You Can’t Afford to Skip This Step
Jumping straight into buying furniture without a solid plan is a recipe for common design disasters. You end up with sofas that don’t fit, awkward dead zones, and a room that just feels “off.” There’s a reason the global interior design market was valued at around USD 138.63 billion and continues to grow—people are increasingly recognizing the value of a thoughtfully designed home. You can learn more about the growth of the interior design industry at Renub Research.
Taking the time for strategic planning eliminates the guesswork. It saves you time, money, and a whole lot of frustration, setting you up for a design that you’ll love for years to come.
Getting the Lay of the Land: Your Blueprint for Success
Every great room design starts with a simple, unglamorous-yet-essential step: measuring. Before you even think about paint colors or furniture styles, you need a precise understanding of the space you’re working with. This isn’t about just eyeballing it; it’s about creating a foundational map that will guide every single decision you make.
Grab a good old-fashioned tape measure—or a digital laser measure if you want to speed things up—and get to work. Your goal is to create a basic, to-scale floor plan. Don’t worry, you don’t need fancy software. A quick sketch on graph paper works perfectly, as long as you keep the proportions accurate. Start with the main walls, from corner to corner, and then measure the ceiling height.
Don’t Forget the Details: Mapping the “Unmovables”
With the room’s basic outline down on paper, it’s time to zero in on the fixed elements. These are the non-negotiables—the features that aren’t going anywhere and that you absolutely have to design around.
- Doors & Windows: Measure their exact location, their width and height, and how far they sit from the corners and the floor. Critically, for doors, note which way they swing. A door that swings into a room can instantly kill a layout idea if you don’t account for its arc.
- Outlets, Switches & Vents: Pinpoint the location of every single power outlet, light switch, data port, and HVAC vent. I can’t tell you how many times I’ve seen a beautiful plan fall apart because the only usable outlet for a lamp ends up hidden behind a massive bookcase.
- Architectural Quirks: Make sure to map any fireplaces, built-in shelves, awkward support columns, or soffits that lower the ceiling height in certain spots.
Leaving out even one of these details is a recipe for frustration. It’s the classic mistake of buying the perfect media console only to find it completely covers the main cable hookup. A little precision now saves a massive headache later.
Think of your detailed floor plan as your strategic guide. It’s what turns your creative vision into a practical, buildable reality, preventing those costly “oops” moments—like when the sofa you waited eight weeks for arrives and completely blocks the main walkway.
From Measurements to Mission: Defining the Room’s Purpose
Once you have the physical space mapped out, the next step is to map out how you’ll actually live in it. A room’s layout has to serve the people using it, day in and day out. Before you start dragging furniture around (even virtually), ask yourself a few honest questions.
First, who is this space for? Is it for a couple who loves hosting big dinner parties? A family with toddlers who need open floor space to play? Or is it a quiet sanctuary for one person and their pets? The “who” will fundamentally shape your layout choices.
Next, get really specific about the “what.” Don’t just say the room is for “relaxing.” What does relaxing actually look like for you? Is it curling up with a book in a quiet corner? Is it hosting a weekly movie night with a big group of friends? Or is it all about conversation? Each of these activities demands a different setup. This practical assessment is what connects the room’s dimensions to its real-world purpose, ensuring the final design isn’t just beautiful, but truly livable.
Creating Functional Zones and Natural Flow
Once you have an accurate floor plan, the real design work begins. It’s time to move beyond the raw dimensions and start thinking about how you’ll actually live in the space. This is where we start to divide a single room into distinct functional zones, each with its own purpose, all without putting up a single wall.
Think about your own living room for a second. Is it just for one activity? Probably not. You can use strategic furniture placement to carve out a comfortable area for conversation, a separate media zone for watching movies, and maybe a quiet reading nook tucked into a corner. This intentional approach brings a sense of order to the room, making it feel both larger and more useful.
This is a great visual example of how an open-concept space can be divided using furniture and thoughtful layout to create flow.
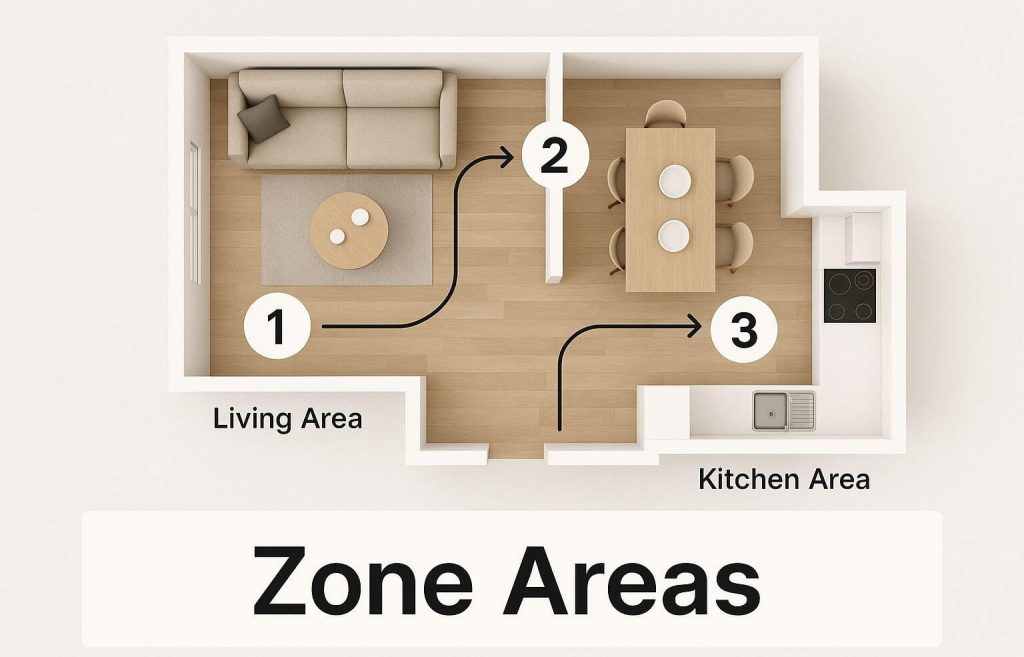
As you can see, zoning is all about clever grouping and visual cues, not physical barriers.
Defining Zones Without Walls
Creating these “invisible rooms” is one of the most effective tools in a designer’s arsenal, especially when working with open-plan layouts. You’re basically assigning a job to each part of the room.
For example, a large area rug is fantastic for anchoring a seating group, instantly telling everyone, “This is the main social hub.” A console table positioned behind a sofa can create a subtle but effective separation between a living area and a dining space. Even something as simple as an armchair paired with a floor lamp can create an intimate reading corner that feels completely distinct from the rest of the room.
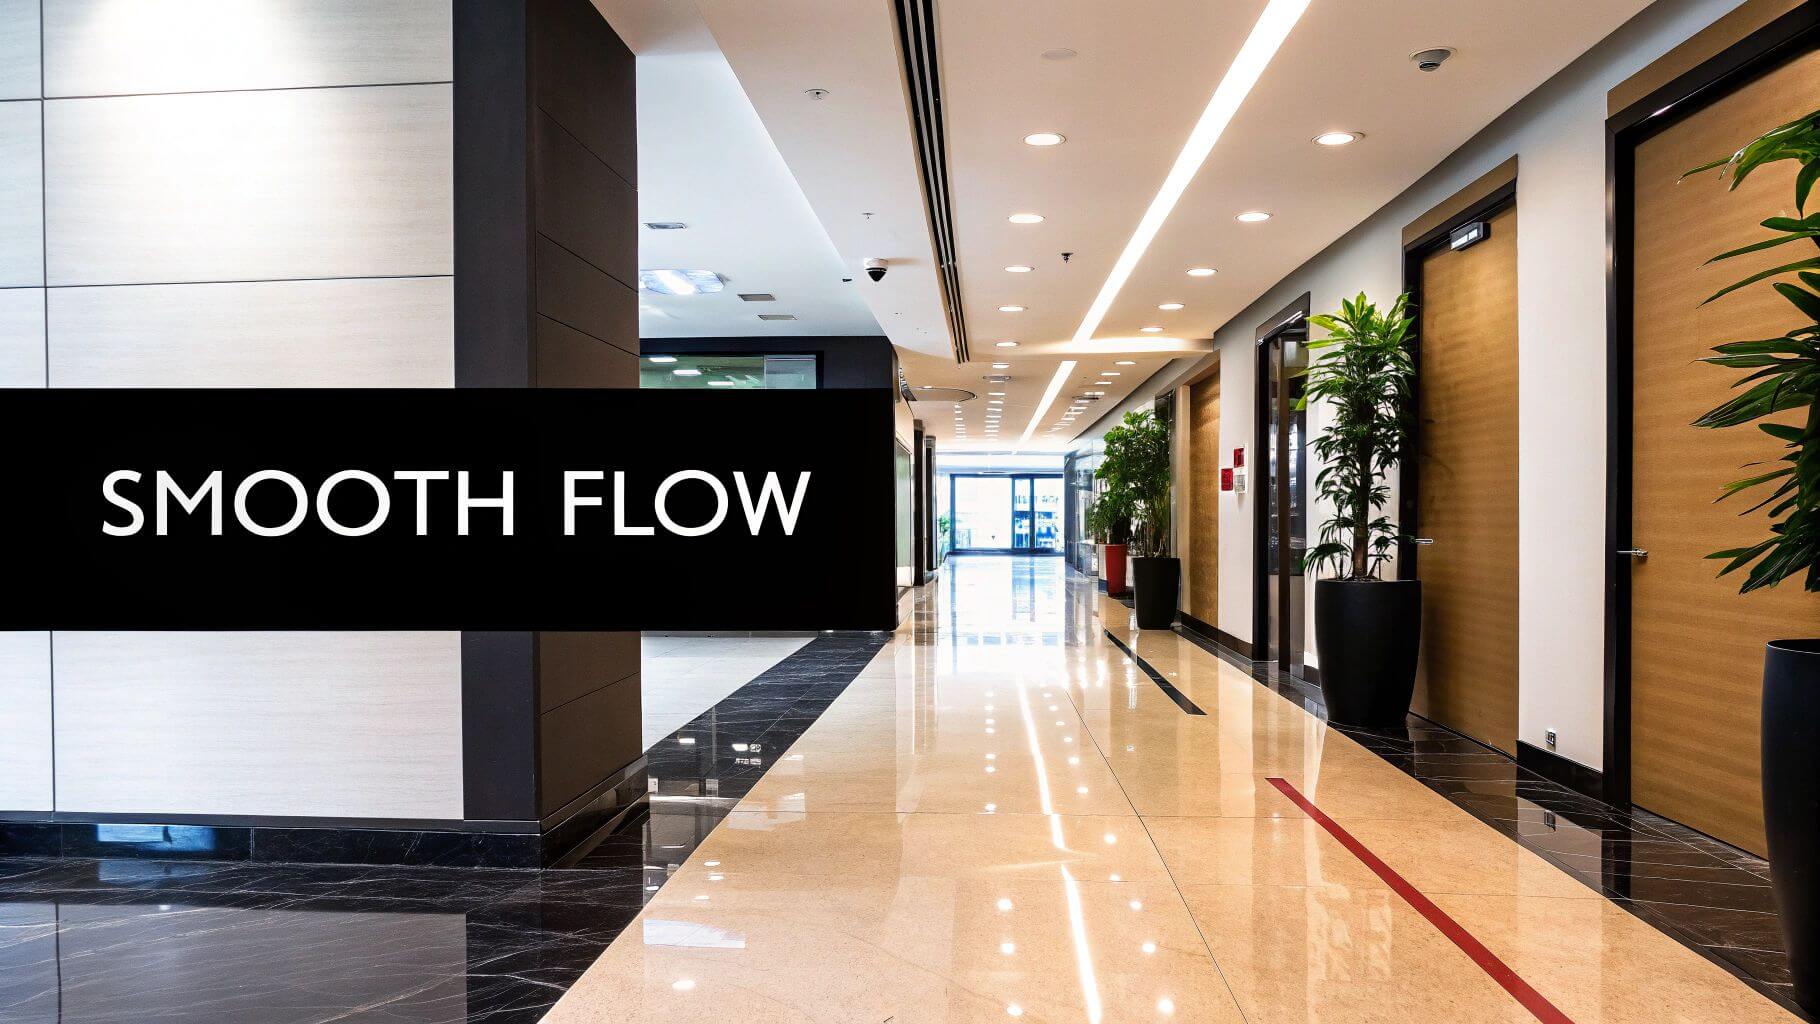
Establishing Circulation Paths
Just as critical as defining your zones is figuring out how people will move between them. We call this circulation flow, and getting it right is the secret to a room that feels effortless and intuitive. The goal is to create clear, unobstructed pathways that guide people naturally from one area to another.
Think about the invisible lines someone would walk to get from the hallway to the sofa, or from the kitchen to the dining table. These routes need to feel direct and easy.
A successful layout is one where you never have to think about how to get around. Movement should feel natural, not like navigating an obstacle course. Aim for main pathways to be at least 36 inches wide to ensure comfortable passage.
Here’s how to map out those pathways effectively:
- Avoid Dead Ends: Every part of the room should be easily accessible. You don’t want to create a layout where you have to awkwardly backtrack through one zone to get to another.
- Use Furniture as Your Guide: The placement of a sofa or a pair of chairs can naturally direct foot traffic around a conversation area, not straight through the middle of it.
- Keep High-Traffic Areas Clear: Key routes, like the path from the kitchen to an outdoor patio door, should always be kept completely open and free of clutter.
Creating clear zones and intuitive pathways is what transforms a room from a collection of furniture into a space that’s not just beautiful, but a genuine pleasure to live in every day.
To help you visualize this, here’s a breakdown of how different rooms can be broken down into functional zones.
Functional Zoning Examples for Common Rooms
| Room Type | Primary Zone | Secondary Zone | Tertiary Zone |
|---|---|---|---|
| Living Room | Conversation Area | Media/Entertainment Center | Reading Nook/Game Table |
| Master Bedroom | Sleeping Area | Dressing/Closet Area | Seating Area/Private Desk |
| Kitchen | Food Prep/Cooking | Dining/Breakfast Nook | Pantry/Storage |
| Home Office | Main Workspace/Desk | Library/Resource Storage | Client Meeting/Lounge Area |
| Basement | Home Theater/TV Area | Home Gym/Workout Space | Kids’ Play Area/Wet Bar |
As you can see, a single room can serve multiple purposes when you plan its layout with intention. This multi-zone approach is the key to maximizing every square foot of your home.
Arranging Furniture for Maximum Impact
Now that you’ve defined your functional zones and mapped out the main traffic routes, it’s time for the fun part: placing the furniture. This is where your interior design space planning really begins to take shape, transforming a blank floor plan into a room that feels both welcoming and intuitive.
My advice? Always start with the biggest piece first. Every room has a star player, an anchor piece that grounds the entire layout.
In a living room, this is almost always the sofa. In a bedroom, it’s the bed. Get that main item situated first. Try positioning it to take advantage of a natural focal point, like a beautiful fireplace or a window with a great view. One of the most common mistakes I see is furniture pushed flat against a wall. Unless you are severely limited on space, pulling your sofa out even just a few inches creates a little breathing room and makes the entire space feel more open and considered.
Once that anchor is set, everything else will naturally fall into place around it.
Building Around Your Anchor
With your main piece in its home, you can start bringing in the secondary players. This usually includes items like armchairs, a credenza, or a large bookcase. These pieces are there to support the primary function of the zone you’re creating.
For example, in a living room, you’ll want to position chairs to create a natural conversation area with the sofa. This doesn’t mean they have to be perfectly symmetrical, but they should be angled inward to encourage interaction. The goal is to make the grouping feel connected and intimate, not like a waiting room.
I always tell my clients to stop treating each piece of furniture like an isolated island. Think in terms of cohesive groups where every piece has a relationship to the others. The space between them is just as crucial as the furniture itself.
The Rules of Comfortable Spacing
A layout that looks great on paper but is a nightmare to live in isn’t a success. This is where clearances come in. Without enough space to move, a room feels cramped and frustrating, no matter how beautiful it is.
I’ve learned over the years that a few key measurements can make all the difference. Here are the numbers I always keep in my back pocket:
- Walkways: For any major traffic path, you need at least 36 inches of clear space. Anything less feels like a squeeze.
- Coffee Table: I aim for 14 to 18 inches between the edge of a sofa and the coffee table. This keeps it close enough to be useful without sacrificing legroom.
- Conversation Distance: The sweet spot for placing seating is around 3 to 4 feet apart. Any further, and people have to raise their voices to chat comfortably.
Think of these as reliable starting points, not rigid rules. By arranging your furniture with both the visual composition and the practical clearances in mind, you’ll end up with a balanced, intentional space that’s a genuine pleasure to live in. This is how a room goes from being simply furnished to truly designed.
Weaving Lighting into Your Space Plan
It’s a classic mistake I see all the time: lighting is treated as a final touch, almost like throwing a few decorative pillows on the sofa. But this approach sells your design short. Great lighting isn’t an accessory; it’s a foundational element that shapes a room’s entire atmosphere and how you function within it.
Think of it this way: instead of just decorating with light, you need to design with it. That means integrating your lighting strategy directly into your floor plan right from the get-go.
A truly well-lit space doesn’t just happen. It’s built by layering different types of light, with each layer serving a specific, important role. When you get this combination right, you create a room that’s not just practical but alive with character and mood.
The Three Essential Layers of Light
- Ambient Lighting: This is your room’s main light source—the general, all-over illumination. It comes from fixtures like chandeliers, recessed cans, or flush-mount ceiling lights. The goal here is a comfortable, even level of brightness that fills the space without creating harsh glare.
- Task Lighting: This is your focused, hardworking light, aimed directly at areas where you perform specific activities. Think of a sleek floor lamp beside your favorite armchair for reading, under-cabinet strips that illuminate your kitchen counters for chopping, or a bright desk lamp in your office. It’s all about preventing eye strain and making life easier.
- Accent Lighting: Here’s where you get to be dramatic. Accent lighting is used to draw attention to specific features you want to show off. A well-aimed spotlight on a piece of art, track lighting grazing a textured brick wall, or uplighting behind a tall plant can add incredible depth and visual drama.
When you plan for these layers from the start, you can map out exactly where every outlet and junction box needs to go. This simple foresight saves you from the future headache of tangled extension cords. For example, if you’ve zoned a cozy reading nook in a corner, your floor plan should absolutely include an outlet for a lamp right there.
A thoughtfully lit room feels more spacious, welcoming, and complete. By placing lights strategically, you can guide the eye, showcase your layout’s best features, and even create the illusion of a larger space.
Consider how lighting can reinforce the zones you’ve so carefully planned. A statement pendant light hanging low over a dining table clearly defines that space for meals and gatherings. Dimmable recessed lights in a media zone can instantly shift the mood for movie night.
Ultimately, by weaving lighting into your initial space planning, you ensure your design doesn’t just look good on paper—it feels right, from the brightest part of the day to the quietest moment of the evening.
Using Digital Tools to Visualize Your Design
Long gone are the days of sketching floor plans on graph paper and just hoping everything fits. Technology has completely changed how we approach space planning, letting us see our vision come to life before we even think about buying furniture. These tools are all about building an accurate digital twin of your room, right down to the last inch.
Think of it as your personal design sandbox. Simple 2D floor planners are fantastic for the initial layout phase. You can drag and drop different furniture pieces, test various arrangements, and make sure your pathways are clear and the scale feels right. It’s an easy, visual way to spot potential problems, like realizing that gorgeous sectional sofa would completely block the doorway. Catching those mistakes early saves so much time and frustration.
Go for an Immersive 3D Experience
Now, where things get really exciting is with 3D visualization. This is the difference between looking at a map and actually being there. Modern design software lets you build a virtual replica of your space that you can “walk through” from any angle.
This gives you a genuine feel for the room’s scale and atmosphere in a way a flat drawing never could. You can see how the morning light will hit a certain wall, test out bold paint colors without commitment, and see how different textures and materials play off each other in a surprisingly realistic environment.
With 3D rendering, you’re not just planning a layout—you’re experiencing it. That shift from an abstract concept to an immersive reality is what gives you the confidence to make those big design decisions.
Artificial intelligence is also starting to play a huge role. AI-powered tools can analyze your room’s dimensions and your list of needs, then generate a whole range of creative layout options you might never have thought of on your own. It’s like having a design assistant that never runs out of ideas.
These tools aren’t just a novelty; they’re becoming standard practice in the professional world. About a third of designers are already using AI for everything from rendering to project management, and another third are gearing up to join them. It’s a clear sign that technology is helping us work smarter and deliver better results for clients. You can dive deeper into these trends in the 2025 U.S. Design Industry Benchmark Report.
Common Space Planning Questions Answered
Even with the best intentions, space planning can throw a few curveballs your way. It’s a process filled with specific challenges, and I’ve seen clients grapple with the same questions time and time again. Let’s break down some of the most common ones to help you move forward with confidence and sidestep those classic mistakes.
What’s the Very First Thing I Should Do?
Before you even think about furniture or paint colors, you have to start with assessment and measurement. Seriously, this is non-negotiable. You need to intimately understand the canvas you’re working on before you start painting.
That means grabbing a tape measure and meticulously noting your room’s dimensions—length, width, and ceiling height. The goal is a simple, to-scale floor plan that maps out all the fixed elements you can’t change: windows, doors, electrical outlets, and radiators. At the same time, get crystal clear on the room’s primary purpose. Who uses this space? And what do they need to do in it? Answering these questions upfront is your best defense against making expensive, frustrating mistakes down the road.
How Do I Deal With an Awkwardly Shaped Room?
The secret to conquering an awkwardly shaped room is to stop fighting it and start zoning. Instead of trying to shoehorn a conventional layout into a space that’s long and narrow or L-shaped, lean into its quirks. Divide and conquer by creating smaller, distinct functional areas.
Think of an L-shaped living room, for example. That smaller leg of the “L” is practically begging to become a cozy home office or a quiet reading nook. In a long, skinny room, you can create a series of zones that flow into one another.
- You might have a main seating area anchored by a sofa at one end.
- The middle could function as a media zone with a console and comfy chairs.
- The far end by a window could be a perfect spot for a small game table or a dedicated workspace.
You can use area rugs, distinct furniture groupings, and smart lighting to visually separate each zone. This strategy turns a tricky layout into a dynamic, multi-functional space that feels completely intentional.
What Are the Biggest Space Planning Mistakes to Avoid?
Getting the scale wrong is, by far, the most common mistake I see. It goes both ways: you can cram a room with furniture that’s far too large, making it feel claustrophobic, or you can choose pieces that are too small and just look lost and insignificant. Another huge error is ignoring traffic flow. People shouldn’t have to shimmy and sidestep to get across a room. Always leave clear, intuitive pathways.
A beautifully decorated room that’s a pain to move through is ultimately a design failure. The goal is a layout that feels as good as it looks, where you can move around effortlessly.
Finally, treating lighting as an afterthought is a massive oversight. You can have the most brilliantly arranged furniture, but if the lighting is flat, the whole room will fall short. Plan your lighting—ambient, task, and accent—right alongside your furniture layout. Good lighting creates mood, supports activities, and makes your design choices shine.
How Much Space Should I Leave Between Furniture?
This is where following established design guidelines makes all the difference. These numbers aren’t just pulled out of thin air; they’re based on decades of experience in how people actually move and live in a space.
- Main Walkways: Keep primary traffic paths clear with at least 30-36 inches of open space.
- Coffee Table and Sofa: The sweet spot is 14-18 inches. This is close enough to set down a drink but leaves plenty of legroom.
- Conversational Seating: For chairs and sofas that face each other, aim for about 3-4 feet between them to keep conversation comfortable and natural.
- Dining Chair Push-Back: Make sure you have at least 36 inches from the edge of the dining table to the nearest wall or piece of furniture. This allows someone to easily walk behind a seated person.
Sticking to these measurements is the key to creating a room that isn’t just pretty to look at, but is genuinely a pleasure to live in.
Ready to connect with top-tier design professionals who master these principles every day? Haute Design is the premier network linking discerning clients with the nation’s leading interior designers, architects, and builders. Elevate your project by partnering with the best in the industry.